Controls and displays, Controls and displays 03, Chapter 3 – Pioneer RCS-656HX User Manual
Page 54: Front panel
Controls and displays
03
54
En
Chapter 3
Controls and displays
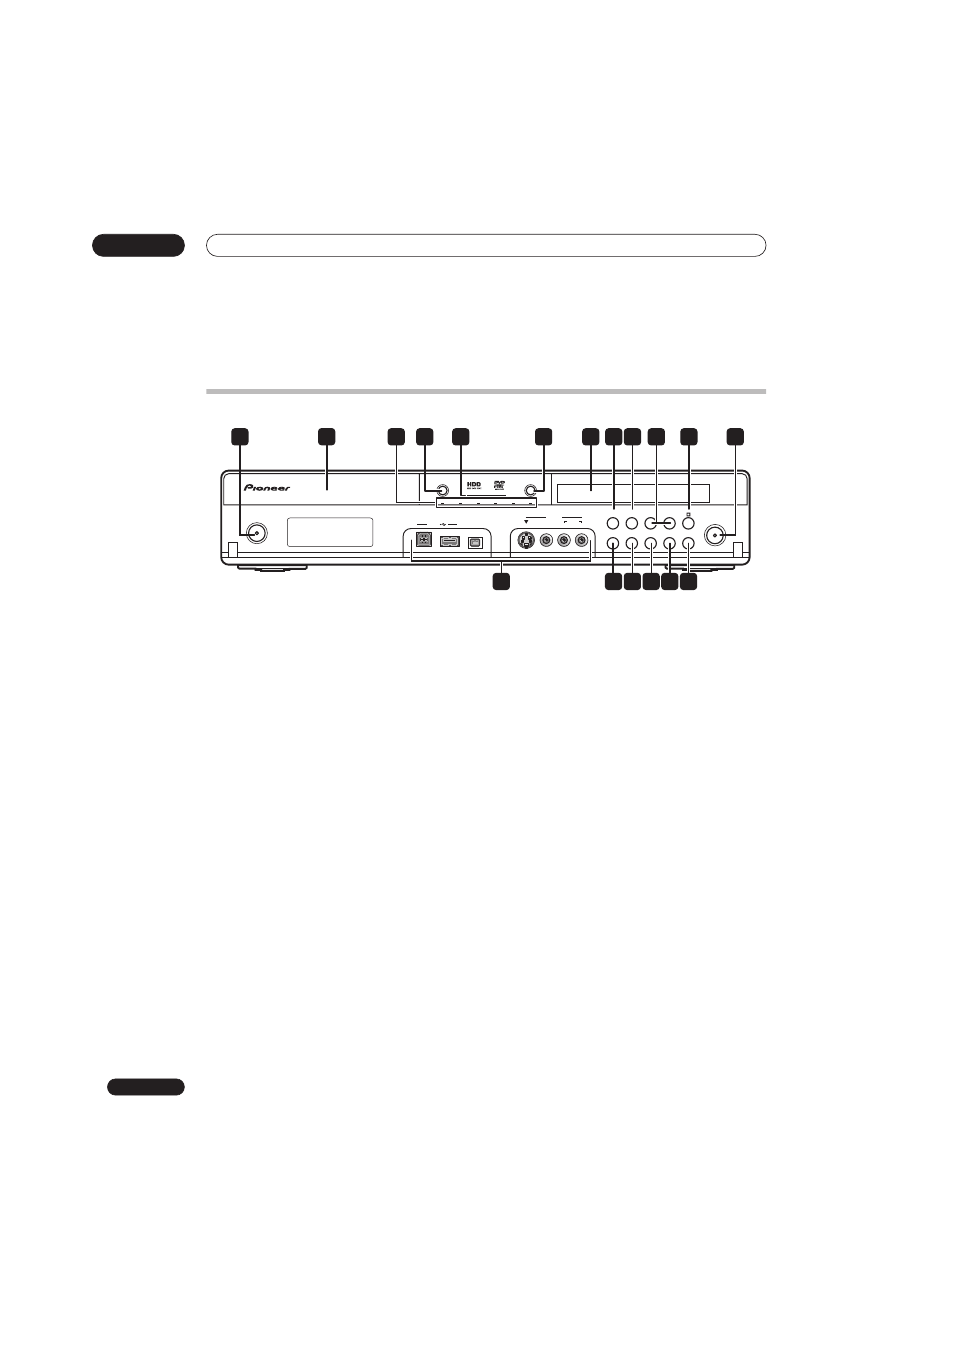
Front panel
1
STANDBY/ON
Press to switch the recorder on/into standby.
2
Disc tray
3
A.TV indicator
Lights when analog TV is selected.
D.TV indicator
Lights when digital TV is selected.
DivX indicator
Lights during DivX playback. (Copy indicator lights
during copying.)
PLTV indicator
Lights during recording started using the Pause Live
TV feature.
HDMI indicator
Lights when this recorder is connected to HDMI
(HDCP) compatible component.
COPY
Light during copying.
4
OPEN/CLOSE
Press to open/close the disc tray.
5
HDD and DVD indicators
Indicator lights blue when the hard disk (HDD) is selected;
orange when the DVD drive is selected.
6
HDD/DVD
Press to switch between HDD and DVD for recording and
playback.
7
Front panel display
See Display on page 55 for details.
8
Press to start or restart playback.
9
Press to stop playback.
10 CH +/–
Use to change channels, skip chapters/tracks, etc.
11
(STOP REC)
Press to stop recording.
12
ì REC
Press to start recording. Press repeatedly to set the
recording time in 30 minute blocks.
13 Front panel inputs
See Front panel connections on page 46 for more
information on these.
14 HELP
Press for help on how to use the current GUI screen.
15 A.TV / D.TV
Switches between analog TV antenna input and digital TV
antenna input. The
A.TV and D.TV indicators show
which is selected.
16 INPUT SELECT
Press to change the input to use for recording.
17 ONE TOUCH COPY (page 110)
Press to start One Touch Copy of the currently playing
title to DVD or the HDD.
18 PAUSE LIVE TV (page 83)
Press to start recording the current TV channel, but with
playback paused, effectively pausing the broadcast.
HDD/DVD
OPEN/CLOSE
STANDBY/ON
S-VIDEO
COPY
HDMI
PLTV
DivX
D.TV
A.TV
VIDEO
L(MONO)
R
AUDIO
INPUT 2
ONE TOUCH
COPY
CH
ì REC
+
–
A.TV/D.TV
HELP
INPUT
SELECT
PAUSE
LIVE TV
DV IN
USB
8
2
1
9
4
5
7
6
11
12
10
14 15 16 17 18
3
13