Creating labels for combined label (label shot) – Olympus SP-700 User Manual
Page 59
59
4
Add
iti
on
al
sh
oo
tin
g
fu
nc
ti
o
n
s
Creating labels for combined LABEL
(LABEL SHOT)
You can make the labels you like for combined LABEL (
g P. 81). Shoot
the picture and text for the label and save them as a combined label shot
file.
Top menu
[MODE MENU]
[CAMERA]
[LABEL SHOT]
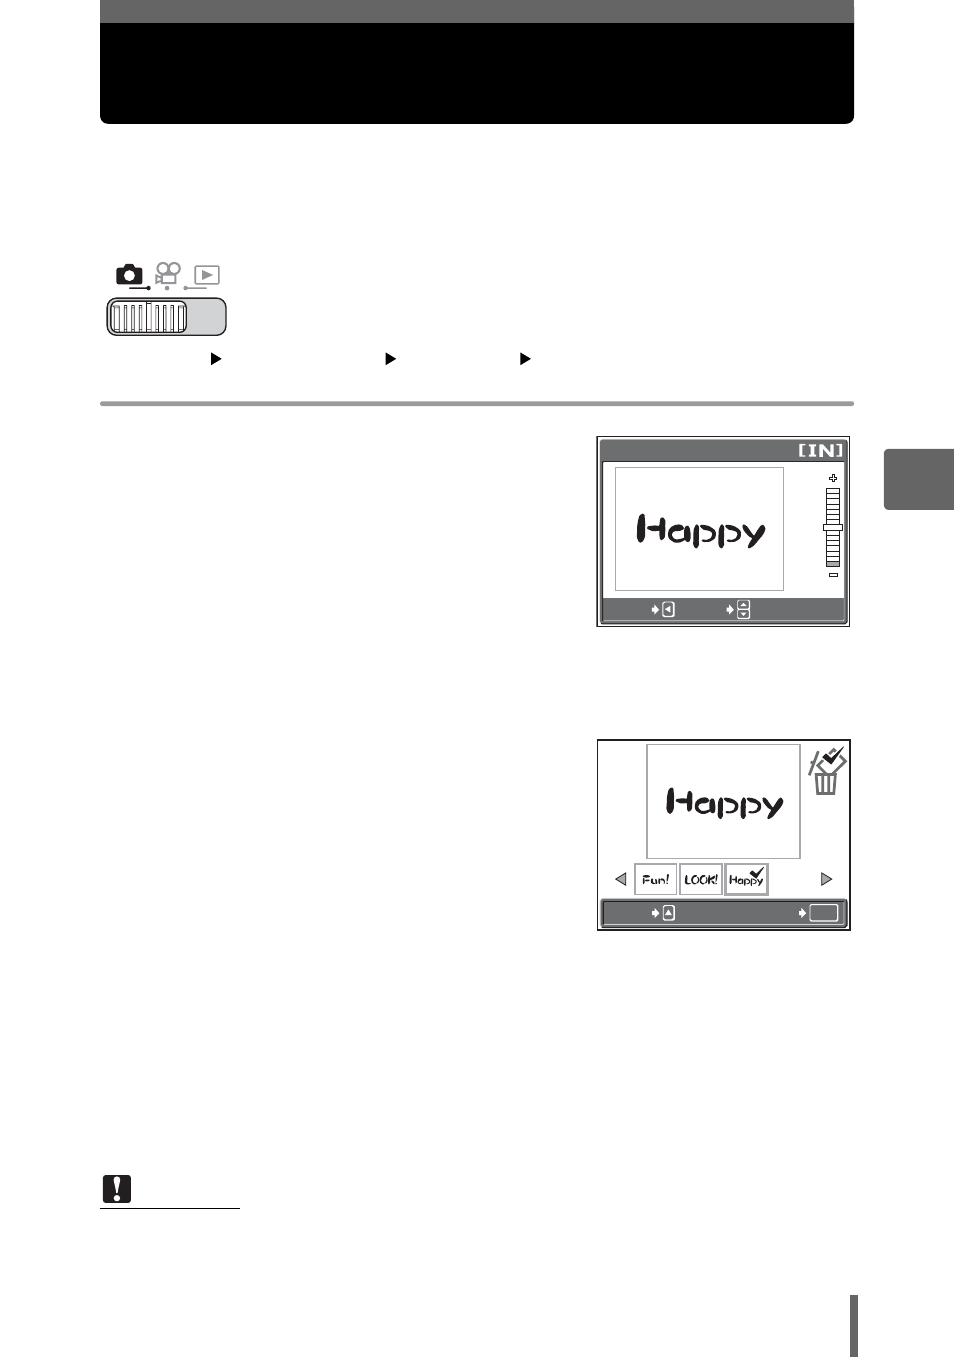
1
Decide on the layout for the
picture and text for the label.
• The design of the label to be created is
displayed in red.
2
Press ON to adjust the range of
the red display.
3
Take the picture.
• You can take a maximum of 100 shots.
• You can adjust the range of the red display for shooting.
4
Press
Z after taking a picture.
5
Press XY to move the cursor to
the picture you want to erase,
and press O to select it.
• A 9 icon is displayed on the selected
picture.
• Repeat Step 5 to erase multiple
pictures.
6
When you have selected all the unwanted pictures, press
Z.
7
Select [YES], and press
Z.
• The selected pictures are deleted and the remaining pictures are saved as
a combined label shot.
• The design of the label that is saved is black and white. You can change the
color when combining labels shots.
Note
• A warning icon (
g) is displayed if you cannot shoot pictures because the
internal memory or card is full or some other reason.
LABEL SHOT
ADJUST
CANCEL
OK
GO
SELECT