Printing pictures (custom print), Printing pictures (custom print)” (p. 118), P. 118) – Olympus SP-700 User Manual
Page 118
Direct printing (PictBridge)
118
7
Pr
in
ti
ng
p
ic
tur
es
Try printing one picture with the most basic printing method of [CUSTOM PRINT].
The selected picture is printed using the standard settings of your printer. The date
and file name are not printed.
1
Power on the printer.
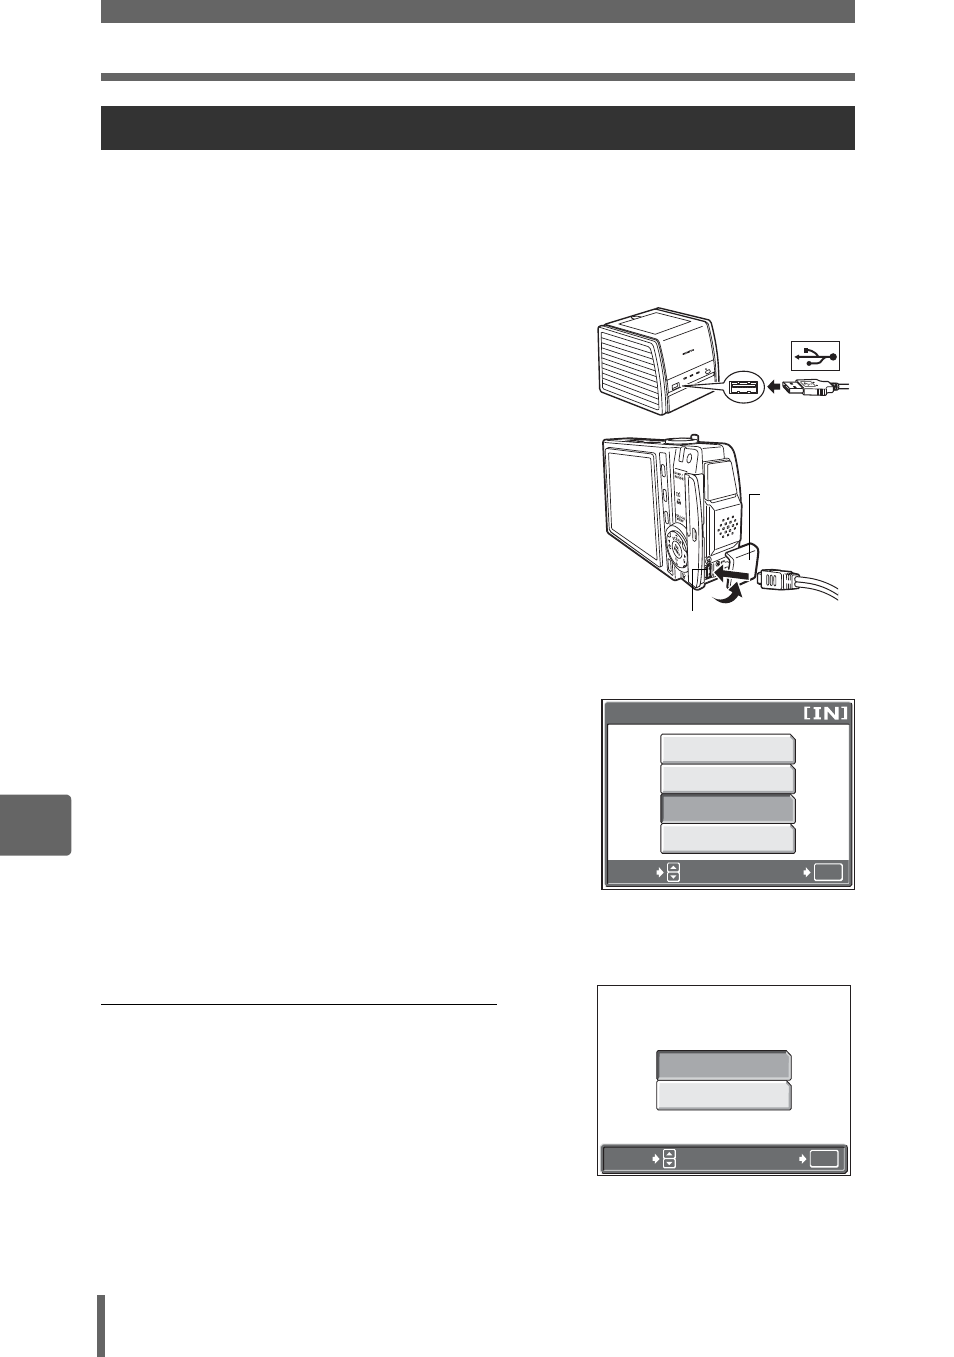
2
Connect one end of the provided
USB cable into the camera’s
multi-connector and the other end
into the printer’s USB connector.
• Pull the connector cover forward and
then turn it.
• The camera turns on automatically.
• The monitor turns on and the selection
screen for the USB connection is
displayed.
• For details of how to turn the printer on
and the position of the USB port, refer to
the printer’s instruction manual.
3
Select [CUSTOM PRINT], and
press
Z.
• [ONE MOMENT] is displayed and the
camera and printer are connected. The
[PRINT MODE SELECT] screen is
displayed on the monitor. Select the print
settings on the camera’s monitor.
• Select [EASY PRINT], and press
Z.
The picture selection screen is displayed.
g“Printing pictures (EASY PRINT)” Step 4 (P. 116)
(To select the pictures to print
When there is a card in the camera, a screen is
displayed for selecting the pictures you want to
print.
Select [ALL IMAGES] or [ALBUM], and press
Z.
To search for the picture from an album, select
[ALBUM], and press
Z.
Printing pictures (CUSTOM PRINT)
Multi-connector
Connector
cover
P C
CUSTOM PRINT
EXIT
EASY PRINT
USB
OK
SELECT
GO
ALL IMAGES
ALBUM
OK
SELECT
GO