Ids for hot-swap hard disk drives, Hot-swap, Hard – Lenovo ThinkServer TD100x User Manual
Page 45: Disk, Drives, Installing, Simple-swap, Sata, Drive, Td100
d.
Push
the
drive
tray
handle
to
the
closed
(locked)
position.
e.
Check
the
hard
disk
drive
status
indicator
to
make
sure
that
the
hard
disk
drive
is
operating
correctly.
(You
might
have
to
restart
the
server
before
the
drive
is
recognized.)
If
the
amber
hard
disk
drive
status
LED
for
a
drive
is
lit
continuously,
it
indicates
that
the
drive
is
faulty
and
must
be
replaced.
If
the
amber
hard
disk
drive
status
LED
for
a
drive
is
flashing
slowly,
this
indicates
that
the
drive
is
being
rebuilt.
If
the
amber
hard
disk
drive
status
LED
for
a
drive
is
flashing
rapidly,
this
indicates
that
the
controller
is
identifying
the
drive.
If
the
green
hard
disk
drive
activity
LED
is
flashing,
it
indicates
that
the
drive
is
in
use.
Note:
If
the
server
is
configured
for
RAID
operation
using
an
optional
ServeRAID
™
adapter,
you
might
have
to
reconfigure
your
disk
arrays
after
installing
hard
disk
drives.
See
the
ServeRAID
documentation
on
the
IBM
ServeRAID
Support
CD
for
additional
information
about
RAID
operation
and
complete
instructions
for
using
ServeRAID
Manager.
6.
If
you
are
installing
additional
hot-swap
hard
disk
drives,
do
so
now.
If
you
have
other
options
to
install
or
remove,
do
so
now;
otherwise
go
to
IDs
for
hot-swap
hard
disk
drives
Hot-swap
server
models
have
drive
bays
that
are
connected
to
a
SAS/SATA
backplane.
This
backplane,
also
known
as
the
hot-swap-drive
backplane,
is
the
printed
circuit
board
behind
these
bays.
The
hot-swap-drive
backplane
controls
the
IDs
for
the
internal
hot-swap
drive
bays.
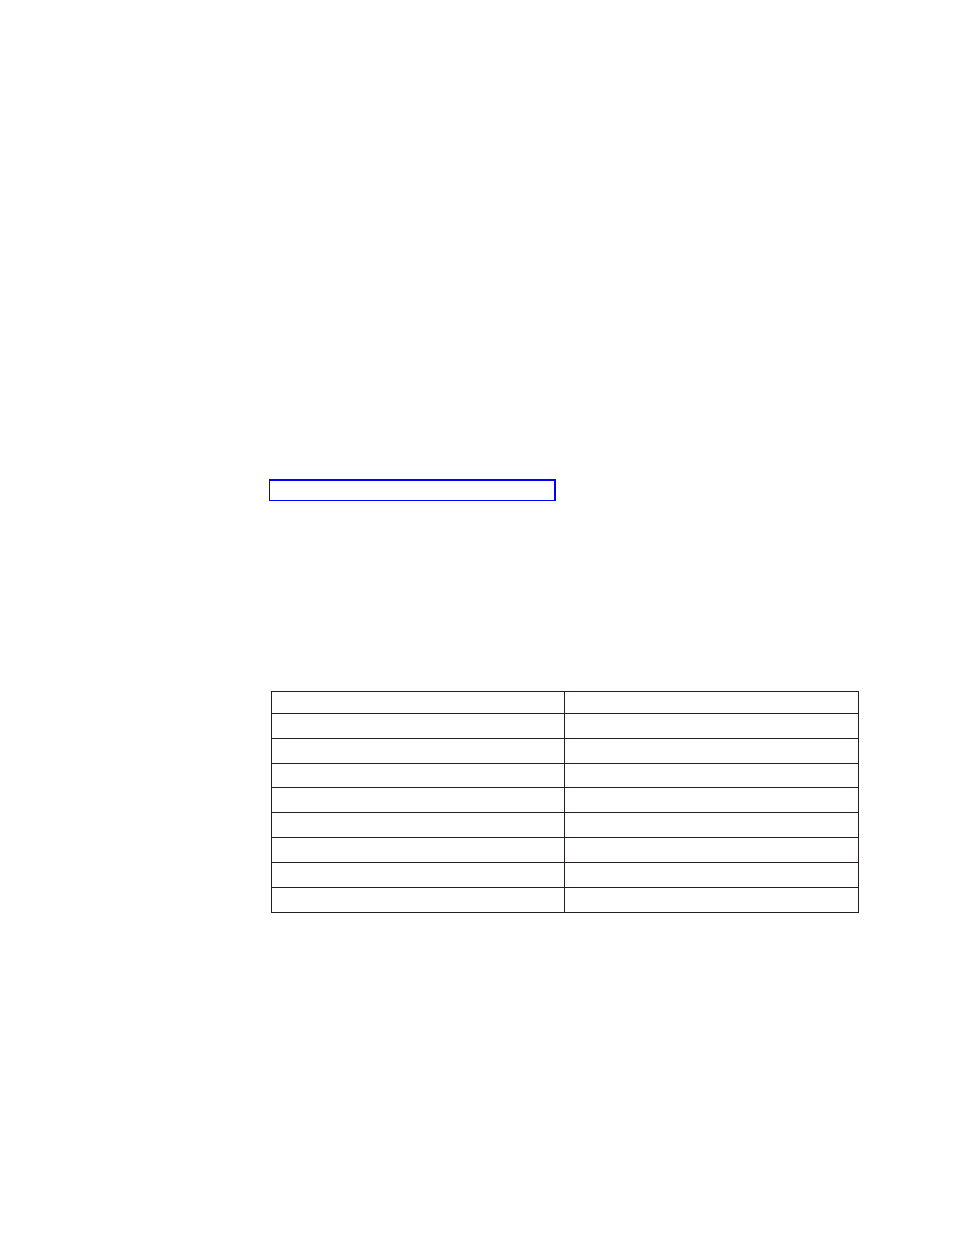
The
following
table
lists
the
IDs
for
the
hard
disk
drives
and
backplane
that
are
connected
to
hot-swap
models.
Device
ID
Drive
bay
4
0
Drive
bay
5
1
Drive
bay
6
2
Drive
bay
7
3
Drive
bay
8
4
Drive
bay
9
5
Drive
bay
10
6
Drive
bay
11
7
Installing
a
simple-swap
SATA
hard
disk
drive
(TD100
models
only)
Some
server
models
come
with
simple-swap
SATA
hard
disk
drives
that
are
accessible
from
the
front
of
the
server.
Before
you
install
a
simple-swap
SATA
hard
disk
drive,
read
the
following
information:
v
You
must
turn
off
the
server
before
installing
simple-swap
drives
in
the
server.
v
You
can
install
only
four
simple-swap
SATA
hard
disk
drives
in
the
server.
v
The
sequence
for
installing
the
hard
disk
drives
is
to
install
the
drives
starting
from
the
bottom
bay
(bay
7)
and
go
up
to
the
top
bay
(bay
4).
Chapter
2.
Installing
options
29