Lenovo ThinkServer TD100x User Manual
Page 44
v
The
sequence
for
installing
the
hard
disk
drives
is
to
install
the
drives
starting
from
the
top
bay
(bay
4)
and
go
down
to
the
bottom
bay
(bay
11).
v
Inspect
the
drive
tray
for
signs
of
damage.
v
Make
sure
that
the
drive
is
correctly
installed
in
the
tray.
v
All
hot-swap
drives
must
have
the
same
throughput
speed
rating;
mixing
speed
ratings
might
cause
all
drives
to
operate
at
the
lower
throughput
speed.
v
The
drive
ID
for
each
hot-swap
hard
disk
drive
is
printed
on
the
bezel.
v
You
do
not
have
to
turn
off
the
server
to
install
hot-swap
drives
in
the
hot-swap
drive
bays.
v
To
maintain
proper
system
cooling,
do
not
operate
the
server
for
more
than
10
minutes
without
either
a
drive
or
a
filler
panel
installed
in
each
drive
bay.
v
See
the
documentation
for
your
RAID
controller
for
instructions
for
installing
a
hard
disk
drive.
v
For
TD100
(Machine
Types
6398,
6399,
6419,
6429),
if
you
want
to
install
the
maximum
number
(eight)
of
hot-swap
drives,
you
need
the
4-drive
backplane
option
kit.
v
Remove
any
dust
shields
from
the
signal
cable
connectors
before
installing
the
signal
cables.
Attention:
Static
electricity
that
is
released
to
internal
server
components
when
the
server
is
powered-on
might
cause
the
server
to
stop,
which
could
result
in
the
loss
of
data.
To
avoid
this
potential
problem,
always
use
an
electrostatic-discharge
wrist
strap
or
other
grounding
system
when
working
inside
the
server
with
the
power
on.
To
install
a
hot-swap
hard
disk
drive,
complete
the
following
steps:
1.
Read
the
safety
information
that
begins
on
page
and
2.
Remove
the
bezel
and
cover.
See
and
for
instructions.
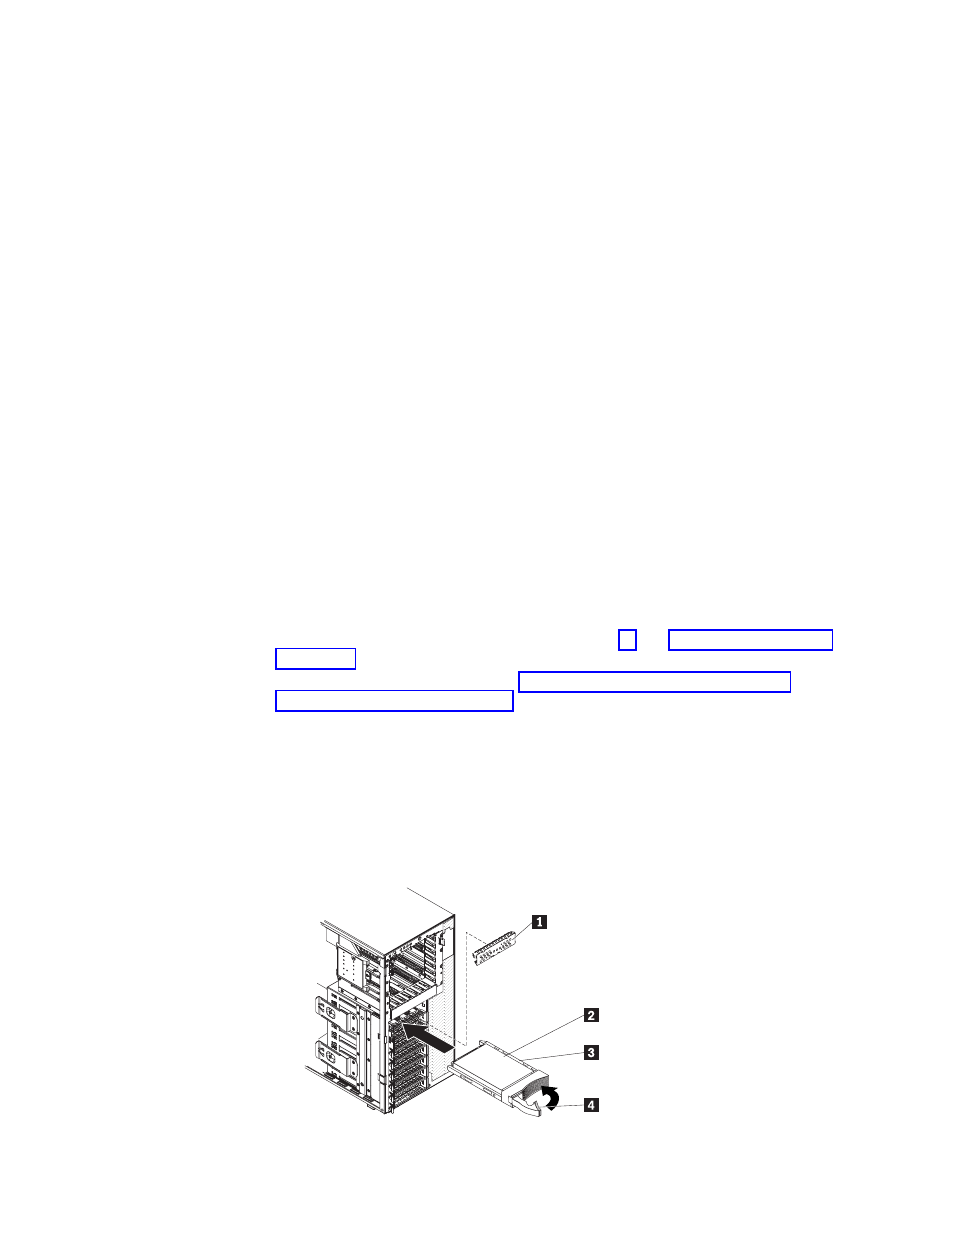
3.
Remove
the
EMC
shield
1
from
the
bay
in
which
you
want
to
install
the
drive.
4.
Touch
the
static-protective
package
that
contains
the
drive
to
any
unpainted
metal
surface
on
the
server;
then,
remove
the
drive
from
the
package
and
place
it
on
a
static-protective
surface.
5.
Install
the
hard
disk
drive
2
in
the
hot-swap
bay:
a.
Make
sure
that
the
drive
tray
handle
4
is
open.
b.
Align
the
drive
assembly
with
the
guide
rails
in
the
bay.
c.
Gently
slide
the
drive
assembly
into
the
drive
bay
3
until
the
drive
stops.
28
ThinkServer
TD100
and
TD100x
Types
4203,
4204,
4205,
4206,
6398,
6399,
6419,
and
6429:
Installation
Guide