Lenovo ThinkServer TD100x User Manual
Page 40
1)
Grasp
the
top
of
the
plastic
push
pins
and
pull
them
out
of
the
rivets
(close-up
of
pin
5
and
rivet
6 )
.
2)
Grasp
the
rivets
and
pull
them
out
of
the
mounting
holes
and
set
them
to
the
side.
Note:
If
the
DIMM
air
duct
in
your
server
is
secured
with
screws,
remove
the
screws.
b.
Push
the
air
duct
up
toward
the
rear
of
the
power-supply
cage.
When
the
locator
pins
4
are
free
of
the
power-supply
cage,
you
can
remove
the
air
duct
from
the
server.
c.
Position
the
transition
duct
1
so
that
the
two
tabs
are
directly
over
the
slots
on
the
side
of
the
DIMM
air
duct
3 .
d.
Slide
the
transition
duct
into
the
slots
until
it
clicks
into
place.
9.
Reinstall
the
DIMM
air
duct
onto
the
power-supply
cage.
10.
Raise
the
power-supply
cage
slightly
and
press
and
hold
the
release
tab
on
the
rear
power-supply
support
bracket;
then,
lower
the
power-supply
structure
into
position.
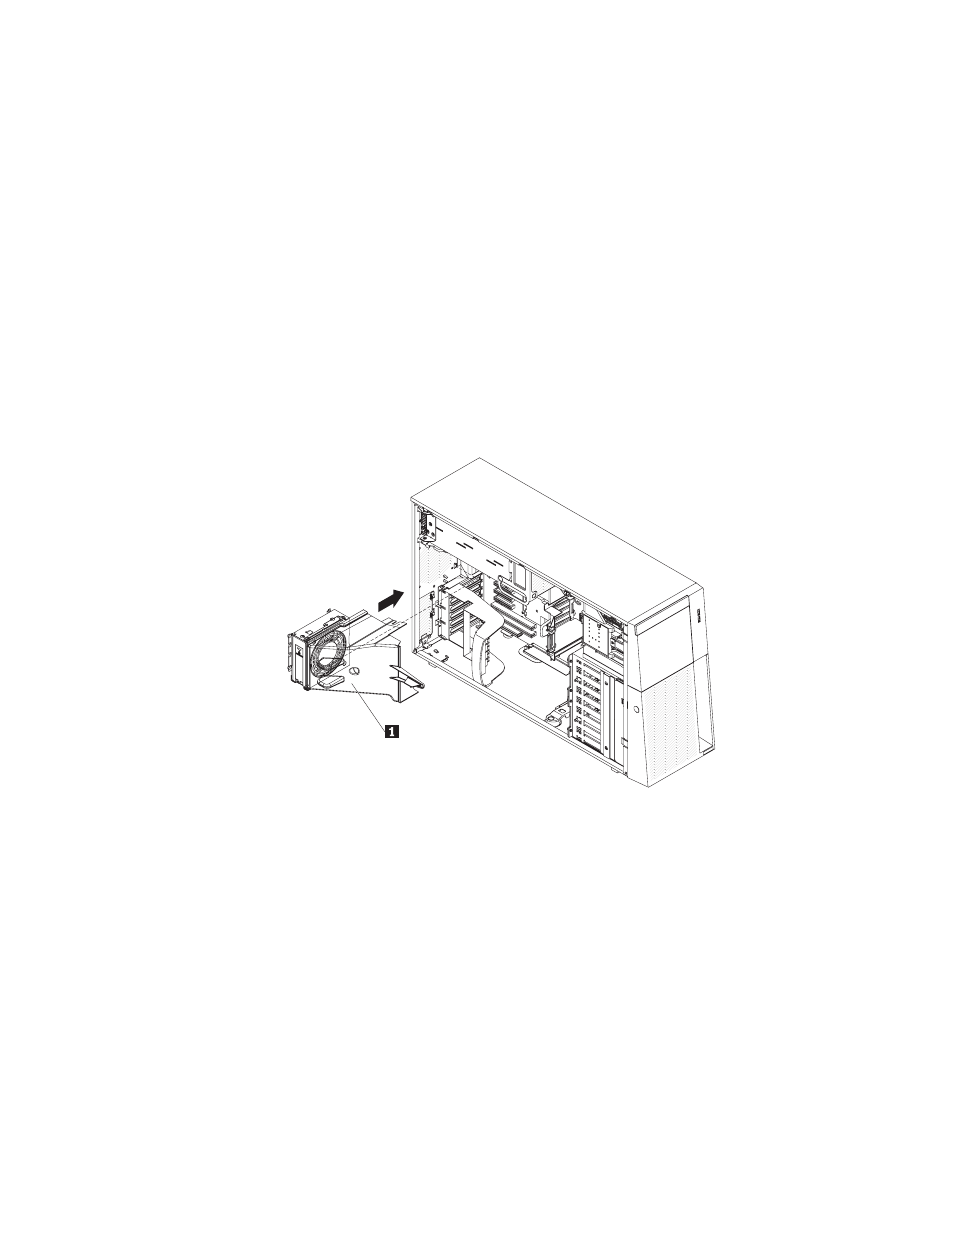
11.
Install
the
rear
fan
and
fan
structure
on
the
chassis:
a.
Align
the
clips
on
the
rear
fan
assembly
1
with
the
holes
in
the
chassis.
b.
Slide
the
assembly
toward
the
power-supply
cage
until
it
stops.
24
ThinkServer
TD100
and
TD100x
Types
4203,
4204,
4205,
4206,
6398,
6399,
6419,
and
6429:
Installation
Guide