Bell & Gossett P5002169C Series VSCS User Manual
Page 30
28
10. Repeat steps 1 through 9 for the other side.
11. If only the mechanical seals are to be
replaced, proceed to the section entitled
Assembly Procedure to Install Standard
Mechanical Seals.
If disassembly of the pump is required,
proceed to the section entitled Disassembly
Procedure to Remove Coverplates and
Shaft Assembly – All Pumps.
DISASSEMBLY PROCEDURE TO REMOVE
STUFFING BOX AND PACKING.
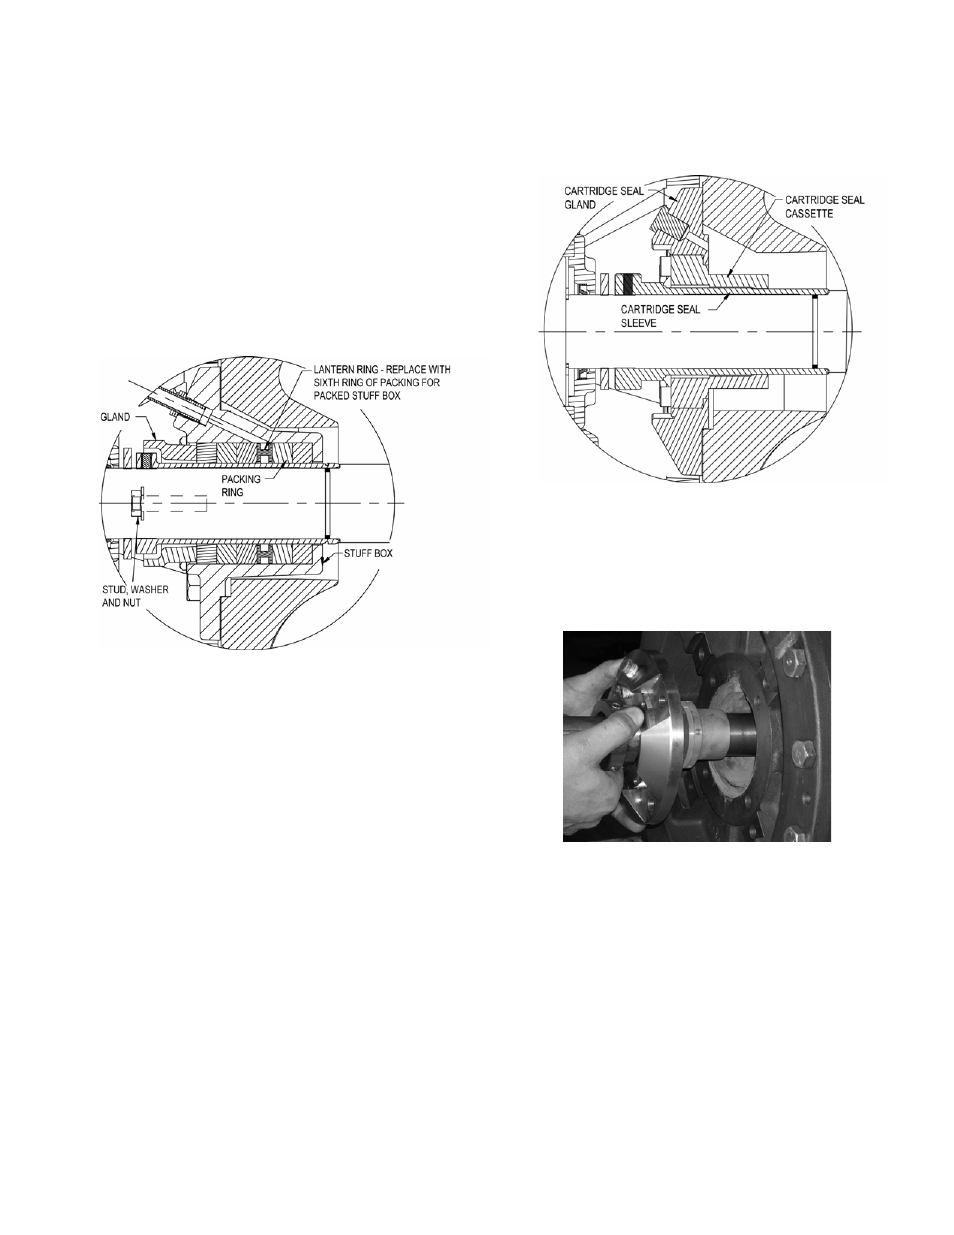
Figure 30: Flushed Stuffing Box Cross Section
1. Remove nuts, washers, studs, and glands.
2. Remove the packing rings and lantern ring.
3. Loosen the set screws in the sleeve and
remove the sleeve from the shaft. The use of
a bearing puller attached to the step in the
sleeve may be required.
4. Remove the four stuffing box capscrews.
5. Remove the stuffing box.
6. Remove the stuffing box gasket.
7. Remove the quad ring from the shaft.
8. Repeat steps 1 through 7 for the other side.
9. If only the packing rings and sleeve are to be
replaced, proceed to the section entitled
Assembly Procedure to Install Stuffing Box
and Packing.
If disassembly of the pump is required,
proceed to the section entitled Disassembly
Procedure to Remove Coverplates and
Shaft Assembly – All Pumps.
DISASSEMBLY PROCEDURE TO REMOVE
CARTRIDGE SEALS
Figure 31: Cartridge Seal Cross Section
1. Loosen the set screws in the sleeve.
2. Remove the four cartridge seal capscrews.
3. Remove the cartridge seal from the shaft.
(See Figure 32.)
Figure 32: Removing the Cartridge Seal
4. Remove the cartridge seal gasket.
5. If only the cartridge seal’s cassette is to be
replaced, loosen the screws from the
cassette/sleeve assembly and fit them to the
threaded holes in the same part. Tighten
evenly allowing the cassette to be pulled out
from the gland and remove it from the shaft.
(See Figure 33.)