Changing the torque cylinder (cont.) – Hawk Industries Hawkjaw Jr. Manual 65K-ALS Serial Numbers 4 to 9 User Manual
Page 58
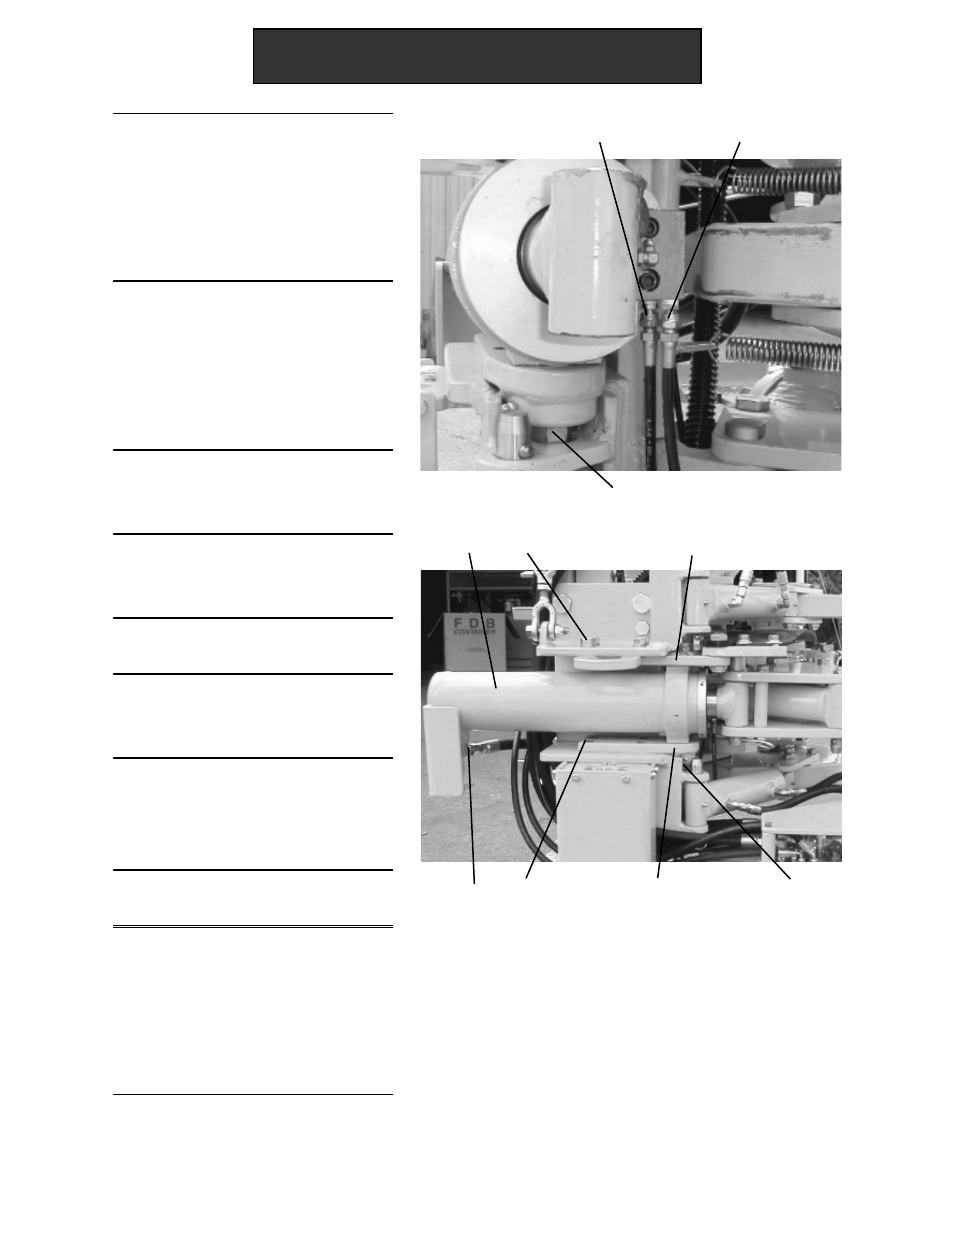
10. Use the 1/2" and 9/16" wrench to
slowly loosen the Low Torque
Warning System Pressure Hose
(PH). Check for fluid flow.
Bleed any pressure. Disconnect
the Pressure Hose (PH).
11. Use the 1/2" and 9/16" wrench to
slowly loosen the Low Torque
Warning System Tank Hose (TH).
Check for fluid flow. Bleed any
pressure. Disconnect the Tank
Hose (TH).
12. Use the 1 1/8" wrench to remove
the Top Torque Cylinder Mount
Bolts (TB).
13. Use the 1 1/8" wrench to remove
the Bottom Torque Cylinder
Mount Bolts (BB).
14. Slide out the Torque Cylinder
(C).
15. Remove the Top Trunion Mount
Plate (TMP) and the Bottom
Trunion Mount Plate (BMP).
16. Place the Top Trunion Mount
Plate (TMP) and the Bottom
Trunion Mount Plate (BMP) on the
new Torque Cylinder.
17. Slide in the new Torque
Cylinder.
18. Use the 1/2" and 9/16" wrench to
connect the Low Torque
Warning System Pressure Hose
(PH) and Low Torque Warning
System Tank Hose (TH). See
Drawings, p. 114.
Changing the Torque Cylinder (cont.)
RH
CH
BB
TMP
BMP
TB
C
TH
PH
RH
58 Maintenance & Repair
Continued on next page.