Heart rate sensor id, Heart rate sensor id / 46, Menu screen – CatEye PW-TR100 Power Unit User Manual
Page 46: Operation guide
MODE-
1
MODE-
2
MODE-
2
MODE-
1
46
PW-TR100 : POWER UNIT
Defining remote button setting
* For the basic information on
how to use the menu screen, re-
fer to “Configuring main unit”
on page 35.
Menu screen
Operation Guide
S/S/E
S/S/E
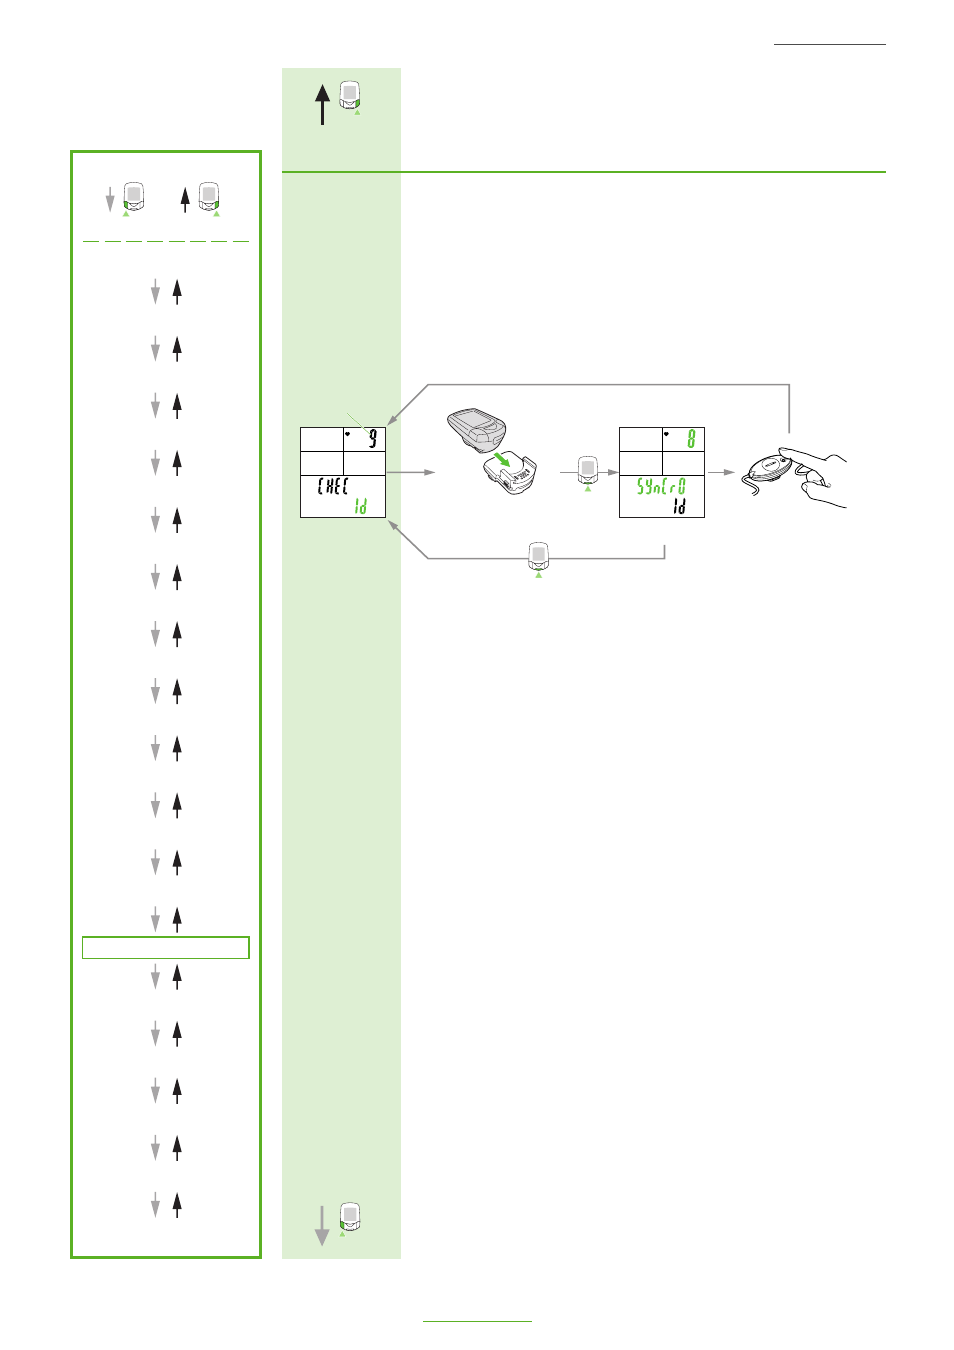
Heart rate sensor ID
This function allows the ID signal transmitted by the heart rate sensor to be received and checked.
Before ID check, attach the main unit to the power unit.
NOTE:
Be sure to attach the main unit to the power unit. Signals from the heart rate sensor cannot be
received by the main unit alone.
Within 5 minutes of pressing the START/STOP/ENTER button, place the HR sensor approximately 20-80 cm
from the main unit and press the reset button on the HR sensor for five seconds to transmit the ID signal.
When the main unit receives the ID signal, the ID check has been completed.
You can view the ID number but cannot reset it while the bicycle is in motion.
NOTE:
• Failure to receive the ID signal within five minutes or the pressing of the START/STOP/ENTER
button cancels the heart rate sensor ID set mode, leaving the ID as it was.
• When two or more users of this unit ride side by side with the same ID, interference can occur
which may, in turn, prevent correct measurement. In this situation, carry out an ID check again
according to the illustration above.
• When two or more users with this unit ride side by side with the same ID, interference can
occur and correct measurement may be impeded. In such a case, change the ID using the
following the steps below:
Present ID number
Heart rate sensor
ID menu screen
Attach the main unit to
the power unit.
Heart rate sensor reset button
5 Sec
Cancel
ID standby screen
After ID checking, the ID viewing screen reappears automatically.
Heart rate zone menu screen
Data file menu screen