Allied Telesis ALLIEDVIEW-UM 1.6 User Manual
Page 12
Allied Telesis
AlliedView-UM
1.6
User's Guide
PN 613-000381 Rev B
Page 12 of 129
2.3 UPGRADING
SOFTWARE
In this section, we will be performing a simple patch upgrade using the Patch Upgrade operation.
Before proceeding, make sure you have added one or more devices. If you have not done so, please go
back to the previous section, "Creating a Device". You will also need to have access to an appropriate
patch upgrade file for your device.
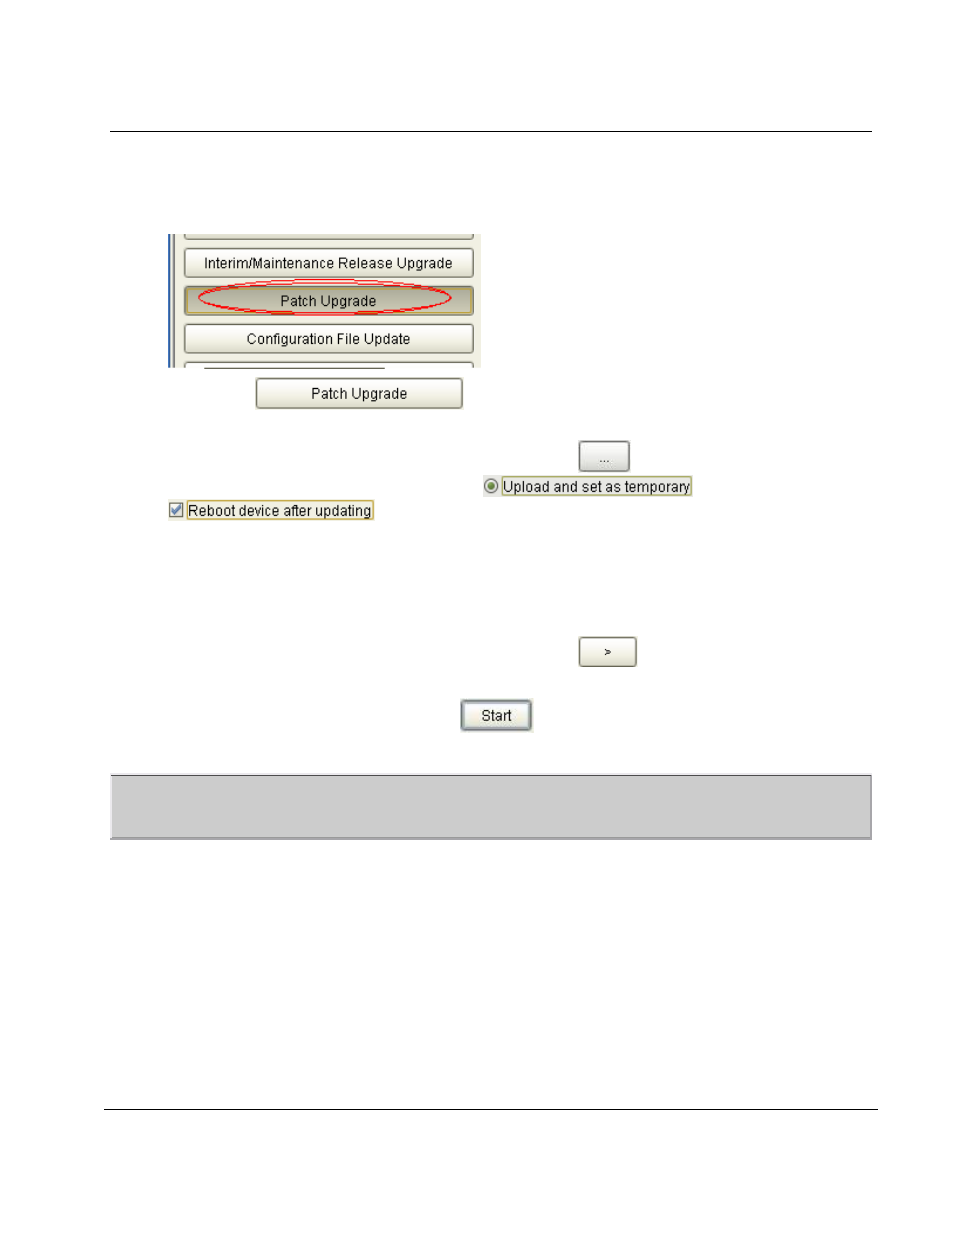
Click on the
button on the Operations Selection Pane. This will display
the Patch Upgrade pane.
Next, locate the upgrade file you will be using by clicking the
button. After you have located and
selected your file, click on the
option. Check the
checkbox.
Enter the address of the server where the file is located. Make sure you enter the correct address
format. If you have an HTTP server, you should enter a URL address. If you have a TFTP server, enter
an IP Address.
Now, select the devices you will be applying the update to. In the "Available Devices" list box, you
should see the IP Addresses of the devices you added a while ago and for which the selected patch is
applicable to. Select one of those entries and click on the
button. The IP Address that you
selected should now appear in the "Selected Devices" list box.
To start the upgrade process, click on the
button.
NOTE:
Upgrading and rebooting a device will make that device unavailable for the duration of the operation. Make sure that you
notify the appropriate groups or people that will be affected before proceeding.
2.4 THE
ALLIEDVIEW-UM
SYSTEM
FOLDERS
Deleting or modifying any of the files under the AlliedView-UM installation folder is not recommended.
Doing so will cause the application to function incorrectly.