Installation overview – Allied Telesis AT-9448Ts/XP User Manual
Page 38
Chapter 2: Installing the Hardware
38
Installation Overview
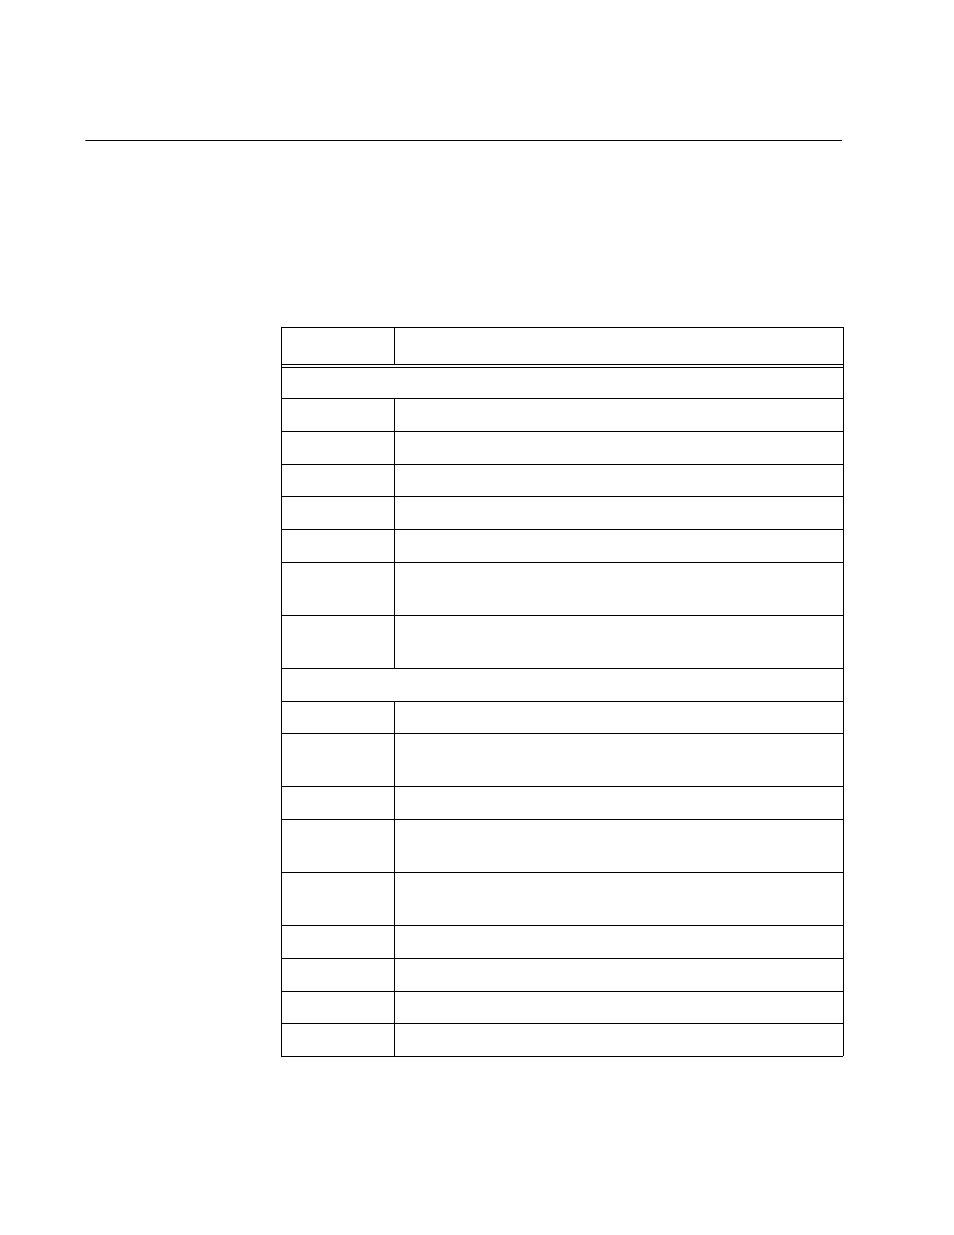
This section lists the procedures for building a stack of the AT-9424Ts,
AT-9424Ts/XP, and AT-9448Ts/XP Switches. The installation procedures
are divided into three chapters and should be performed in the order
presented in Table 7. Allied Telesis recommends printing this table and
placing a check mark beside the procedures as you complete them.
Table 7. Installation Procedures for a Stack
Step
Procedure
Chapter 2, “Installing the Hardware”
1
“Reviewing Safety Precautions” on page 40
2
“Planning the Installation of a Stack” on page 42
3
“Maximum Number of Switches in a Stack” on page 43
4
“Unpacking a Switch” on page 44
5
“Installing the AT-StackXG Stacking Module” on page 45
6
“Installing the Power Cord Retaining Clip (AC Switches
Only)” on page 48
7
“Installing the Switches in an Equipment Rack” on
page 49
Chapter 3, “Preparing the Switches of the Stack”
8
“Verifying the AT-S63 Version Number” on page 52
9
“Choosing Static or Dynamic Module ID Numbers” on
page 55
10
“Labelling the Switches” on page 56
11
“Assigning the Static Module ID Number 1 to the Master
Switch” on page 58
12
“Assigning a Static Module ID Number to the Member
Switches” on page 61
13
“Cabling the AT-StackXG Stacking Modules” on page 62
14
“Powering On the Switches of the Stack” on page 65
15
“Verifying the Installation” on page 67
16