Color, Beginner | quick & easy calibration – Monoprice 9497 Disney World of Wonder User Manual
Page 6
8
9
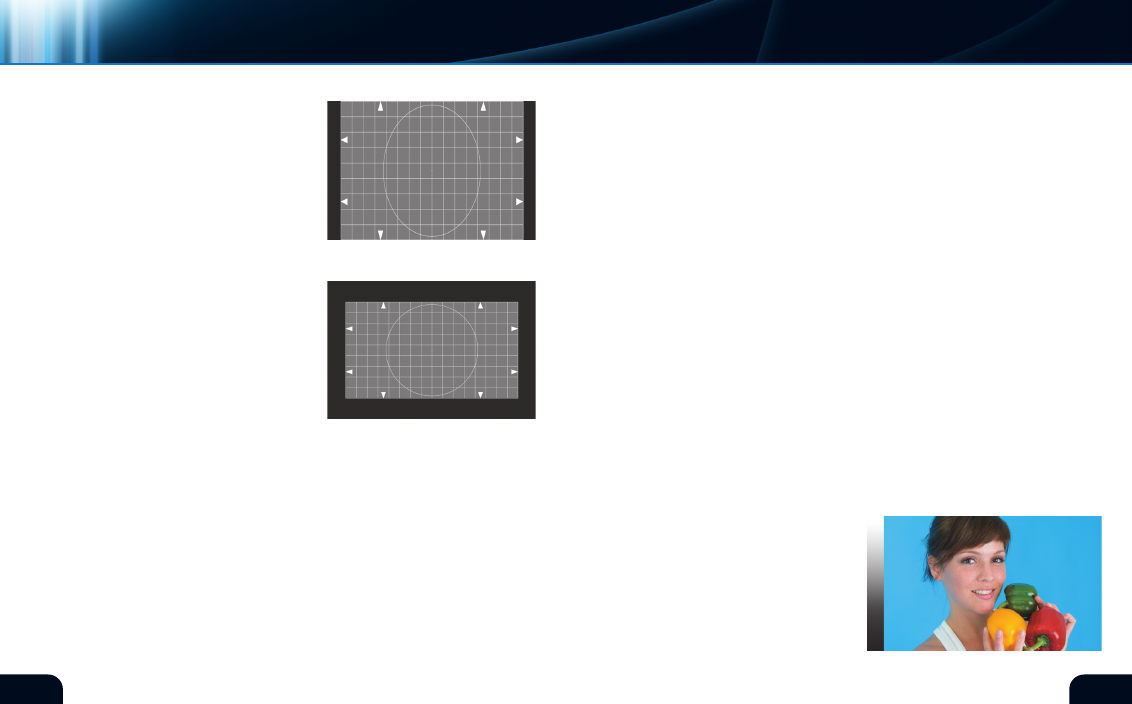
The arrows on the sides
should be uniformly visible
and there should be no
black bars on either side of
the chart nor on the top and
bottom (figures 9, 10, 11).
If this is not the case, find
the controls on your Blu-
ray™ player that affect the
display type. Set this control
to match the connected
display, in this case 16:9
(figure 7).
If the display still appears
improper, find the controls
on your monitor that affect
display sizing. many flat
panel displays provide easy
access to settings that allow
for several basic aspect ratio compensations, intended for use
when 4:3 SD video is present. All of these compensations should be
disabled to bring the test chart into compliance. check that your
monitor is set to accept a 16:9 video source as opposed to a 4:3
source. The most important use of these settings is to make both
the player and display system agree on the native format of the
display.
manufacturers of players and televisions generally provide
settings to allow for a variety of equipment to be connected with
mismatched native aspect ratios. Using these same aspect ratio
controls, it’s possible to connect your Blu-ray player to a 4:3 display.
player setup
display setup
MisMatched
equipMent
beGinner | QUIck & EASY cAlIBRATIOn
video
Incorrect Aspect Ratio Settings.
(figure 10)
Incorrect Aspect Ratio Settings.
(figure 11)
Set your Blu-ray™ player’s aspect controls to output a 4:3 image
instead of 16:9. The Blu-ray player will likely apply a “letterbox”
correction to the images. Similarly, a DVD player may have aspect
ratio controls as the DVD format was introduced just as widescreen
televisions were becoming available.
If your primary video source is 4:3 and there are no aspect controls
on the player, set your 16:9 monitor to expect 4:3 video. The
monitor will apply aspect ratio corrections that avoid fat or skinny
pictures. The inverse of a “letterbox” correction is the “windowbox”
or “side panel” that allows a 4:3 image to rest in the center of a 16:9
display. The source image is narrower than 16:9, so the extra screen
real estate on the sides is unused. The unused area may be filled
with black or some shade of grey.
COLOR
SATURATIOn
The images in the Beginning color & Hue Test have been
specifically selected for color and tone. These pictures can be
used as a reference for adjusting your monitor. Please adjust the
controls affecting color and tint so the images appear accurate on
your monitor. For more precise adjustment
of color and tone, please use the chroma
and Hue calibration tools in the advanced
section of the disc.
Beginning with the first image shown on the
right, adjust the color until the flesh tones
appear slightly saturated or artificially high,
then reduce the color level until flesh tones
appear normal and lifelike (figure 12).
(figure 12)*
*Digital Reference Standard