Speaker level adjustment, Advanced audio set up tools, Subwoofer level adjustment – Monoprice 9497 Disney World of Wonder User Manual
Page 26: Advanced | audio set up tools
48
49
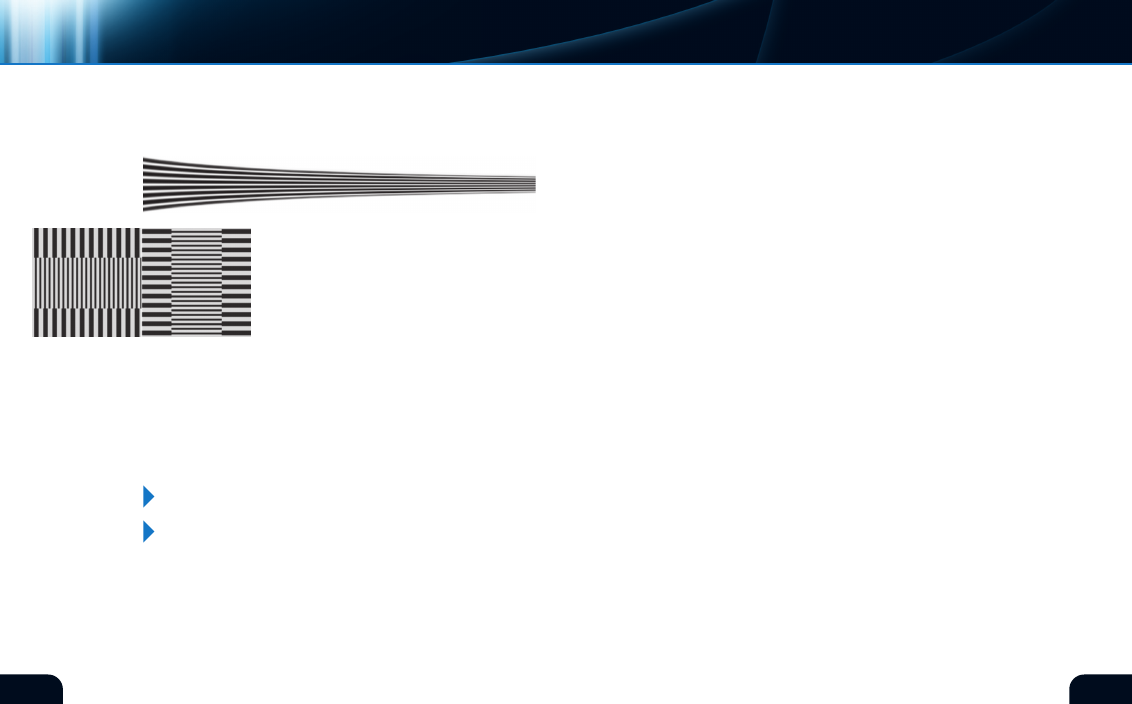
the horizontal wedge (figure 62) is calibrated in TV lines. These
indicators are intended for analog connected devices. While the
readings are subjective, they are useful in quantifying basic system
performance.
Sharpness setup blocks are included to assist
in adjusting aperture correction or sharpness
found in most display systems (figure 63). Use
these blocks in conjunction with other high
resolution elements of this chart, including
text, to sharpen the image without over
exaggerating high detail.
If any of these parameters appear to be out of adjustment, confirm
them using the test signals dedicated to the specific adjustments,
located elsewhere on this disc.
(figure 63)*
advanced | AUDIO SET UP TOOlS
spEaKER LEVEL aDjUstmENt
SPl mETER REQUIRED
aDVaNCED aUDIO sEt Up tOOLs
SPl mETER nOT REQUIRED
This test will allow you to adjust the level of each speaker to ensure
that your system is balanced from left to right and from front to
rear. When properly adjusted, the speakers will produce the most
lifelike sonic presentation and allow a soundtrack to be heard as
the producer and recording engineer intended.
The test signal used will be band-limited pink noise. If you have
remote control capability for level adjustment on your system, use
the remote to begin the test, seated in your normal viewing position.
Adjust the individual channels for equal volume at that position.
For best results, use a sound pressure level meter to adjust channel
levels. A comfortable volume is usually between 78 dB and 85 dB
as measured on a Radio Shack or equivalent sound level meter set
for c weighting and slow response.
It is important to keep in mind that music and sound tracks are
dynamic, that is they have loud and soft passages. Properly setting
the levels should allow the loudest passages to have impact without
distorting the sound.
As you set your levels, do not try to set them at maximum volume.
level
adjustMent
test
sUBWOOFER LEVEL aDjUstmENt
SPl mETER REQUIRED
This portion of the audio test is specifically for subwoofer setup.
If you do not have a subwoofer or it is not connected to your
receiver, please proceed to the next audio test.
Just like the other speakers in your system, the subwoofer should
not be set for maximum output. Because this is a very demanding
test, prior to commencing, be sure to reduce the level of the
subwoofer to no more than 50% of its maximum output.
test
description
speaker id, polarity test, noise floor, buzz & rattle test
see pages . . . . . . . . . . . . . . . . . . . . . . . . . . . . . . . . . . . . . . . . . 13-15
a/v sync
see page . . . . . . . . . . . . . . . . . . . . . . . . . . . . . . . . . . . 33
(figure 62)*
*Digital Reference Standard