Assemble the lower section, Remove the insulating disk – DAVIS Vantage Pro2/Pro2 Plus: Daytime Fan Asp. Radiation Shield Kit User Manual
Page 7
Installing the Daytime Fan Kit
7
5. Put the cable clamp back on the cable and use the screw and flat washer to
resecure the cable onto the radiation plate.
6. Replace the radiation plate back in its correct place in the radiation shield
plating stack.
Assemble the Lower Section
Once the existing radiation shield has been disassembled and the
Temperature/Humidity sensor has been mounted correctly in the radiation
plating stack, the existing disks have to be re-organized and assembled with
the fan-aspirated kit. To reassemble the radiation shield with the new
fan-aspirated shielding:
1. Locate the plate at the top
of the radiation shield
plating and find the
insulating disk on the
underside of the radiation
shield.
2. Remove the two screws
holding insulating disk
attached on the underside
and discard it. Save the top
plate for use in Step 3.
3. Start building the lower
section of the new radiation
shield, starting with the
original bottom plate on
bottom and the
disassembled top plate above that.
4. Place the plate containing the Temperature/Humidity sensor and the two
open plates on top of the two bottom plates.
Note:
When stacking plates, make sure the screw bosses (holes) line up with each other.
5. Place the third open plate (supplied with the fan-aspirated kit) on the stack.
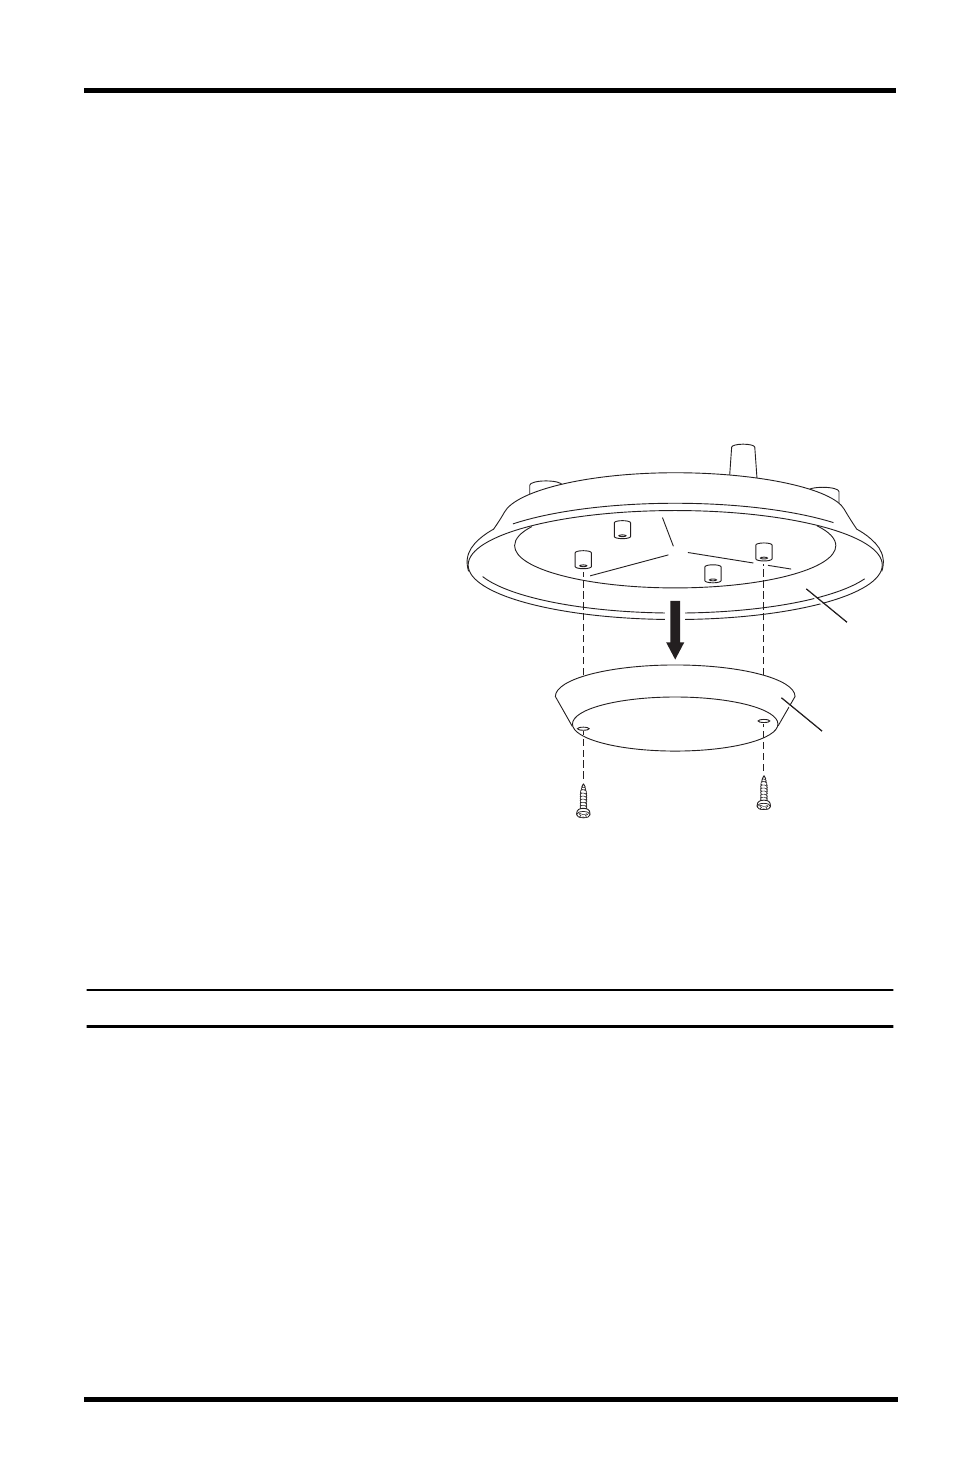
Remove the Insulating Disk
Top Plate
Insulating Disk