DAVIS Vantage Pro2/Pro2 Plus: Daytime Fan Asp. Radiation Shield Kit User Manual
Page 6
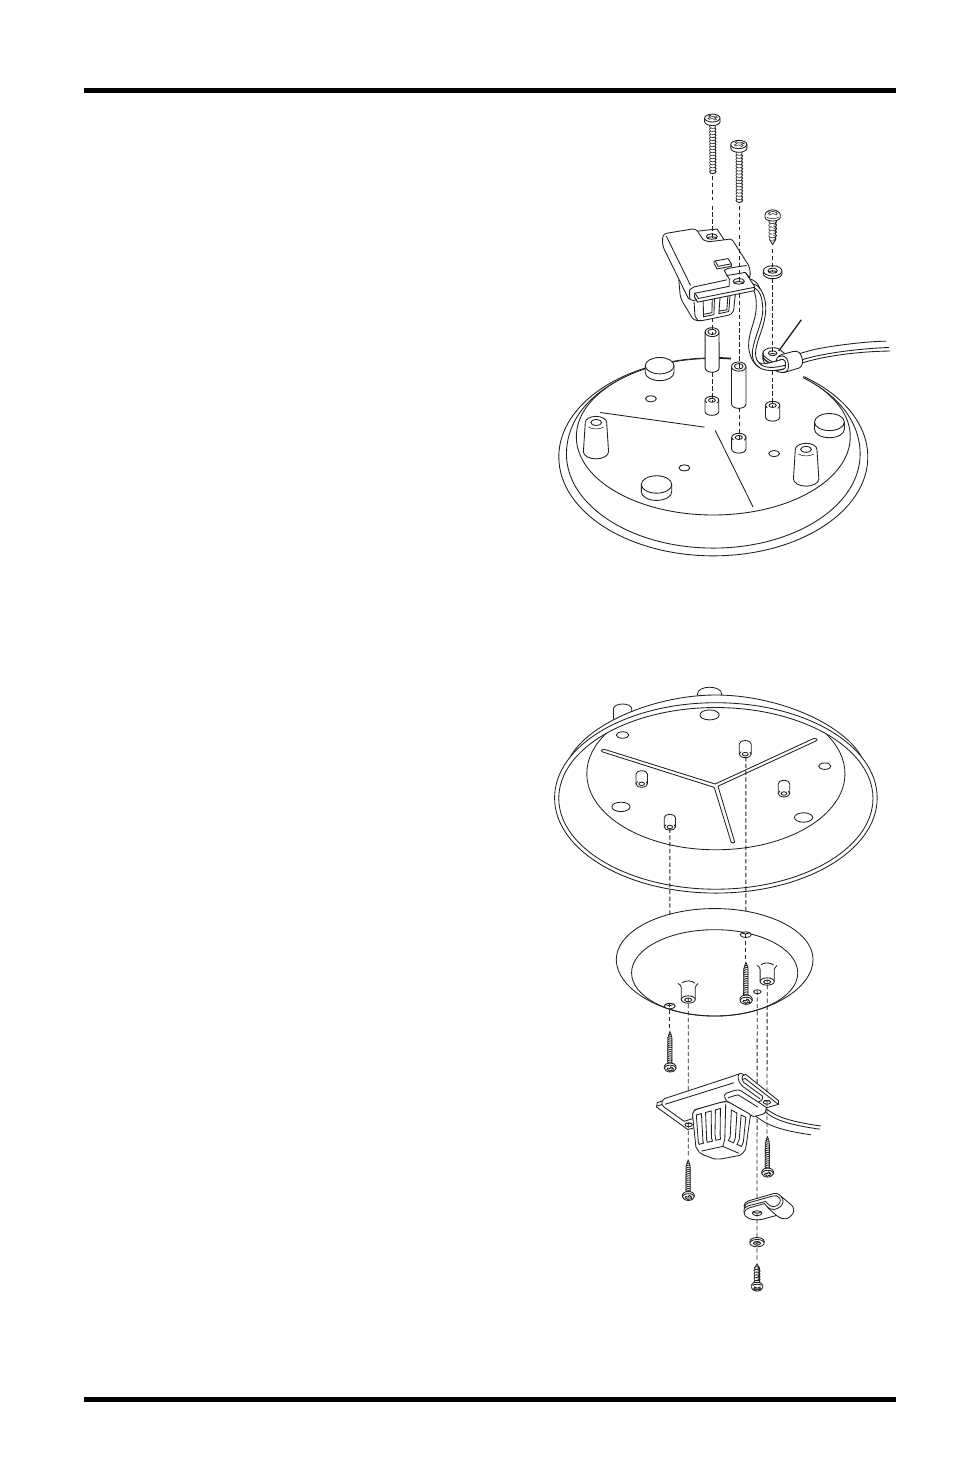
Installing the Daytime Fan Kit
6
3. Reinstall the sensor face down on the
radiation plate, using the two 1'
spacers and #4 screws included with
the kit.
4. Put the cable clamp back on the
cable and use the screw and flat
washer to resecure the cable onto the
radiation plate.
5. Replace the radiation plate back in
its correct place in the radiation
shield plating stack.
Reinstall the Temperature/Humidity Sensor — For Sensors on the
Insulating Disk
1. Locate the plate at the top of the
radiation shield plating and find the
insulating disk with the
Temperature/Humidity sensor on
the underside of the radiation
shield.
2. Remove the three screws, flat
washer, and cable clamp securing
the Temperature/Humidity sensor to
the insulating disk. Save the small
screw, flat washer, and cable clamp
for use later.
3. Remove the two screws holding the
insulating disk attached on the
underside and discard the disk.
4. Reinstall the sensor face down on
the second to bottom-most radiation
plate, using the two 1' spacers and
#4 screws included with the kit.(See
illustration above.)
Temperature/
Humidity
Sensor
#4 Screws (2)
Spacers (2)
Cable Clamp
Reinstalling Temperature/Humidity
Sensor with Sensor Mounted Down
Insulating
Disk
Cable
Clamp
Temperature/
Humidity
Sensor
Removing Temperature/Humidity
Sensor with Sensor Mounted on
Insulating Disk