Installing the fan plate onto the radiation shield – DAVIS Vantage Pro2/Pro2 Plus: Daytime Fan Asp. Radiation Shield Kit User Manual
Page 11
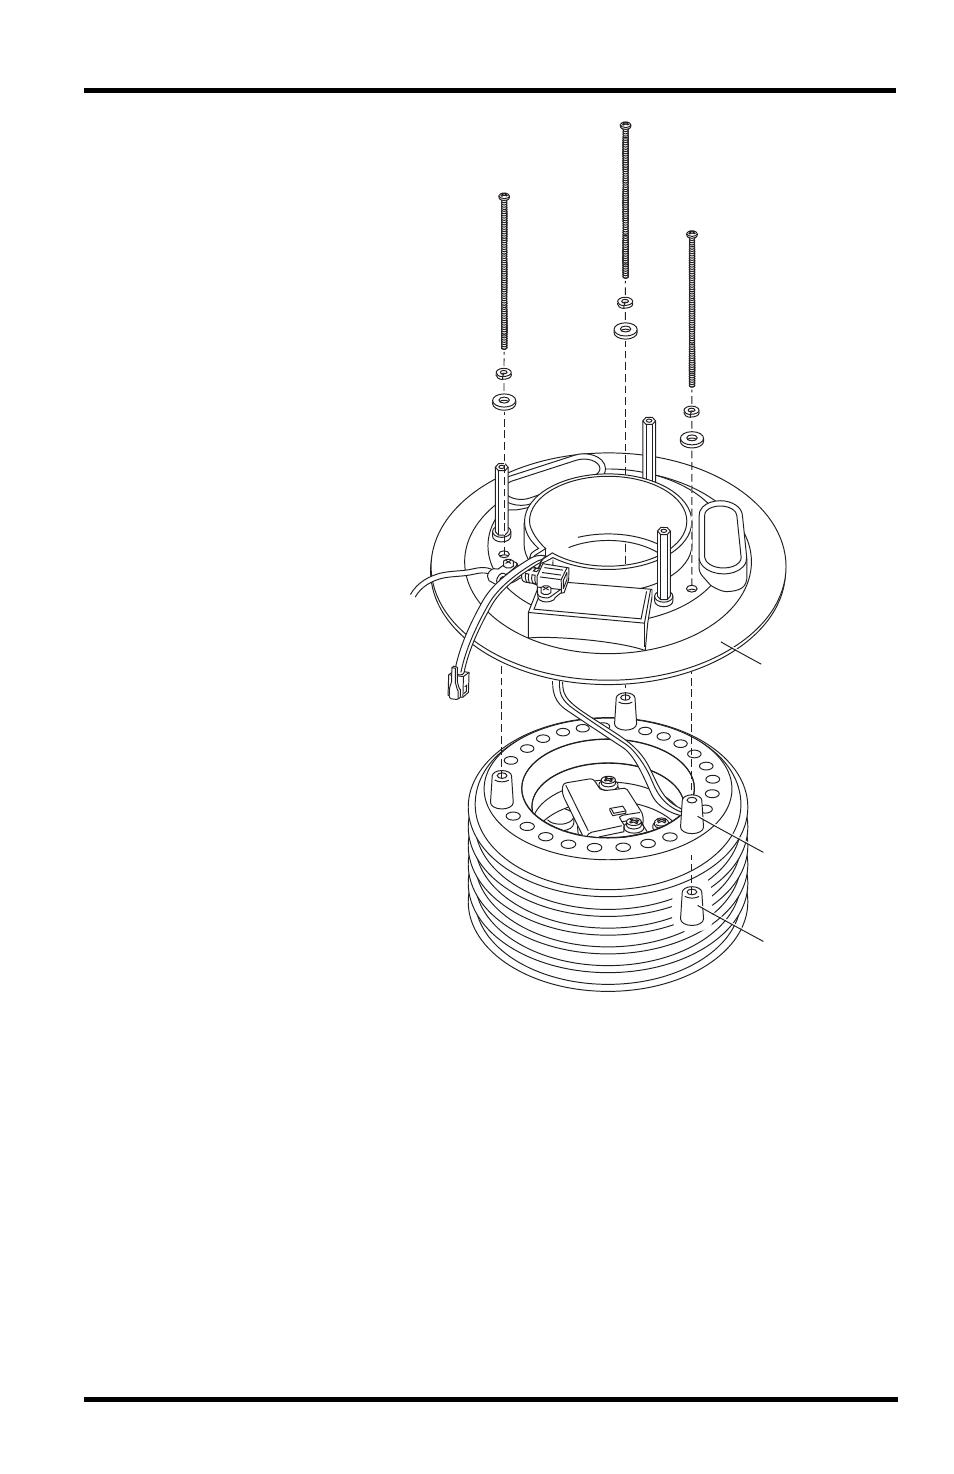
Installing the Daytime Fan Kit
11
12. Place one of the 4
''
screws removed
from the original
radiation shield and
its corresponding
#8
lock washer and # 8
flat washer into one
of the radiation
shield plate holes on
the fan plate located
just
counter-clockwise
from a threaded
spacer, making sure
the screw goes
through the boss in
each of the plates
and lines up with the
threaded insert
located in the
bottom plate.
13. Turn the screw to
engage the threaded
insert in the bottom
plate.
14. Make sure the other
screw bosses are
aligned and then
insert the other two
4
''
screws and corre-
sponding washers in
the same way.
15. Tighten all three
screws to securely
fasten the bottom section of the radiation shield.
16. Place the fan motor back into place and plug the fan motor cable back into
the power cable assembly.
17. Unscrew the cable clamp holding the power cable assembly in place.
18. Thread the Temperature/Humidity cable into the cable clamp and tighten
the screw back down in its original placement.
19. Place the cap plates on top of the rest of the radiation shield and line up
their bosses.
Fan Plate
#8 Flat Washer
#8 Lock Washer
#8-32 x 4" Screws (3)
Threaded Insert
in Bottom Plate
Screw Boss
Installing the Fan Plate onto the
Radiation Shield