Daytime fan kit hardware, Tools needed, Installing the daytime fan kit – DAVIS Vantage Pro2/Pro2 Plus: Daytime Fan Asp. Radiation Shield Kit User Manual
Page 2: Installation overview, Take the iss down from its installed position, Disassemble the standard radiation shield, Check temperature/humidity sensor orientation, Install the fan unit, Re-install the iss, Take the console out of setup mode
Installing the Daytime Fan Kit
2
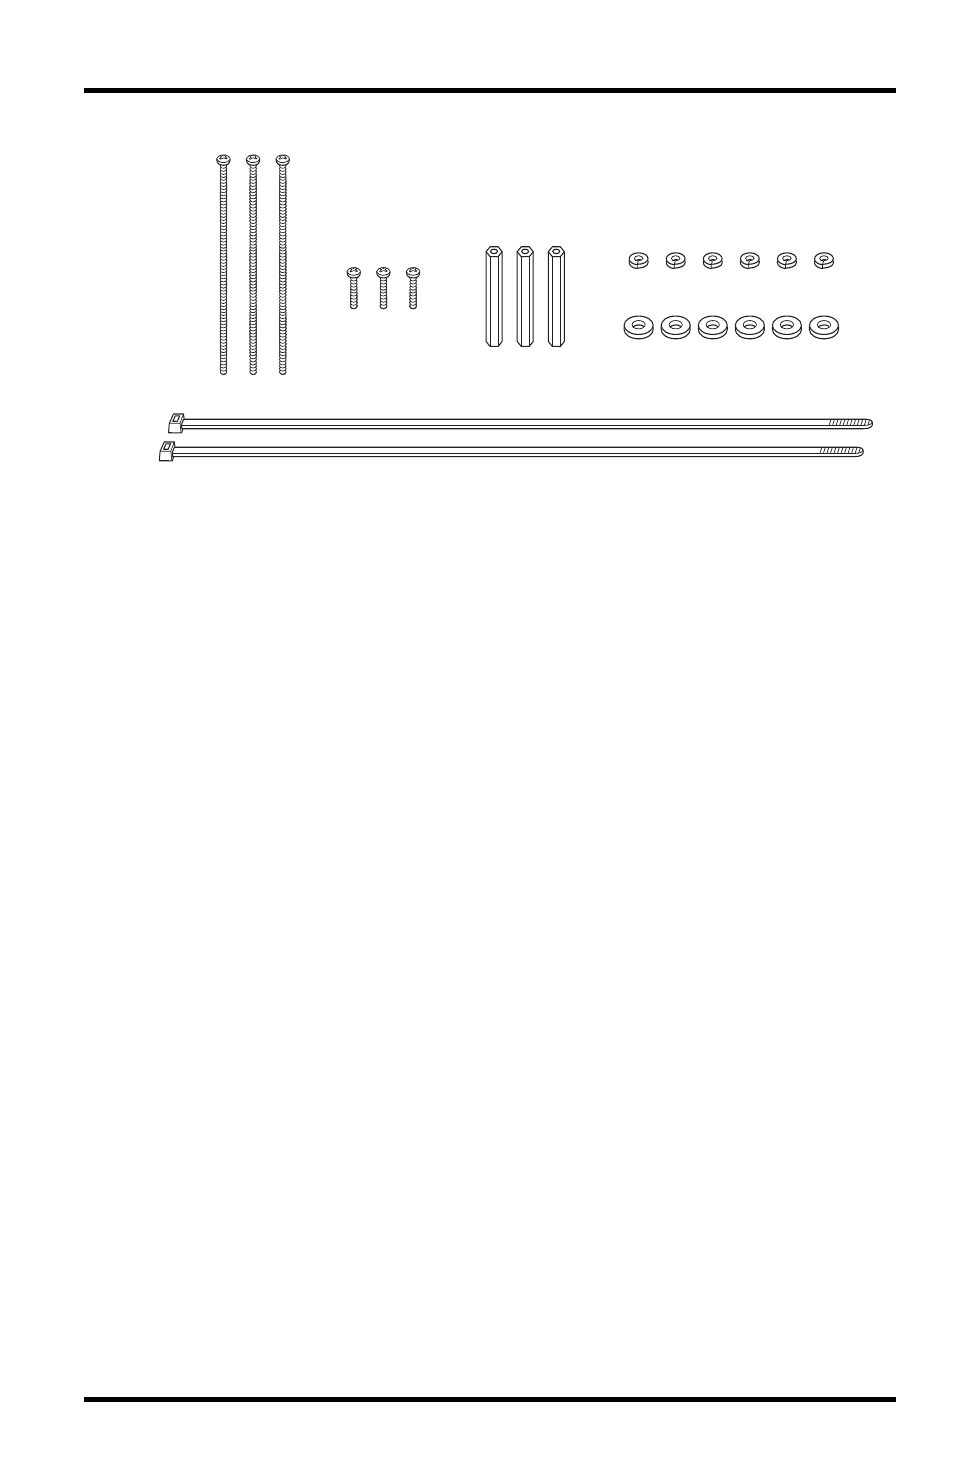
The kit also includes the following hardware:
Tools Needed
You may need some or all of the following tools to complete the upgrade:
• A medium Phillips-Head screwdriver
• A medium slot-tip screwdriver
• Other tools as required to remove and re-mount the ISS
Installing the Daytime Fan Kit
Installation Overview
These are the steps to install the Daytime Fan components:
1. For Consoles Only — Put the console into Setup Mode.
2. Take the ISS down from its installed position.
3. Disassemble the standard radiation shield.
4. Check Temperature/Humidity sensor orientation.
5. Assemble the lower section of the fan-aspirated shield.
6. Install the fan unit.
7. Assemble the upper section of the fan-aspirated shield.
8. Re-Install the ISS.
9. Take the console out of Setup Mode.
For Consoles Only— Put Console in Setup Mode
If you have a console, you need to put it in Setup Mode. This prevents the
reception of erroneous data while you are removing the ISS.
If you have an Envoy and are concerned with erroneous data, you may edit the
data via the WeatherLink software. See the WeatherLink Online Help for more
information.
#8-32 x 3-1/4" Screws
(3)
#8-32 x 1/2" Screws
(3)
Threaded Spacers
(3)
#8 Split-Lock Washers (6)
#8 Flat Washers (6)
12" Cable Ties (2)
Daytime Fan Kit Hardware