Connect the anemometer cable to the interface – DAVIS Universal Anemometer Interface for Vantage Pro2 User Manual
Page 7
7
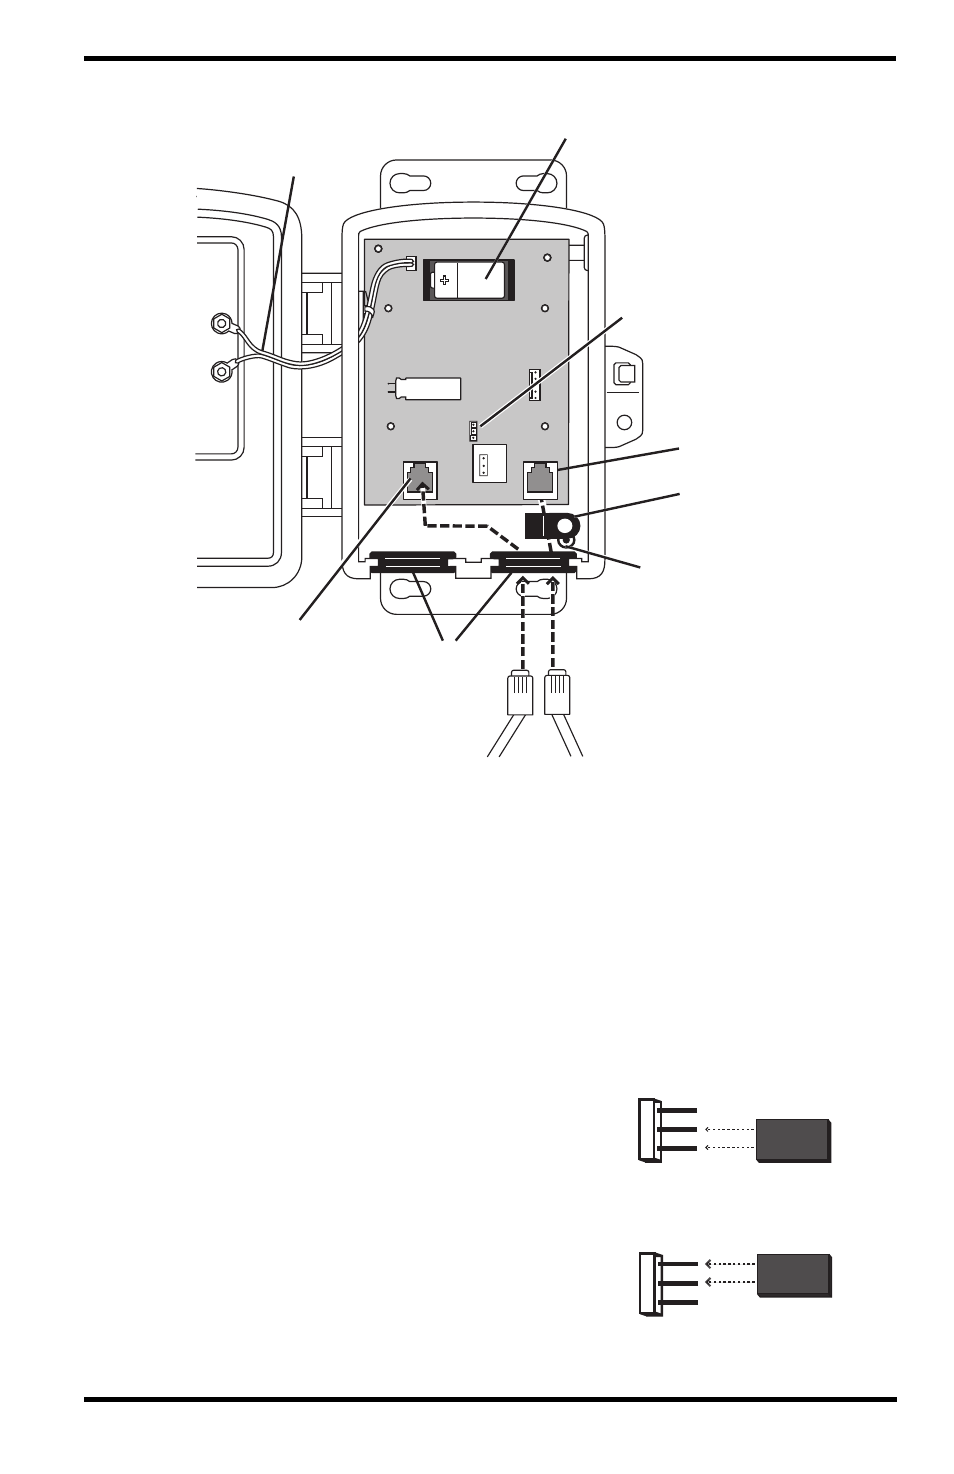
Connect the Anemometer Cable to the Interface
3-Volt Lithium Battery
“OUT”
RJ Jack
Anemometer
Selector Jumper
(labeled “P2”)
IN
OUT
Solar Panel Cable
Square Black
Grommets
Cable Clamp
Mount
ISS Cable
Cable Clamp
Anemometer
Cable
“IN”
RJ Jack
P2
3
2
1
1. Open the interface shelter. Feed the loose end of the 6‐conductor anemometer
cable up through the square black grommet at the base of the shelter. (The
Davis shelter has two of these grommets to provide weather‐resistant
entrances for cables. In this case, use the grommet on the right. You can also
remove the grommet, thread the cable through it and then replace the
grommet in the shelter if that is easier.)
2. Plug the end of the cable into the RJ jack labeled “IN.”
3. Locate the anemometer selector jumper and move the shunt to the correct
pins, as illustrated
• Shunt P2 pins 1 & 2 if your anemometer’s AC
output signal has a frequency of 90 Hz when
the wind speed is 19.7 mph or 8.8 m/s;
transfer function: mph = Hz x 0.219. (e.g.
R. M. Young 05103).
R.M. Young
(Pins 1 & 2 shunted)
Other
(Pins 2 & 3 shunted)
3
2
1
3
2
1
• Shunt P2 pins 2 & 3 if you are using another
anemometer that is not an R.M. Young or
does not have the same transfer function as
the R.M. Young (see above).