Figure 17 - media sensor adjust knob – AMT Datasouth 4000 User Manual
Page 23
User's Guide 23
11. Thread the media over the Back Media Rail and under the Front Media Rail.
12. Continue feeding the media through the black Upper and Lower Media Sensor Arms
located under the print module.
13. Place the green Outside Media Guide (smooth side in) back onto the Front and Back
Media Rails.
14. Slide the Outside Media Guide towards the center of the printer until it just touches but
does not buckle the media.
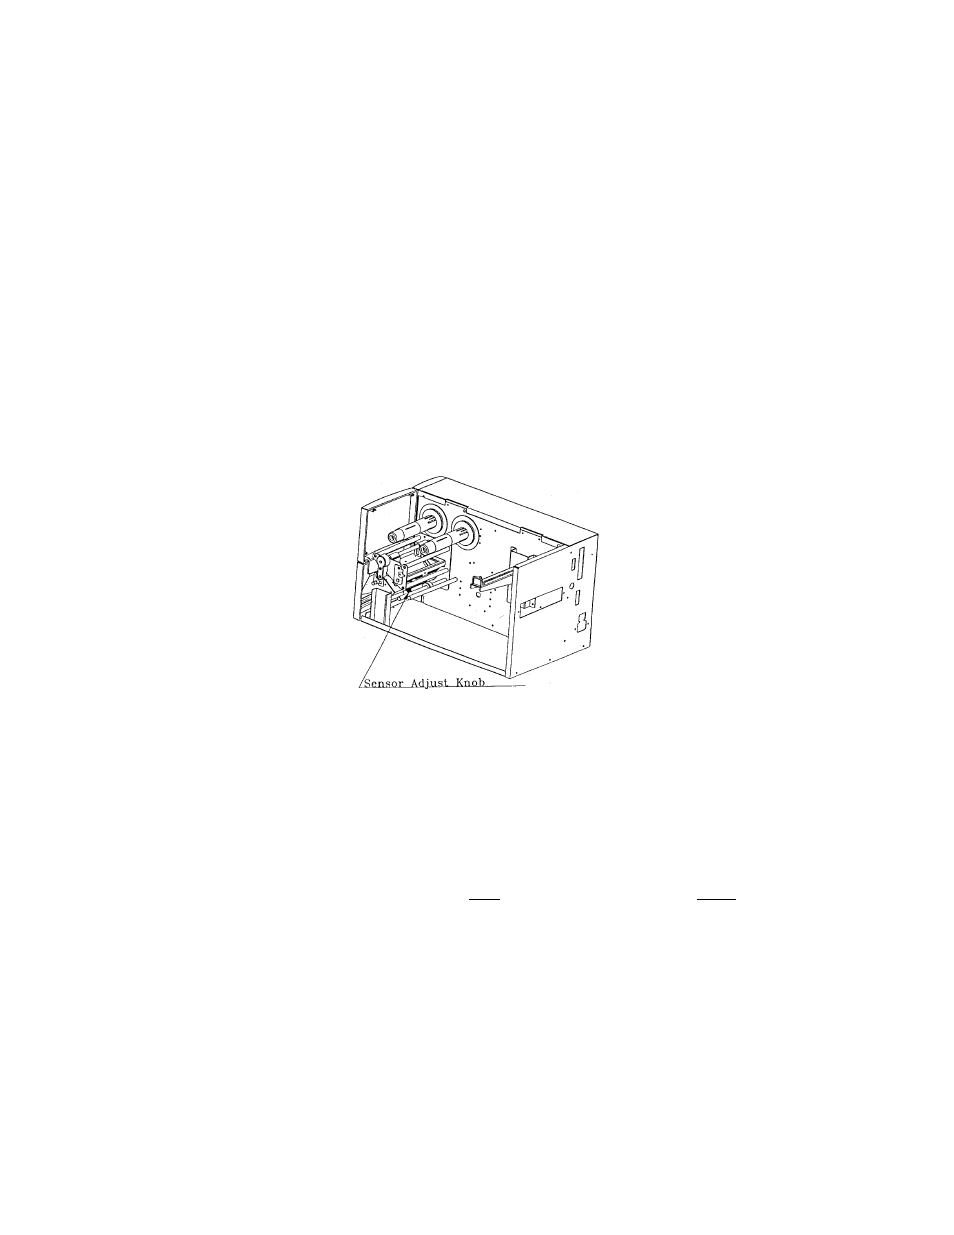
15. If needed, grasp the Sensor Adjust Knob and slide in or out to move the Media Sensor to the
position on the media to be sensed.
NOTE: With the print head open and viewing from the front, the location of the media sensor on
the sensor arm is indicated by a small triangle. Normally any location directly over the label gap
is sufficient. In some cases, this sensor will need to be precisely located for example to see a
hole in a wristband. Locate this sensor before running the label calibration test.
Figure 17 - Media Sensor Adjust Knob
16. Important: To ensure proper media feeding and sensor operation, complete the following
checklist:
#
Media is wound Face Out (print side out) and feeding off the top of the roll. (Very
important otherwise media may peel and stick to the media rails.)
#
Media is routed exactly as shown over the Back Media Rail and under the Front
Media Rail.
#
Media is routed between the Upper and Lower Media Sensor Arms located under
print module.
#
The green Outside Media Guide has been re-installed.
#
If required, the media sensor is adjusted directly over the notch (hole) or gap.