Maintenance – JKS OGS128 User Manual
Page 3
JKSOGS128
JKS Adjustable HD Trackbar Installation
Page 3
Steering Wheel
Â
Have a partner turn the steering wheel in
small increments to shift the vehicle chassis
side-to-side.
Â
After each adjustment, have your partner
hold the steering wheel steady while you take
measurements.
4. SET ADJUSTABLE TRACKBAR LENGTH
AND MOUNT TO AXLE
Using a 1/2” drill bit, enlarge the original mounting
hole on the factory axle bracket.
IMPORTANT: Length of Adjustable Trackbar must be
set with axle housing perfectly centered and the ve-
hicle at normal ride height.
With the axle housing centered beneath the chas-
sis, adjust the length of Adjustable Trackbar by
rotating the axle end until the bushing aligns with
the mounting holes on the axle bracket.
Apply anti-seize lubricant to threads of 1/2” x
2-1/2” Bolt (D).
Install Axle End (C) of Adjustable Trackbar to the
axle bracket and secure with 1/2” x 2-1/2” Bolt (D)
and 1/2” Flanged Locking Nut (G).
Take measurements again to ensure axle housing
is perfectly centered and make any final adjust-
ments if necessary.
Check the Chassis End (A) of Adjustable Trackbar
to ensure it is aligned with the chassis rail bracket.
If necessary, rotate fore/aft until the space be-
tween the trackbar and chassis rail bracket is
even.
IMPORTANT: The Chassis End of Adjustable Trackbar
must be in the “neutral” position (as illustrated above)
before the Jam Nut is tightened.
Once all adjustments are complete, fully tighten
the Jam Nut (B) to prevent Adjustable Trackbar
length from changing. HINT: It may be easier to
tighten Jam Nut with the Adjustable Trackbar re-
moved from the vehicle.
Tighten the 1/2” x 2-1/2” Bolt (D) on axle bracket to
65 ft-lb. using a torque wrench.
5. LUBRICATE ADJUSTABLE TRACKBAR
Lubricate the Grease Zerk (N) at the chassis end
of Adjustable Trackbar using common wheel bear-
ing grease or equivalent.
Maintenance
Re-torque fasteners after driving 150 miles. Continue to
check torque specifications as part of regular vehicle main-
tenance routine.
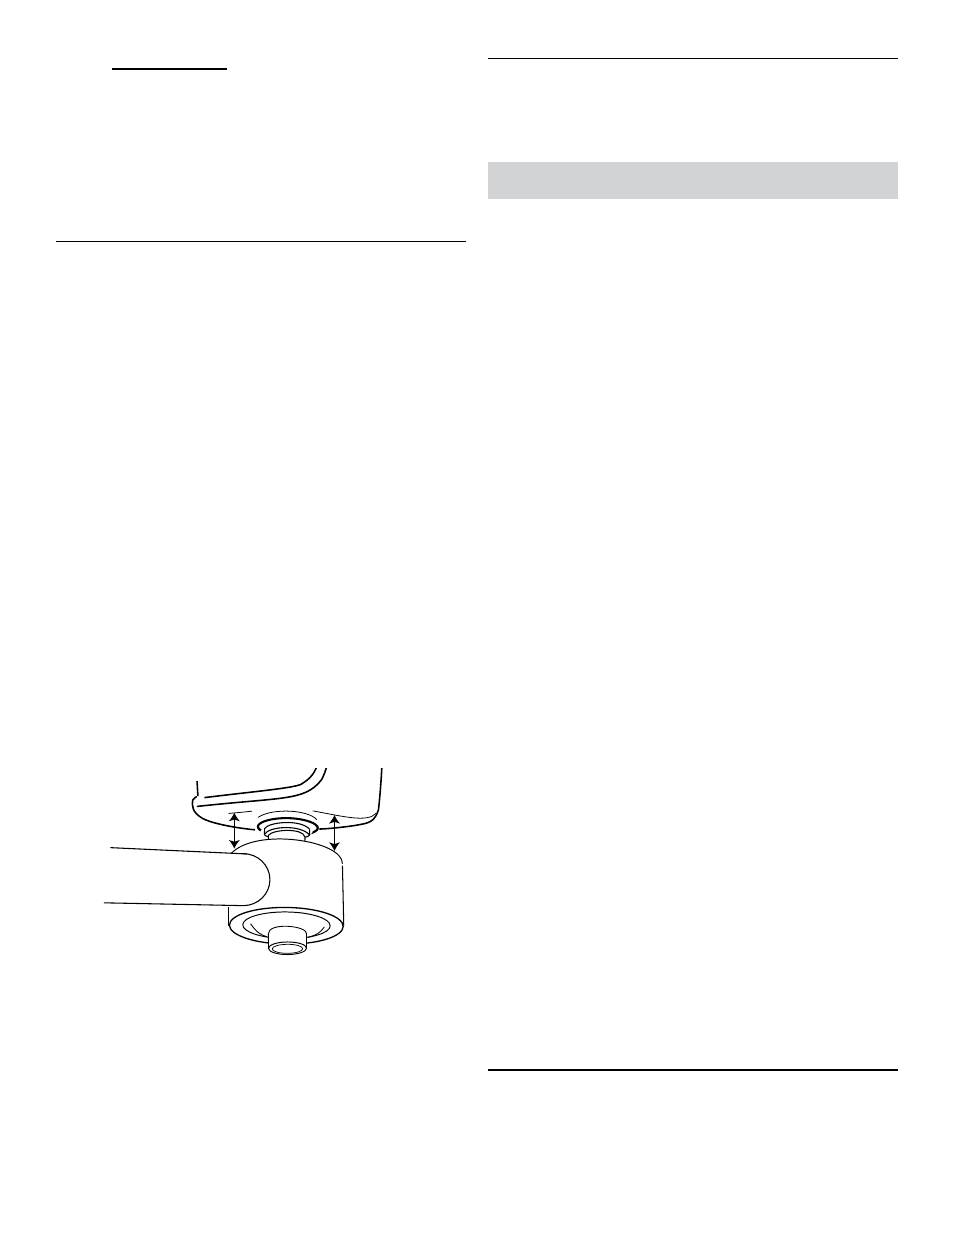
The chassis end of the Adjustable Trackbar features a
spherical Nylatron bushing which is greaseable, adjustable
and rebuildable.
Lubrication
Lubricate the bushing via the Grease Zerk (N)
regularly as part of vehicle maintenance schedule.
Use common wheel bearing grease or equivalent.
Bushing Preload
The spherical Flex Joint is factory preloaded to 15
ft-lbs. and no adjustments are necessary at time
of installation. In the unlikely occurrence that the
bushing begins to loosen up over time, the user
can tighten the Preload Ring (I) to eliminate any
slop.
To adjust bushing preload, first remove the Set
Screw (O) to unlock the Preload Ring (I). Then
tighten the Preload Ring to 15 ft-lbs. using a torque
wrench. Re-install the Set Screw to lock the Pre
load Ring.
JKS strongly recommends the use of Flex Joint
Tool # SM-FJL-TOOL to adjust the Preload Ring (I).
This special spanner socket is available directly
from Summit Machine by calling 877-533-7557.
Replacement Parts
Flex Joints are designed for maximum longevity
and it is extremely unlikely that any parts will
wear out. Just in case, all replacement parts are
available directly from JKS Manufacturing on our
website at www.jksmfg.com.
Cleaning
Regular cleaning with pressurized water is
recommended to maximize ease of operation and
reliability. Always lubricate afterwards to evacuate
any moisture.
©2013 JKS Manufacturing, Inc & Aftermarketing, LLC
Revision Date 10/31/2013