Installation – JKS 9400 User Manual
Page 2
JKS5006-5007-9300-9400
JKS Quick Diconnect Installation
2 Page
Installation
1. REMOVE ORIGINAL EQUIPMENT (OE)
SWAYBAR LINKS
Remove front swaybar drop links per the fac-
tory service manual instructions for your vehicle.
Retain the original mounting hardware as it is
required for Quick Disconnect installation.
2. MOUNT UPPER ENDS TO SWAYBAR
Install Upper Female End (E) of Quick Disconnect
to outboard side of swaybar, ensuring Grease Zerk
(C) is facing forward.
IMPORTANT: Female end must be mounted on top to
prevent it from collecting mud and debris.
Secure Upper End (E) with the original tapered
mounting bolt and hardware. Tighten to 40-50 ft-
lb. using a torque wrench.
3. MOUNT LOWER ENDS TO AXLE
Install Lower Male End (B) of Quick Disconnect to
the front axle U-bolt plates, ensuring Grease Zerk
(C) is facing forward.
Secure Lower End (B) with the original mounting
hardware. Tighten until all threads on nut engage
the OE mounting stud, but do NOT overtighten
polyurethane bushing.
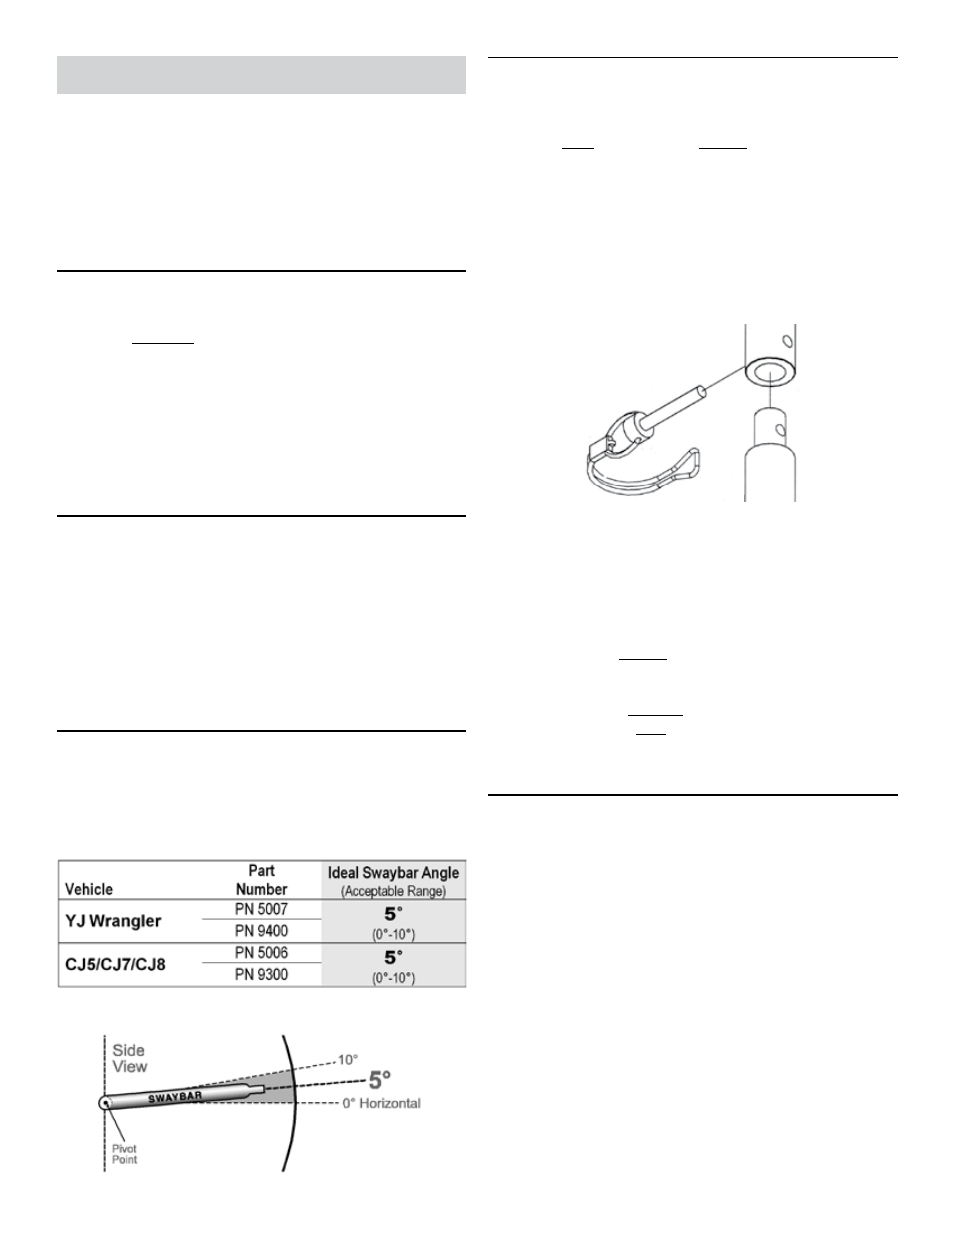
4. MEASURE ANGLE OF SWAYBAR
With the Quick Disconnects installed, and the
vehicle on level ground and at normal ride height,
measure swaybar angle to ensure it complies with
the Acceptable Range below.
HINT: See illustration of swaybar angle
5. DISCONNECT AND RECONNECT ENDS
OF QUICK DISCONNECT
HINT: Always disconnect and reconnect swaybar with
vehicle on level ground and at normal ride height.
Remove the Stainless Steel Lynch Pins (D) to
disconnect swaybar.
Rotate the swaybar up and out of the way.
IMPORTANT: When disconnected, the swaybar must
be secured to vehicle chassis to prevent interference
with suspension components or axle. Use plastic wire
ties, bungee cord or equivalent.
To reconnect, rotate swaybar down and align both
ends of Quick Disconnect so that male and female
union slides together.
Insert Stainless Steel Lynch Pin (D) through the
male/female union to secure Quick Disconnect
ends and lock the lynch pin in place.
HINT: It is normal to experience some difficulty
when removing or inserting lynch pins following
initial installation. Vehicle must be driven for a
few days to break in Quick Disconnects and allow
lynch pins to seat. With use, lynch pins will be-
come easier to remove/insert.
6. LUBRICATE QUICK DISCONNECTS
Flush mount grease zerks require special grease gun at-
tachment available at any auto parts store – use Lincoln®
PN 83278 or equivalent.
Lubricate all Grease Zerk fittings (C) on Quick
Disconnects immediately after installation using
common wheel bearing grease or equivalent.