JKS 8100 User Manual
Page 2
JKS8100
JKS 1" Budget Motor Mount Installation
2 Page
Carefully raise the hydraulic jack just enough to
remove the weight of the engine from the engine
mounts.
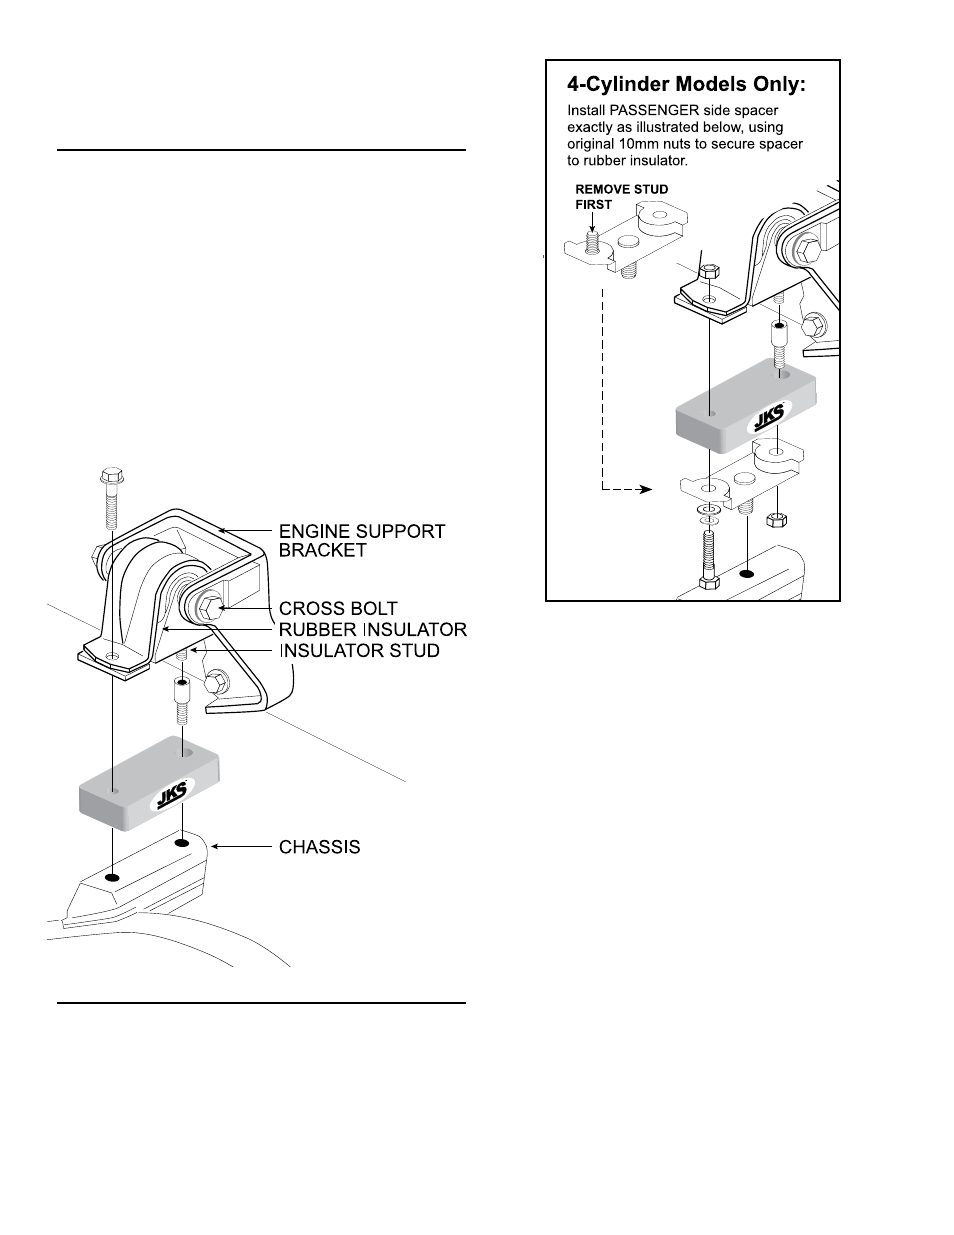
2. REMOVE OE ENGINE MOUNT
Remove nut from cross bolt that secures the rub-
ber insulator to the engine support bracket. DO
NOT REMOVE cross bolt yet.
Remove the original retaining bolt and nuts that
secure the rubber insulator to the chassis. Retain
original nuts.
Remove cross bolt and insulator from vehicle.
IMPORTANT: If vehicle is equipped with air condi-
tioning, the condenser pump will not allow adequate
space to remove the cross bolt. Therefore, it will be
necessary to remove the entire engine support brack-
et assembly from the engine.
3. INSTALL MOTOR MOUNT SPACERS
Using a wire brush and/or chemical cleaner, thor-
oughly clean threads of stud protruding from base
of rubber insulator.
Using a cutting tool, remove 1/4” from length of
OE insulator stud. HINT: Use care to avoid damag-
ing threads.
Thread supplied Bolt Extension (B) onto insulator
stud. Use pliers or vice grips to ensure Extension
completely threads onto stud until seated against
bottom of insulator.
Slip Motor Mount Spacer (A) over the Bolt Exten-
sion (B) and re-position engine mount assembly
on the chassis.
IMPORTANT: If vehicle is equipped with air condition-
ing, it will be necessary to reinstall the engine support
bracket on the engine at this time.
Apply anti-seize lubricant to threads of M10 x
60mm Bolt (C) and insert with M10 Washers
(D&E) into remaining mounting hole.
Loosely thread the original 10mm nuts onto Bolt
Extension (B) and M10 x 60mm Bolt (C) to secure
engine mount to chassis.
Adjust height of hydraulic jack to align rubber insu-
lator with engine support bracket.
Re-install original cross bolt and nut to secure rub-
ber insulator to engine support bracket. DO NOT
TIGHTEN yet.