Advanced setup – Ag Leader EZ-Guide Plus Quick Reference Guide User Manual
Page 3
EZ-Guide® Plus Lightbar Guidance System
Quick Reference Card
A
www.EZ-Guide.com
ADVANCED SETUP
To set up ...
Complete these steps ...
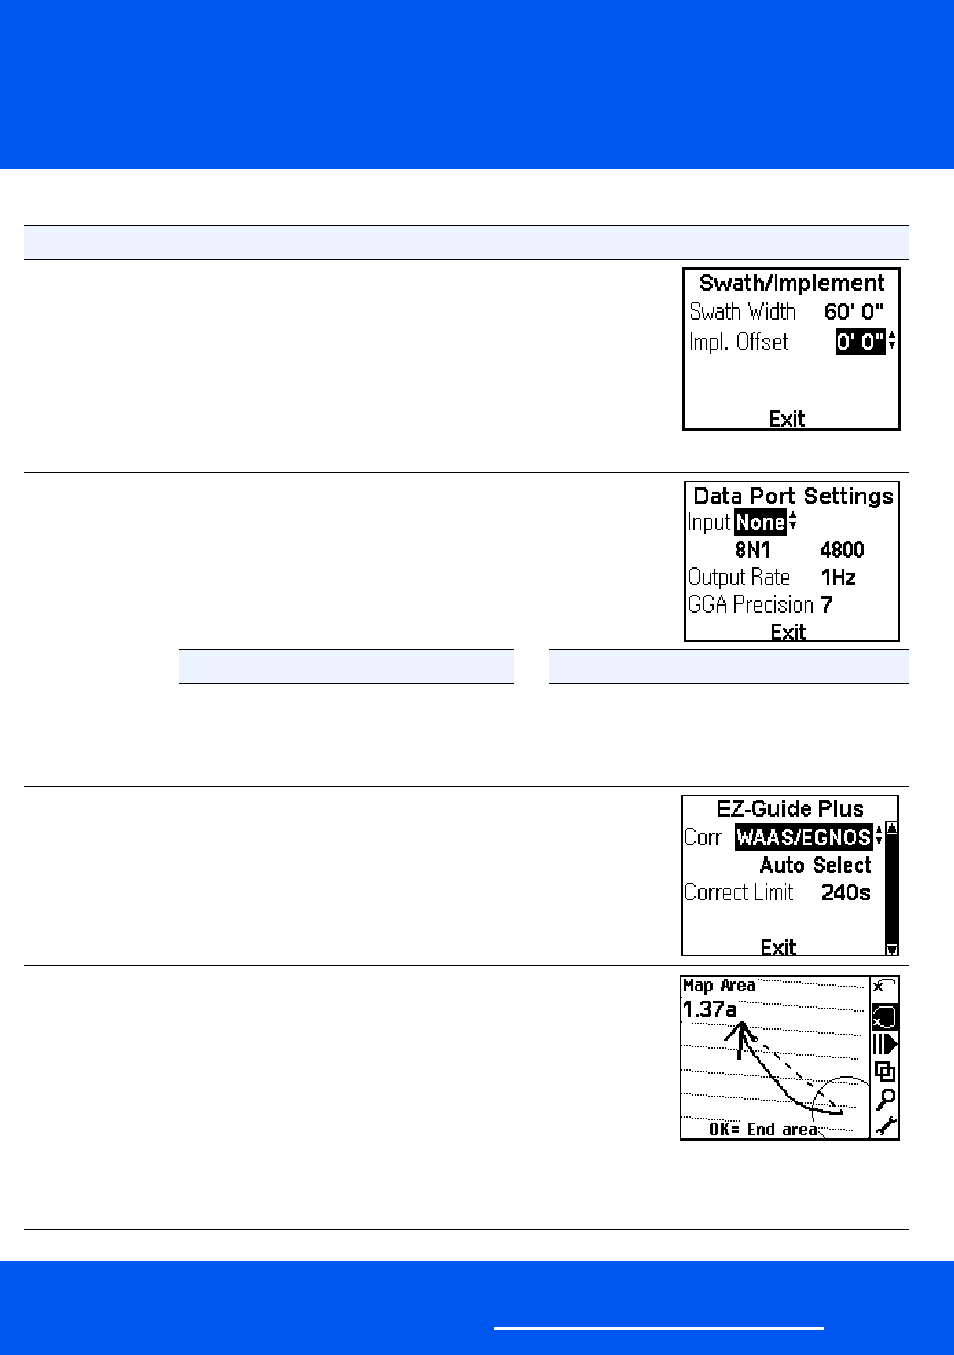
Implement side
offset
(If the implement
is offset to one
side of the vehicle
centerline)
1. Reset guidance and then select a new guidance pattern.
The Swath /Implement screen appears.
2. Select the Impl. Offset field.
3. Press u or D until the correct value is displayed.
4. Press o.
Note —
If an implement side offset is configured, the
guidance arrow will show the center of the implement
instead of the center of the vehicle.
GPS receiver
1. Select Lightbar / Data Port Settings.
The Data Port Settings screen appears.
2. Press u or D to choose the receiver type from the Input
field.
3. Press o.
Input
Select this input for...
Input
Select this input for...
None
Internal GPS receiver
Autopilot
AgGPS® Autopilot™ system
TSIP Receiver
External Ag Leader GPS
Corrections
RTCM input from a radio
External GPS
Third-party GPS receiver
Diagnostics
Diagnostics with AgRemote
GPS corrections
1. Select GPS / Corrections.
Note —
Only correction types supported by your receiver
are available for selection. You cannot configure
corrections for third-party GPS receivers.
2. To edit the WAAS or EGNOS satellites, change Auto Select
to Edit.
Area mapping
Use Area Mapping to define an area in the field or to calculate
the size of an area:
1. Select 9 and then press
o
to reset guidance.
The Guidance Pattern screen appears.
2. Select New Area and then press
o
.
3. Select the point on the vehicle that will be used to define
the area and then press
o
. The main screen appears.
4. Press 8 to begin mapping and then drive around the out-
side of the area.
5. Press D or drive back into the start/finish circle to end.