HP Pavilion t350.uk Desktop PC User Manual
Page 116
108
user’s guide
6 Remove the cables attached to
the back of the drives in the
drive cage.
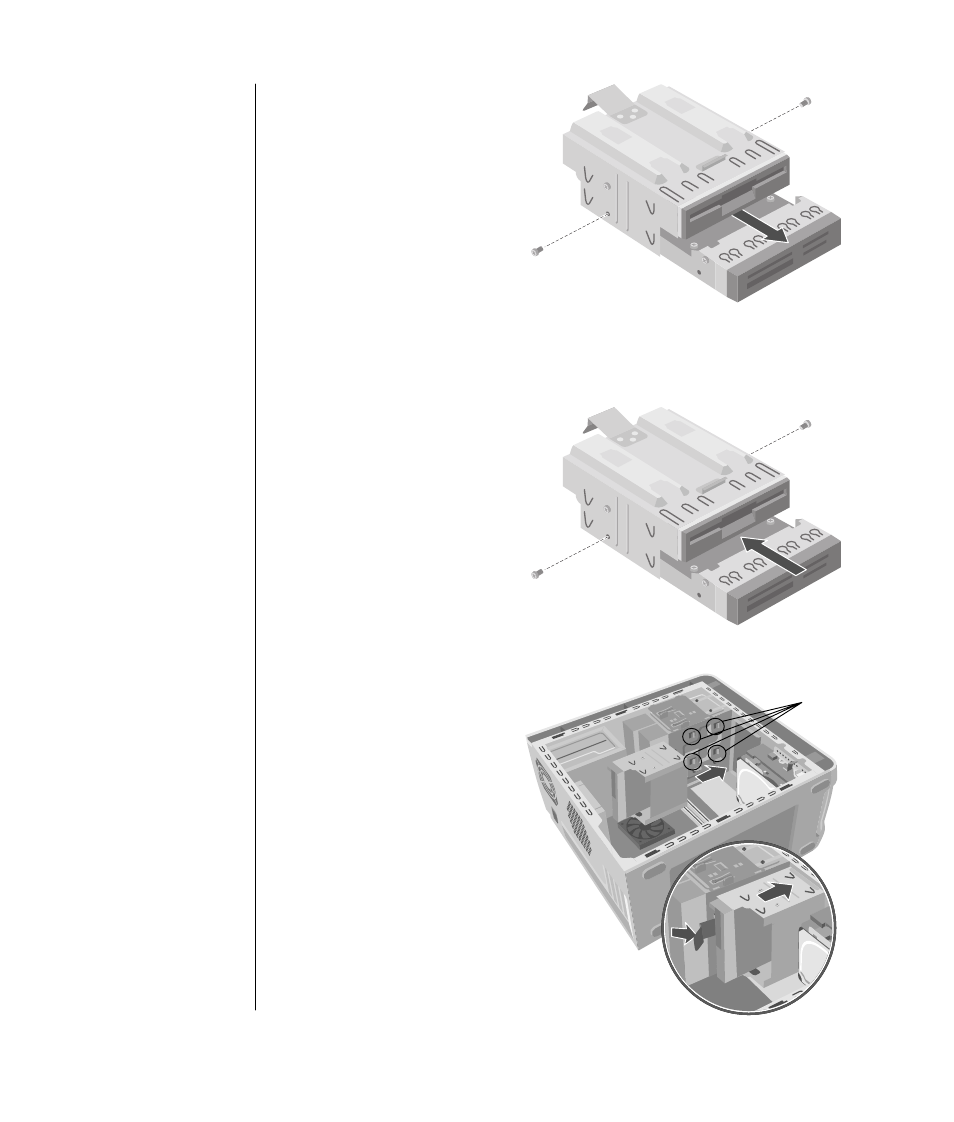
7 Remove the screw from each
side of the drive cage to
remove the 7-In-1 memory card
reader.
Or
Remove the screws from each
side of the drive cage to
remove the diskette drive.
8 Pull the drive out through the front of the drive cage.
installing the 7-in-1 memory card reader or the
diskette (floppy) drive
1 See ”removing the 7-in-1
memory card reader or the
diskette (floppy) drive” on
page 107.
2 Slide the replacement drive
into the drive cage until the
two screw holes on each side
are aligned.
3 Replace the screws on each
side of the drive cage.
4 Pull the drive cage release tab
(E) back. Align the four holes on the top of the drive cage with the four hooks
(G) on the bottom of the optical drive bracket. Slide the drive cage so that the
hooks go into the holes on the
drive cage, and then push the
drive cage forward until it
snaps into place.
5 Connect the cables to the back
of the drive you installed.
6 Replace the side panel. See
page 101.
E
G