HP 9000 Virtual Library System User Manual
Page 209
IMPORTANT:
RAID controllers should only be replaced while the array is powered up to ensure
that the array will copy configuration data from the surviving controller into the newly added
controller.
CAUTION:
When removing a controller, allow 60 seconds for the failover to complete before
fully inserting a replacement. When you remove a controller with the disk array enclosure powered
on, install a replacement controller or a blank within two minutes. Otherwise, the disk array
enclosure might overheat.
NOTE:
A damaged midplane may appear as though a controller has failed. If you replace a
controller and it does not remedy the original fault, replace the whole disk array enclosure.
To replace a RAID controller or expansion controller:
1.
Disconnect all cables attached to the controller in this order:
•
For a RAID controller:
1.
Fibre Channel port 0
2.
SAS output port
3.
Ethernet port
•
For an expansion controller:
1.
SAS port 0, input port
2.
SAS port 1, output port
2.
Turn the thumbscrew on each latch counterclockwise until the screw disengages from the
controller.
Do not remove the screw from the handle.
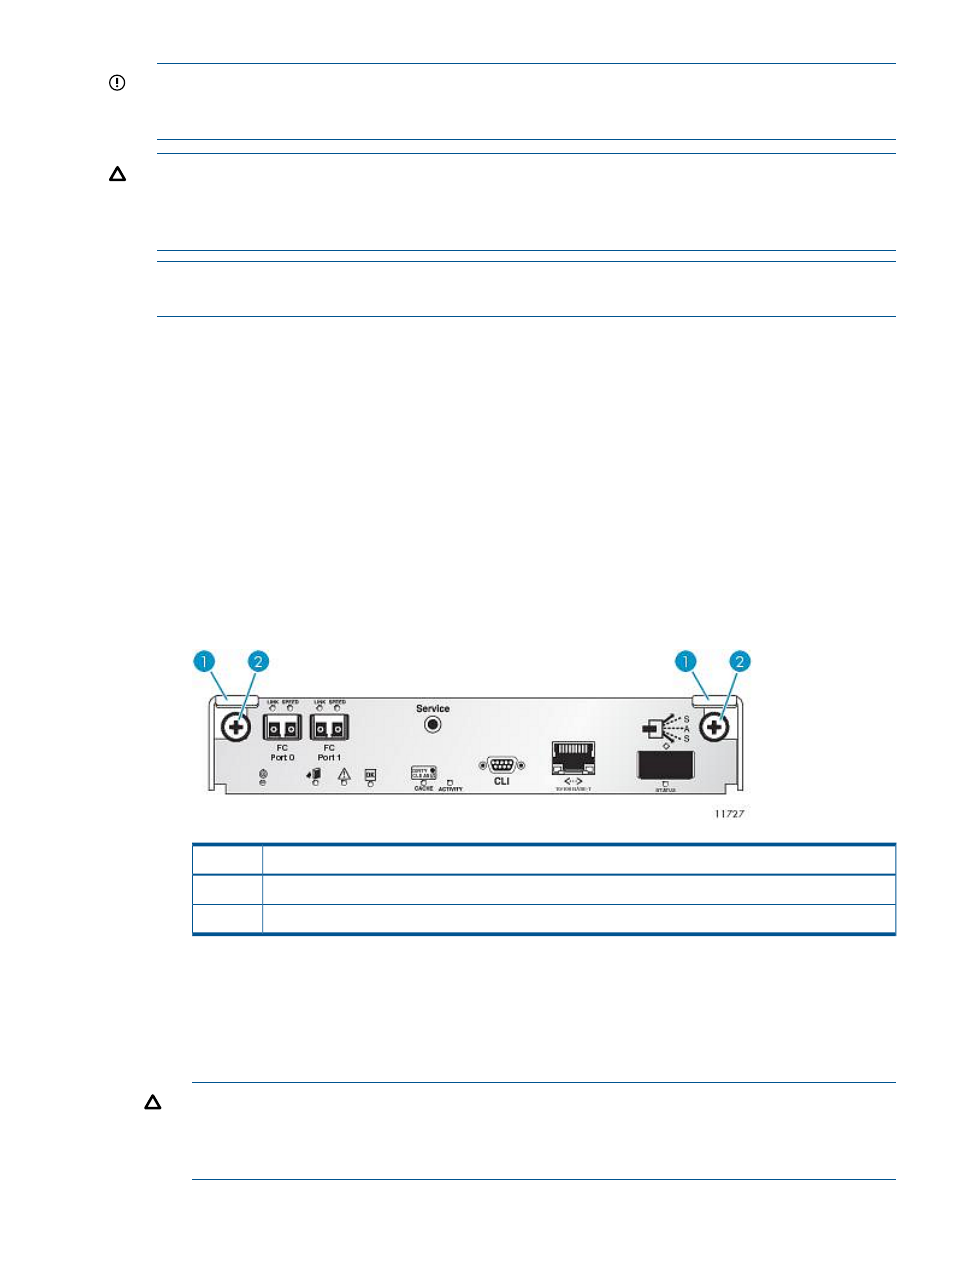
Description
Item
Latches
1
Thumbscrews
2
3.
Press both latches downward to disconnect the module from the midplane.
4.
Pull outward on the latches to slide the controller out of the disk array enclosure.
5.
Loosen the thumbscrews on the latches of the new controller and press the latches downward.
6.
Position the controller with the latches toward the top and slide the controller into a slot as far
as it will go.
CAUTION:
When replacing a controller, ensure that less than 10 seconds elapse between
inserting the controller into a slot and fully latching it in place. Failing to do so might cause
the controller to fail. If it is not latched within 10 seconds, remove the controller from the slot
and repeat the process.
VLS9200 Disk Array Component Replacement 209