HP Matrix Operating Environment Software User Manual
Page 52
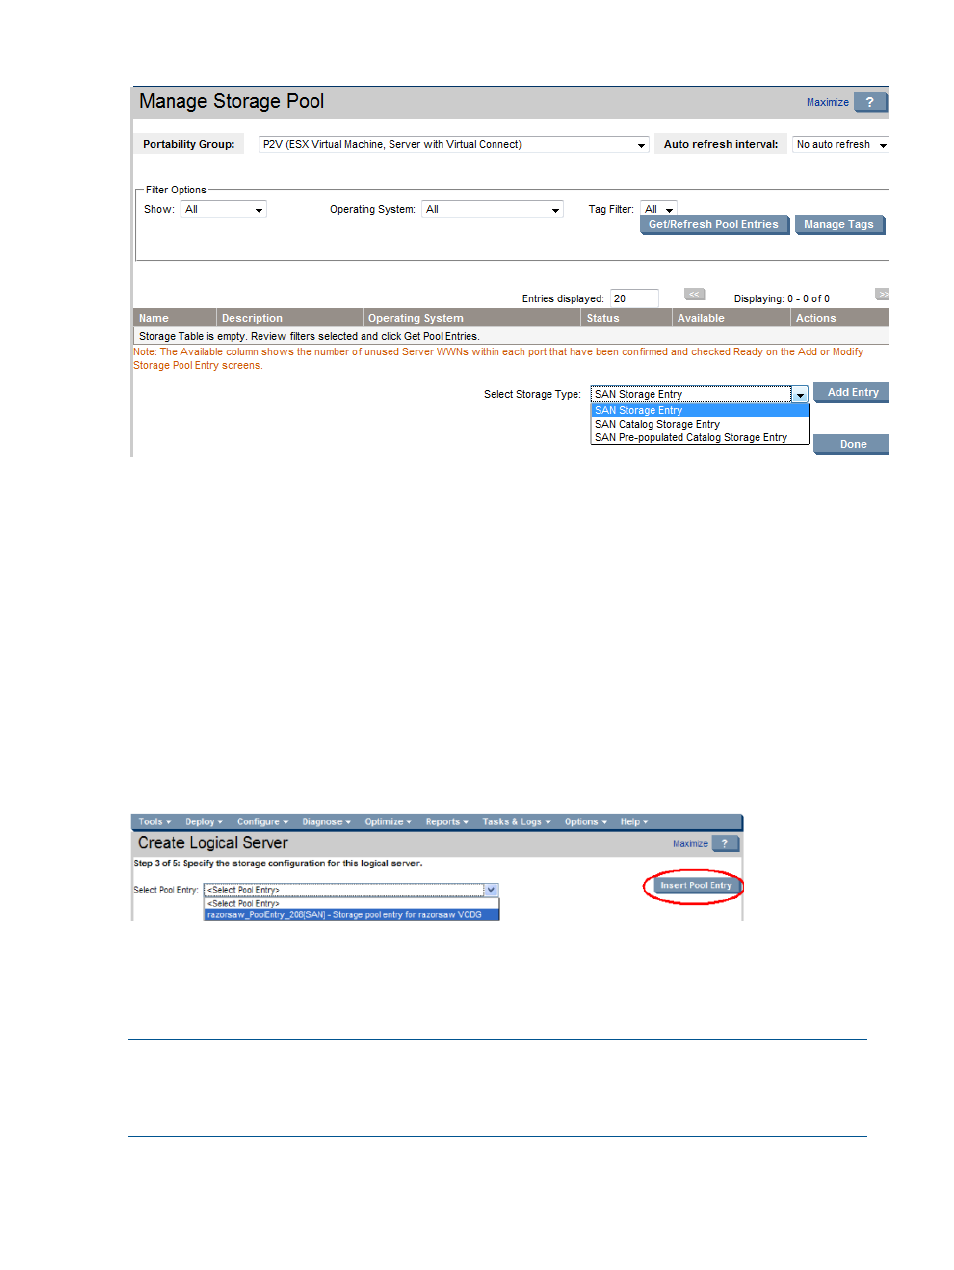
Figure 18 Manage storage pool screen
Associating a storage pool entry with a logical server
When you create a logical server, you can select a storage pool entry as the storage configuration
for the logical server by performing the following steps from the Create
→Logical Server... storage
configuration screen.
1.
Select a storage pool entry from the drop-down menu. Only entries whose operating system
matches the operating system specified for the logical server will be available for selection.
The drop-down menu is empty if no pool entries have been previously defined, or if you have
not checked Ready next to a server WWN in the Manage Server WWNs table on the SAN
Storage Pool Entry screen.
2.
Press the Insert Pool Entry button to assign the selected storage pool entry to the storage
configuration for the logical server. After you insert a pool entry into the logical server storage
configuration and use the Modify
→Logical Server Storage Pools... menu selection, you can
view the entry by pressing View in the Actions column of the Storage Entries table.
Figure 19 Associate storage pool entry with logical server
You can add a storage pool entry later, and modify the storage configuration for the logical server
to associate the storage pool entry to it using the Modify
→Logical Server... menu selection.
Adding a storage pool entry using the Modify
→Logical Server Storage Pools... menu selection
inserts the storage pool entry into the drop-down menu.
NOTE:
If you create a logical server, insert its storage configuration into the storage pool, then
modify the logical server, catalog storage options are not available on the Modify Logical Server
storage tab. Catalog storage options are available only on the Add/Modify Storage Pool Entry:
SAN screen.
52
Defining storage for logical servers