2 selecting site and mounting, Installation – KROHNE OPTISYS TUR 1050 EN User Manual
Page 16
3
INSTALLATION
16
OPTISYS TUR 1050
www.krohne.com
11/2012 - 4002444301 MA OPTISYS TUR 1050 R02 en
• If you want to replace the desiccant pouch and the humidity indicator, take them out at first 3.
• Take the shrink packed desiccant pouch and the humidity indicator out of the protective
packaging.
• Put the humidity indicator on the bottom of the lower part of the electronic device and lay the
desiccant pouch on it 4 and 5.
• Inspect the seal and reseat or replace it if necessary.
• Reassemble everything in reverse order 6.
• To expedite the recognition of the new desiccant, reset the powered device by disconnecting
the sensor interconnect cable for two seconds and reconnecting it.
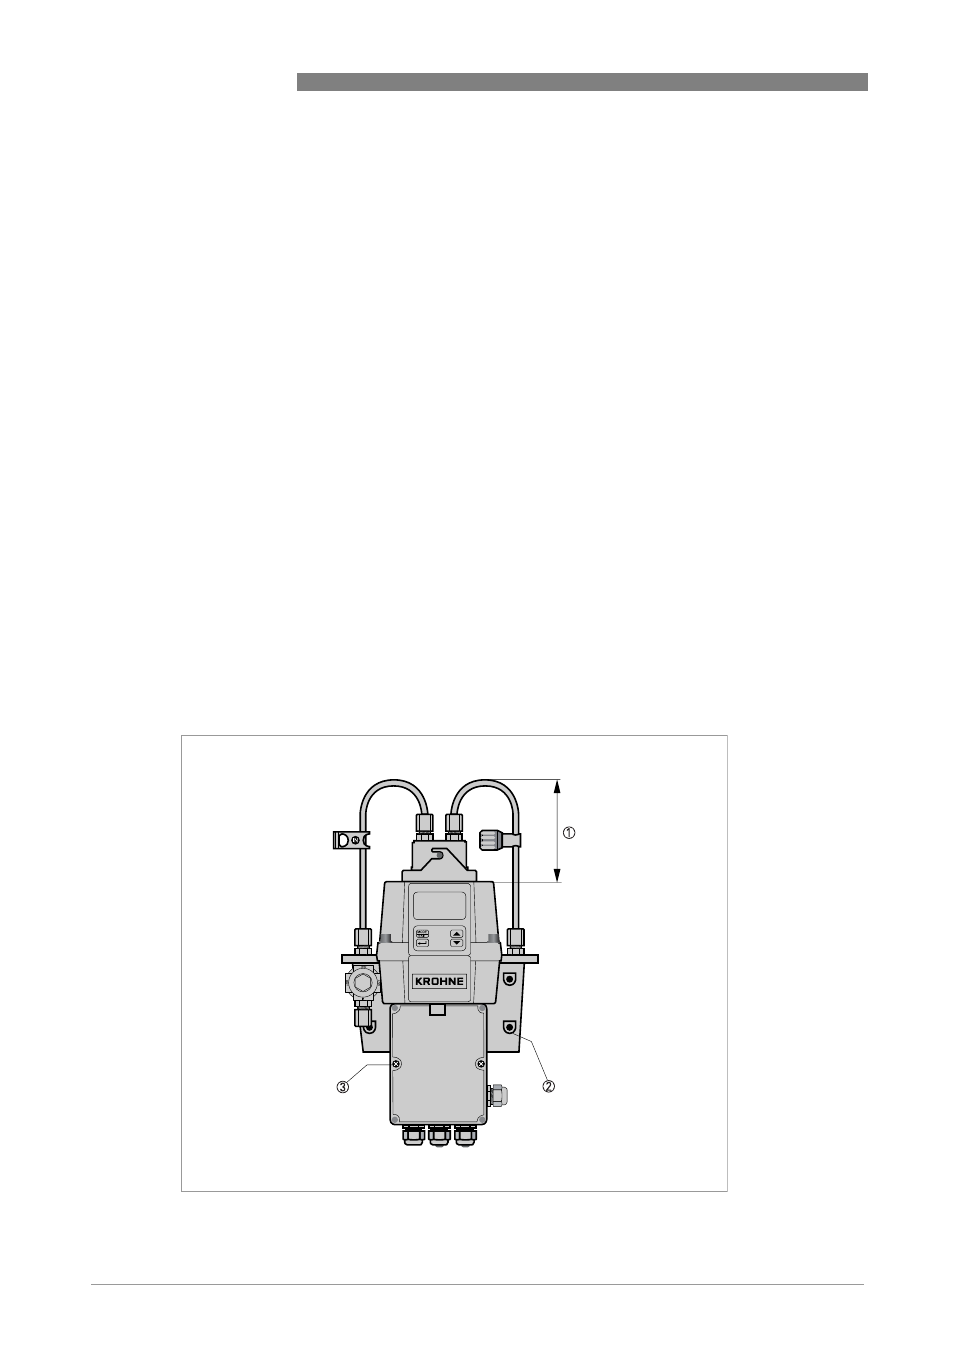
3.4.2 Selecting site and mounting
The preferred way of mounting of the device is wall mounting. If this is not possible, you can
mount the device on any suitable level surface. Irrespective of this possibilities always note the
following guidelines:
• Choose a location that is easily accessible for operation and service and that is as close as
possible to the sampling point to ensure a quick response time (maximum distance:
3 m / 10 ft)
• Leave at least 20 cm / 8" of free space above the device for easy service (e.g. removal of the
flow head and insertion of calibration cuvettes), see position number 1 in the following
drawing.
• Ensure that the front display rests at eye level.
• Refer to chapter "Dimensions" for the device dimensions.
• Use screws M6 / 1/4" to fix the electronic device 2 and M4 / 3/16" to fix the junction box
power assembly 3.