3 cleaning – KANOMAX 3443 Digital Dust Monitor User Manual
Page 13
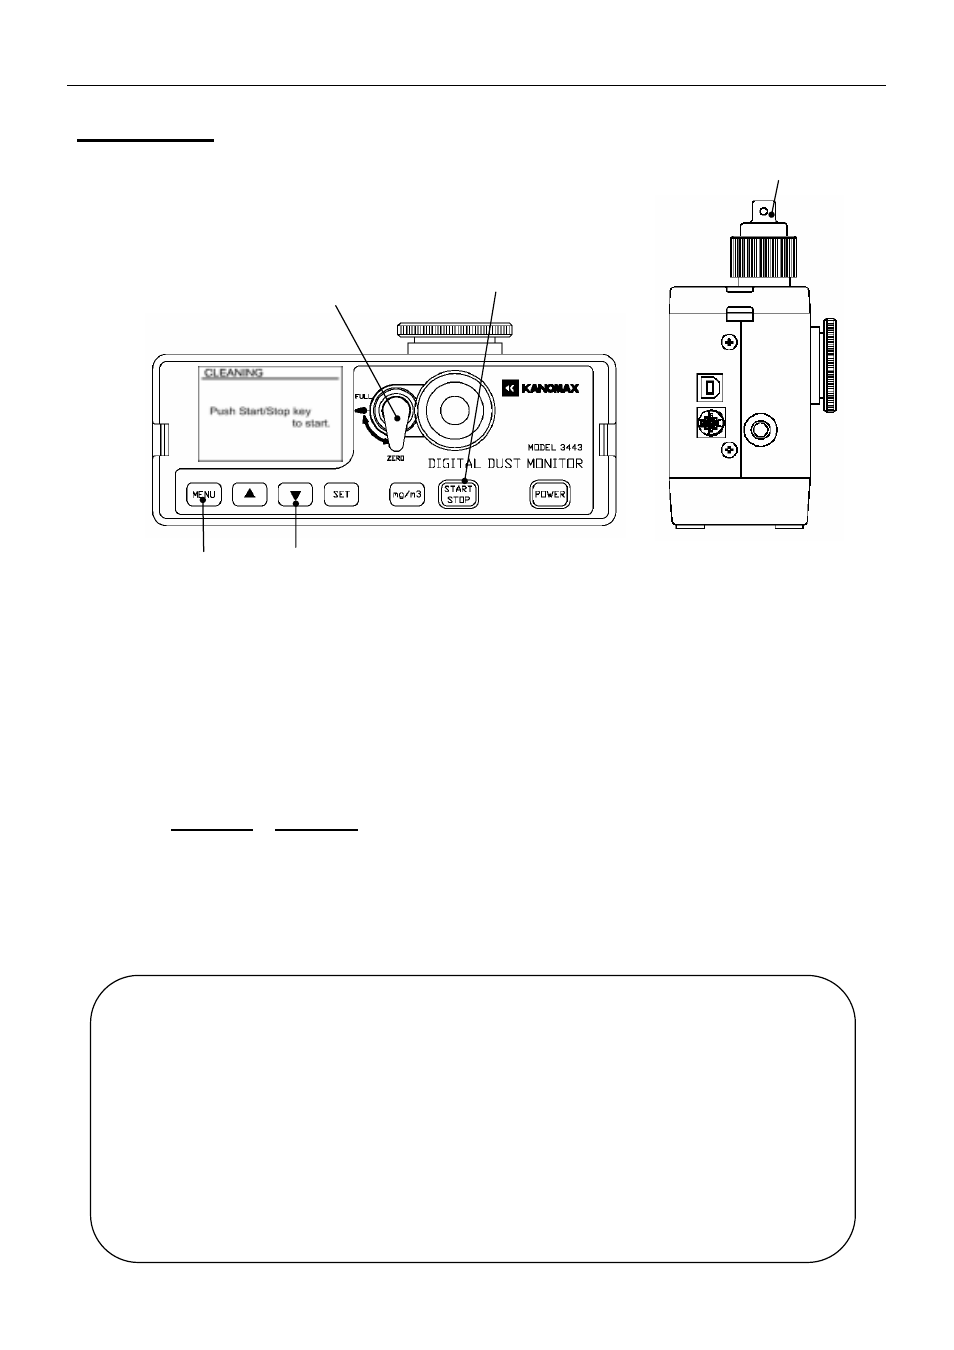
2. Getting Started
7
2.3 Cleaning
To maintain the accuracy, make sure to perform cleaning before using the instrument.
(When measuring for all day, please perform cleaning before and after measuring.)
(1) Confirm that the surrounding atmosphere is clean. Put the rubber cap on the inlet as shown in the above picture
and press [POWER] key to turn the power ON.
(2) Confirm that the sensitivity check knob is at the “ZERO” side.
(3) Press [MENU] key to display the menu.
(4) Press [▼] key (or [▲] key) to move the cursor to “UTILITY” and press [SET] key to display the UTILITY
screen.
(5) Confirm that the cursor is on “CLEANING”, and then press [SET] key to display the CLEANING screen.
(Refer to A)Cleaning in 3.4.6 Utility.)
(6) Press [START/STOP] key to start cleaning.
(7) Perform cleaning for about 5 minutes.
* The required time for cleaning varies depending on the usage environment.
(8) Press [START/STOP] key to finish cleaning.
* To shorten the cleaning time as much as possible, perform a cleaning following the above procedure
right after measuring and especially after measuring in a highly concentrated environment (100 CPM
or higher) or after performing a long-term continuous measurement.
>>> If you leave the instrument without cleaning, the remaining dust will become deposited inside the
optical system, which can deteriorate the measurement accuracy and may affect accurate
calibration.
* Perform cleaning in a clean atmosphere.
If you perform a cleaning in a dirty environment, it can cause discrepancies. Therefore, make sure to
perform a cleaning in a clean environment.
Sensitivity Check Knob
START/STOP Key
MENU Key ▼ Key
Rubber Cap