Detcon 1600A-N1R User Manual
Page 17
1600A-N1R
1600A-N1R Instruction Manual
Rev. 0.1
Page 13 of 38
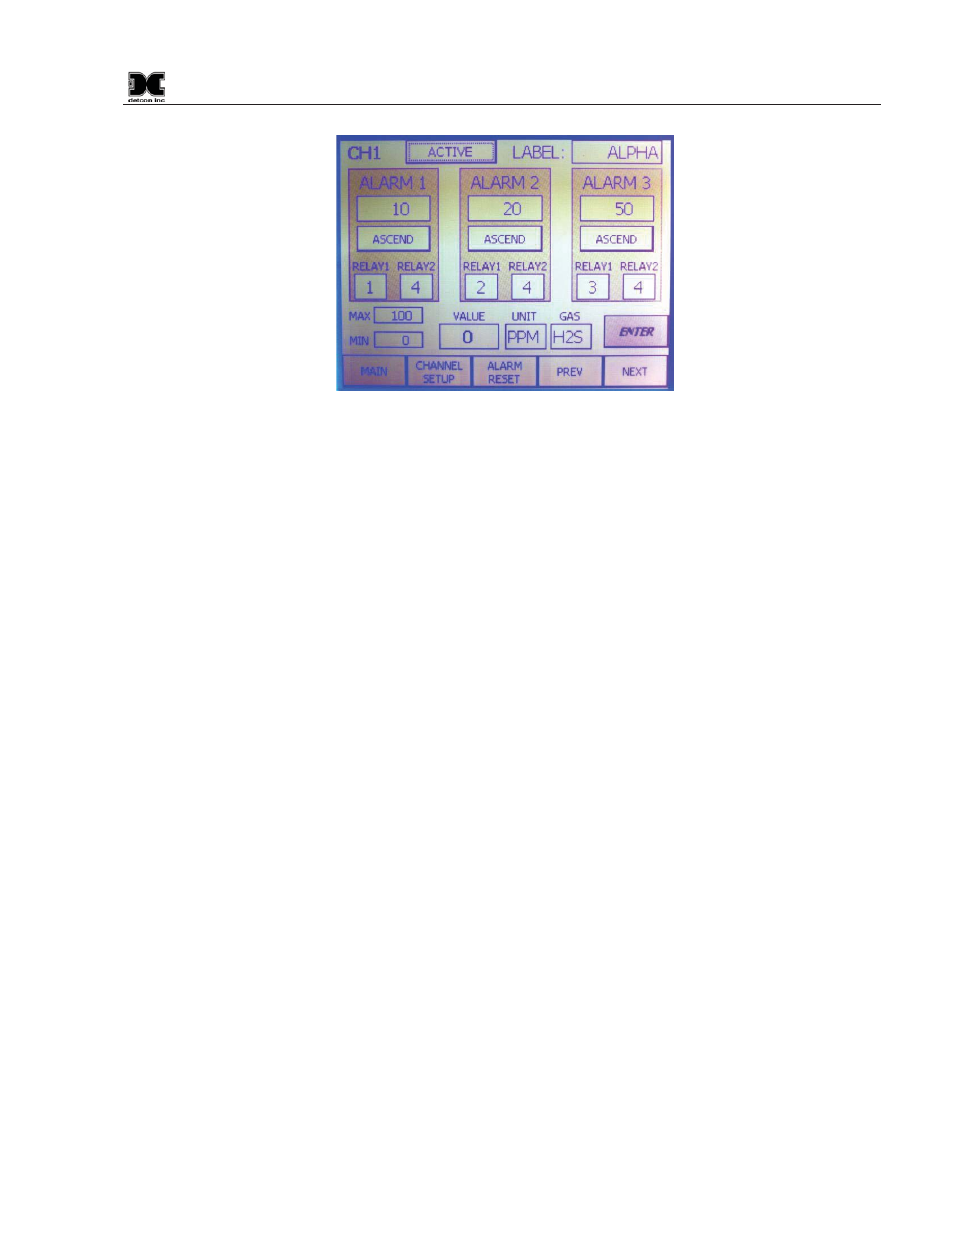
Figure 17 Individual Channel Setup
Channel Activation: If the channel is active, touch the ACTIVE button to disable it; touch the ENTER button
to save change. If the channel is disabled, touch the DISABLED button to activate it; touch the ENTER button
to save change. The main display will show “DISABLED” if a channel is selected as disabled.
Tags/Labels: The Main, Zone 2 and individual channel screens displays the current tag names assigned to
each active gas channel. To add or change a Tag Name, enter Channel Setup, press the channel desired to
change, press the current tag/label, type the new tag on the screen, press “ ” (enter key on on-screen
keyboard). When each entry in the channel setup screen is complete, press the ‘ENTER’ key to save the entry.
Alarm 1, 2, 3: Set point, direction, and relay assignments are all handled in the 3 alarm blocks. The Set
points are changed by touching the value window below each alarm designation. The example shown in figure
17 is 10 for ALARM 1, 20 for ALARM 2, 50 for ALARM 3. Touch the current value window, enter the new
value on the screen touch pad, touch ENTER to save change. Touching the Ascend and Descend window will
toggle between Ascend and Descend. Each Alarm has up to two relays assigned to it. To change a relay
assignment touch the relay window, enter the new relay on the screen touch pad, touch “ “, touch ENTER to
save change.
NOTE: Relay output assignments can be set as discrete or common and a relay can be used as many
times as desired. However, relay outputs can only be set up one way (relative to latching, energized,
silence able) and will be applied in that way for every function they are assigned.
NOTE: The relay state as it pertains to latching/unlatching, energized/non-energized, and silenceable /
non-silenceable are configured in the RELAY OUTPUT on the PROGRAM MENU. See section 4.1.3.
Range: To change the range of a channel touch the MIN or MAX window, enter the new value on the screen
touch pad, touch “”, touch ENTER to save change.
Units: To change the units of a channel touch the UNIT window, select the new unit (% or PPM) on the
screen touch pad, touch “”, touch ENTER to save change.
Gas Type: To change the Gas Type touch the GAS window, Select Gas Type from the selection on the screen
touch pad, touch “”, touch ENTER to save change.
Press the ‘ENTER’ key after the completed set-up selections for each gas channel are made