Aquametrix 2300 Multi-Input Controller Quick Start Guide User Manual
Page 4
2300 Controller Quick Start Guide
Page 4
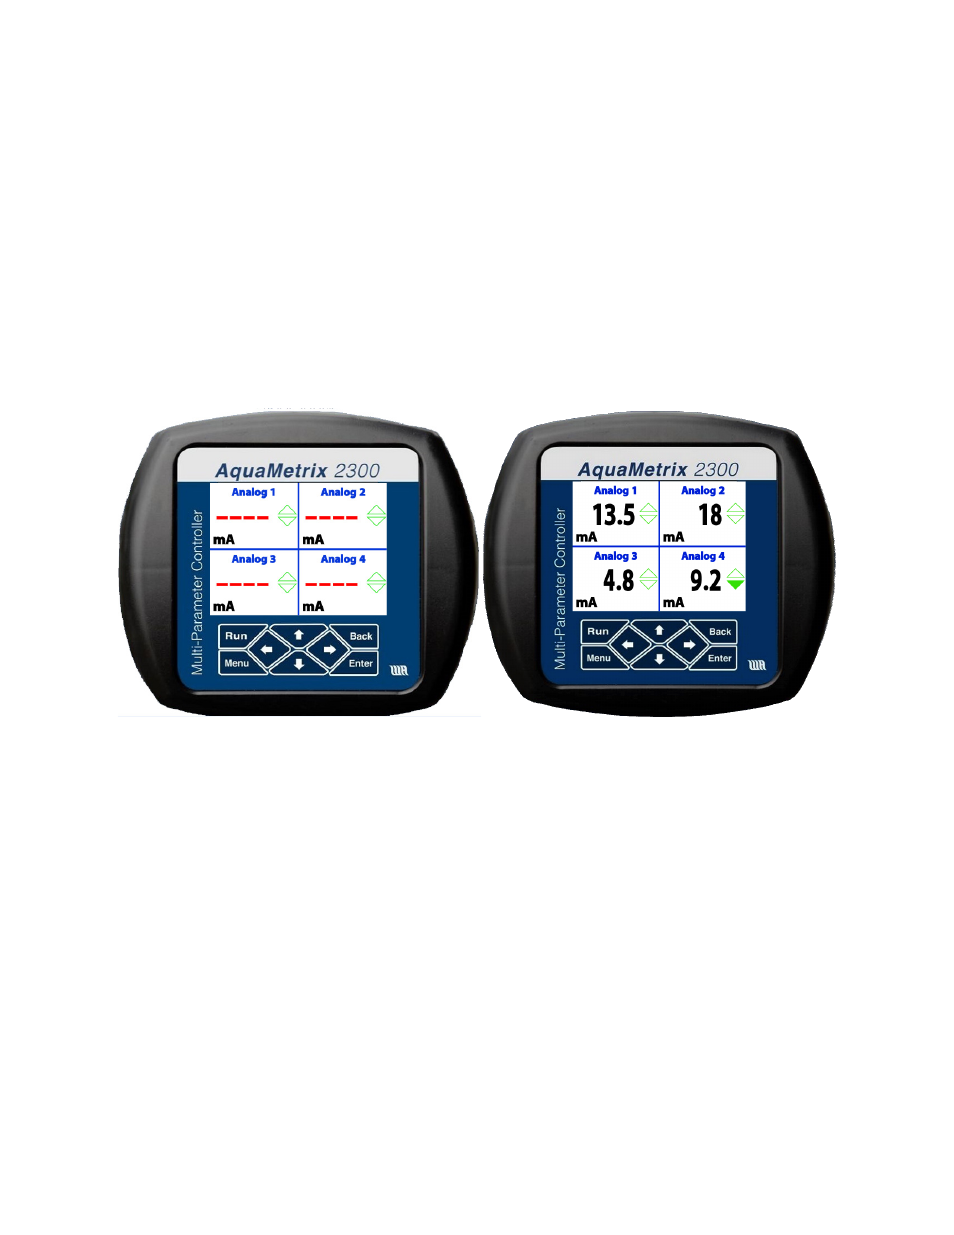
The Run screen should appear and display 4 panes. It will show the actual mA reading of the four
analog probes (see Figure 4). Dashes (----) indicate that a probe is either not connected or it is out of
range. Note that the preconfigured software only shows the actual current being read by the 2300. In
order to have probe outputs expressed in the appropriate units (e.g. pH, mV, µS/cm, etc.) you need to
carry out set-up over a network using a web browser. See Section 1.5 or 1.6 of this guide for network
setup, and Section 2 for configuring the 2300 over the network. The main purpose of this initial screen
showing the raw current outputs of the connected probes is simply to reassure you that that
controller is running properly.
To navigate the front panel screens, use the front-panel buttons as follows:
• RUN brings up the quad screen from anywhere
• MENU brings up the front panel menu
• BACK returns the user to the previous screen.
Figure 4 - The RUN screen showing four analog probe inputs. On the left is a display showing
that no probes have been connected. On the right, four analog probes have been connected.
The 2300 is software-preconfigured for six probes, allowing the user to wire up probes and start
operation prior to network hookup. Analog 1 is set up to the analog 1 input on the back of the unit.
The first 4 software channels are shown on the RUN quad screen. If you have more than 4 sensors
connected, press the down arrow to see channels 3 through 6. Channels 5 and 6 are set up as flows
using the pulse inputs 1 and 2 (see Figure 2). The 2300 can be easily reconfigured via a network,
including changing the names, units, order of probes, and just about everything else you can think of.
Use the right arrow on a quad screen to see detailed screens for each channel, addressable by the up
or down arrows. Pressing ENTER on a detailed screen brings up a configuration screen for that
channel. Examples of each are shown below in Figure 5. Press BACK or RUN to move up a level or two
in the front display.