2 viper pro™ calibration, 1 pre-calibration setup – Seed Hawk AIRCART 2014 User Manual
Page 40
SEED HAWK
®
2014 AIRCART OPERATOR’S MANUAL
SEED HAWK
®
2014 AIRCART OPERATOR’S MANUAL
72
8.3.2 Viper Pro™ Calibration
ATTENTION! Before a meter calibration can be done the implement width
must be entered and the speed calibration must be completed (Refer to the
Section Setup Wizard and Calculating the speed Calibration sections of your
Seed Hawk Viper Pro™ Manual). Exit to the Seed Hawk Viper Pro
™ Main
Menu on the Viper monitor before powering up the Remote Calibration Con-
sole.
NOTE: For convenient cali-
bration, use the remote cali-
bration console that attaches
to the tank harness.
To begin the remote calibration of
the meters mount the remote cali-
bration console on the ram-ball and
attach the electrical connector. Turn
the console on using the blue
Power
button.
1. Remove the plate on the bottom
of the meter and place the calibration
under the meter as shown.
2. Turn the diverter valve to the
lower air stream position for calibra-
tion (return to proper position after
calibration is complete).
If operating an SCT
®
equipped machine, ensure meter gates are fully open for
proper product flow.
8.3.1.1 Pre-Calibration Setup
Measure and record the weight of the empty calibration bucket.
Calibration Bucket Weight: _________________
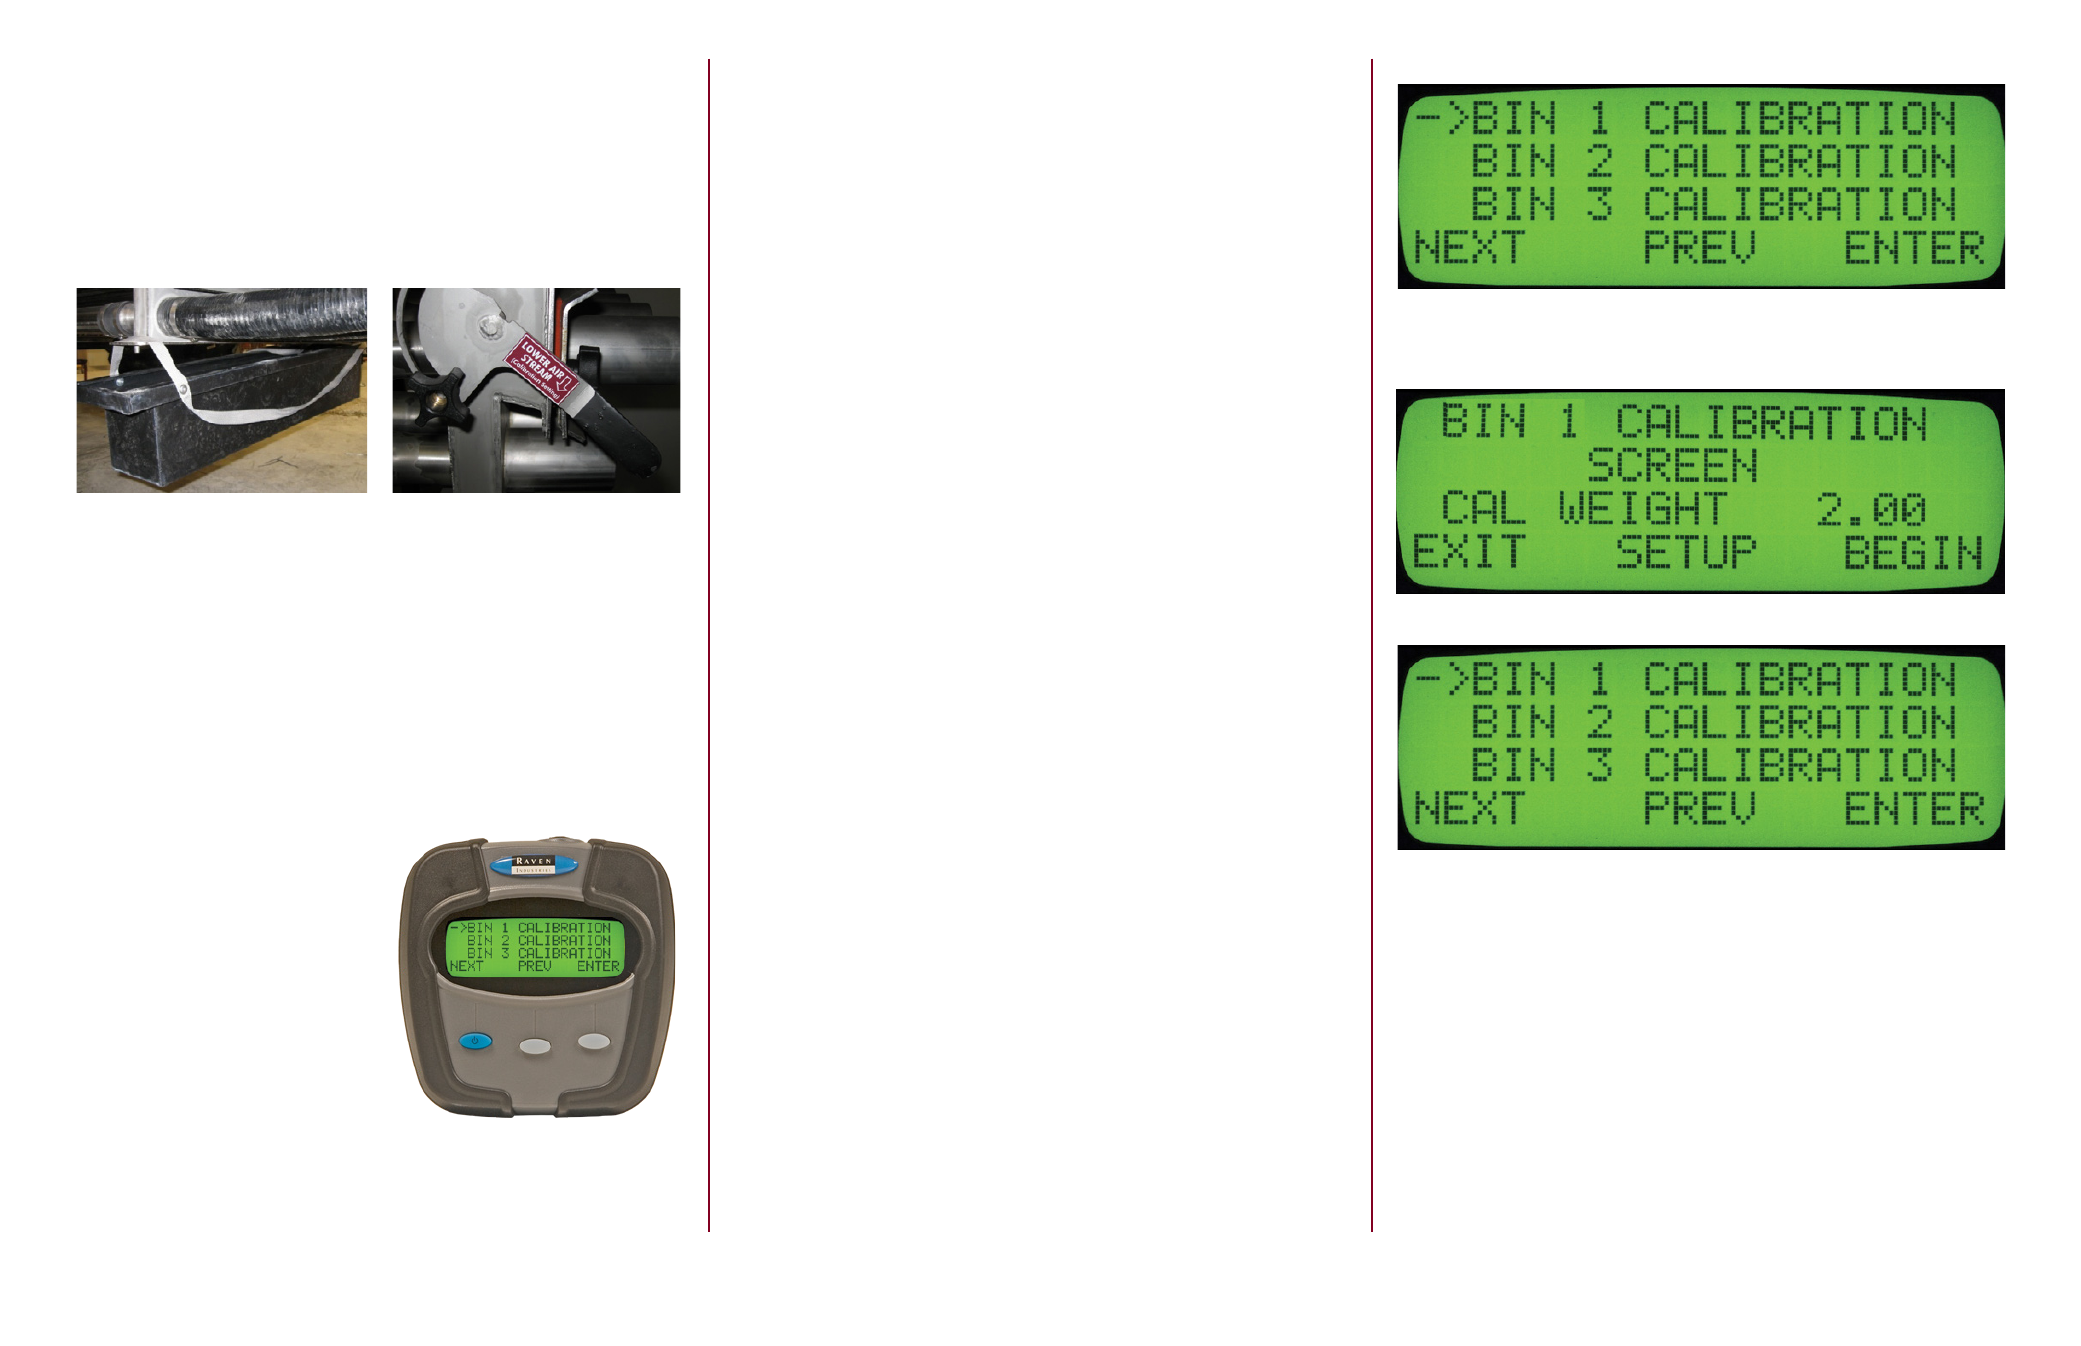
1. After turning on the remote calibration console, the bin selection screen is
displayed. Using the
Soft Keys select the bin which corresponds to meter to be
calibrated and select
Enter using the white Soft Keys.
2. Select Begin to start the calibration process.
73
3. The meter needs to be primed before calibration begins to ensure full prod-
uct flow during calibration. Select
Prime Meter Roller to prime the meter.
NOTE: It is important to cal-
ibrate as close to the actual
seeding rpm of the roller as
possible. Refer to Section 8.4
for the Meter RPM Chart,
to get an approximate roller
rpm for the specific roller
and drill width.