3 restore settings to default, 4 ground speed calibration – Seed Hawk AIRCART 2014 User Manual
Page 31
SEED HAWK
®
2014 AIRCART OPERATOR’S MANUAL
SEED HAWK
®
2014 AIRCART OPERATOR’S MANUAL
54
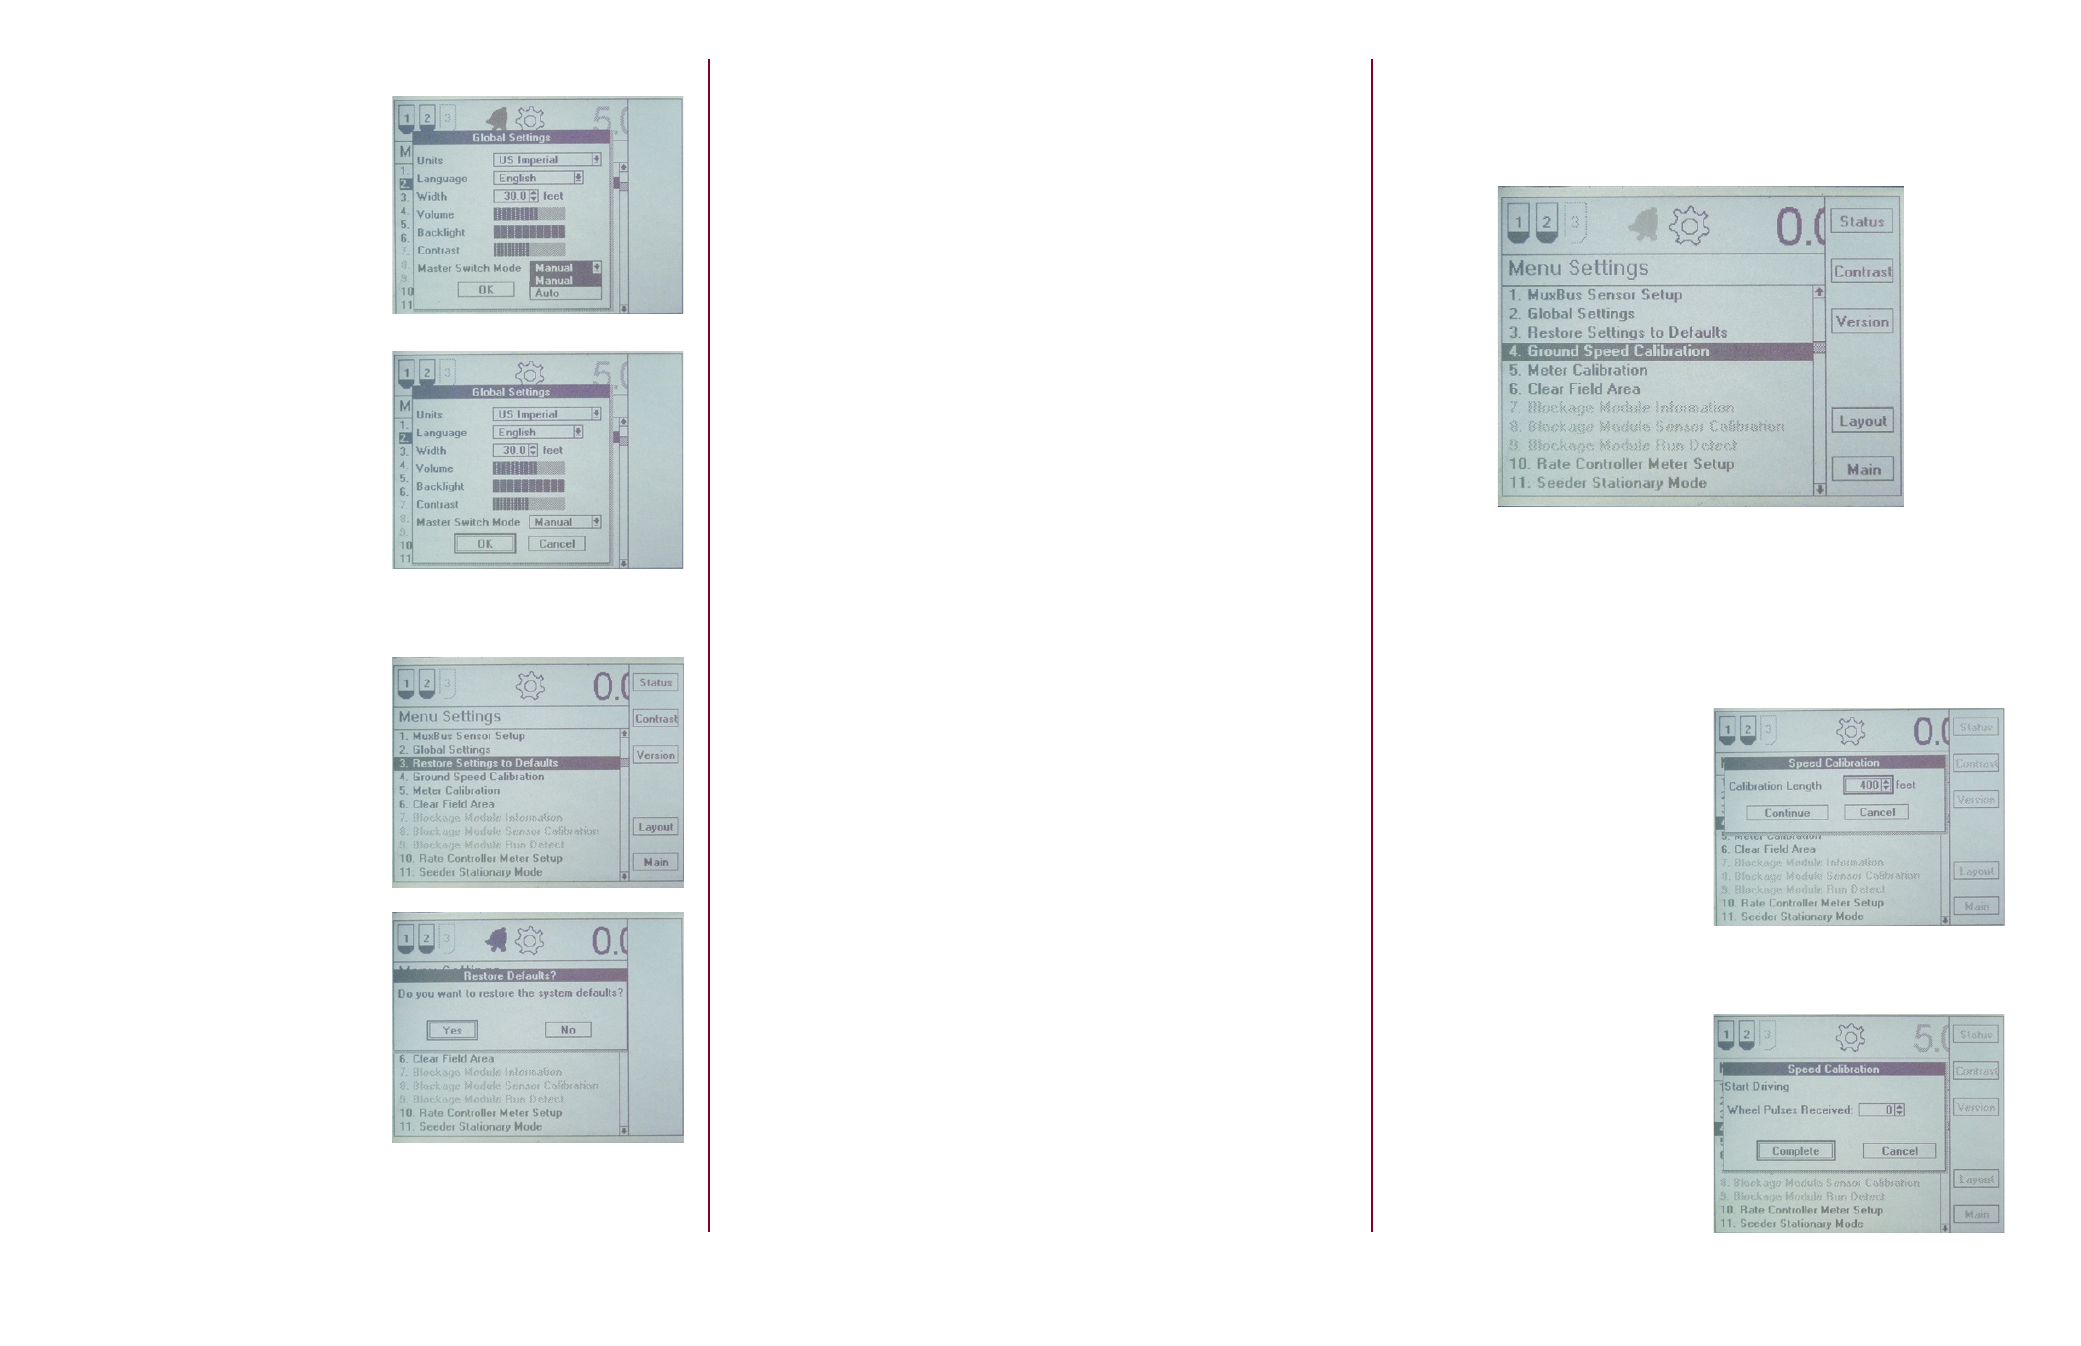
7. Master switch mode: The choic-
es are “Manual” and “Auto”. Manual is
used when the operator engages and
disengages the drive by pressing the
ACK button at the beginning and end
of each pass. Auto is used when a lift
switch on the implement engages and
disengages the drive. Manual is the
normal mode of operation.
8. OK/Cancel: Select “OK” to save
any changes that have been made or
Cancel to ignore changes that have
been made.
1. Choosing this item will allow the
user to restore the monitor to facto-
ry defaults on all global settings. This is
useful when moving the monitor to a
new installation or when it is neces-
sary to “start over”.
7.4.3 Restore Settings to Default
2. A dialog box will appear to verify
the selection before any setup chang-
es are made in case this item was
chosen accidentally. Once reset, the
previous settings cannot be recovered
and must be set individually.
55
7.4.4 Ground Speed Calibration
All new systems require a ground speed calibration to ensure accurate area
totals and accurate ground speed readings.
During the calibration the monitor is counting the number of pulses produced
from the drill mounted sensor. The monitor will display the pulses counted in
400 ft. (122m). Choosing this item will allow you to calibrate the ground speed
sensor to a known distance. The default distance is 400 ft. (122m) but this can
be set by the user. To perform a ground speed calibration, determine the dis-
tance to be used and measure out a course.
1. To complete the calibration, mea-
sure a course 400 ft. (122m) long
preferably on level ground with a start
and finish point. Line up tractor at
the Start Point. The drill must be in
the down position throughout the
procedure. On the monitor, verify that
the calibration length is 400 ft. (122m).
If not, be sure to correct it. Once
the distance is selected, highlight and
select “Continue.”
3. At the end of the 400 ft. (122m)
course, stop the tractor, highlight the
“Complete” button and press
Enter.
2. The monitor now displays “Start
Driving”
and shows a Wheel Pulses
Received window. You should see this
number increase as you drive the 400
ft. (122m) course.