Maintenence, 1 removing and replacing a relay strip, Inset a – Hired-Hand Farm Hand Series: SCS w/Back-Up User Manual
Page 22
Part No. 4801-5117 Rev. 8-01
Farm Hand SCS
20
Note: In step 2, it very important to remove electrical power
from the circuits connected to the relay board, since
external equipment may back-feed voltage through the relay
board!
CAUTION !
18. Maintenence
18.1 Removing and Replacing a Relay Strip
1)
Remove electrical power from the SCS™ panel.
2)
Remove power from the equipment connected to the relay strip to be replaced.
3)
Unplug the Stage harness cables from the relay strip.
4)
Verify the type of relay strip. (See Inset A below)
5)
Use needle nose pliers to pinch the tops of the mounting tabs to release the relay strip.
6)
Install new relay strip by pressing evenly on the strip near the mounting tabs.
7)
Verify the Back-Up jumper settings.
8)
Re-install the stage harness cables.
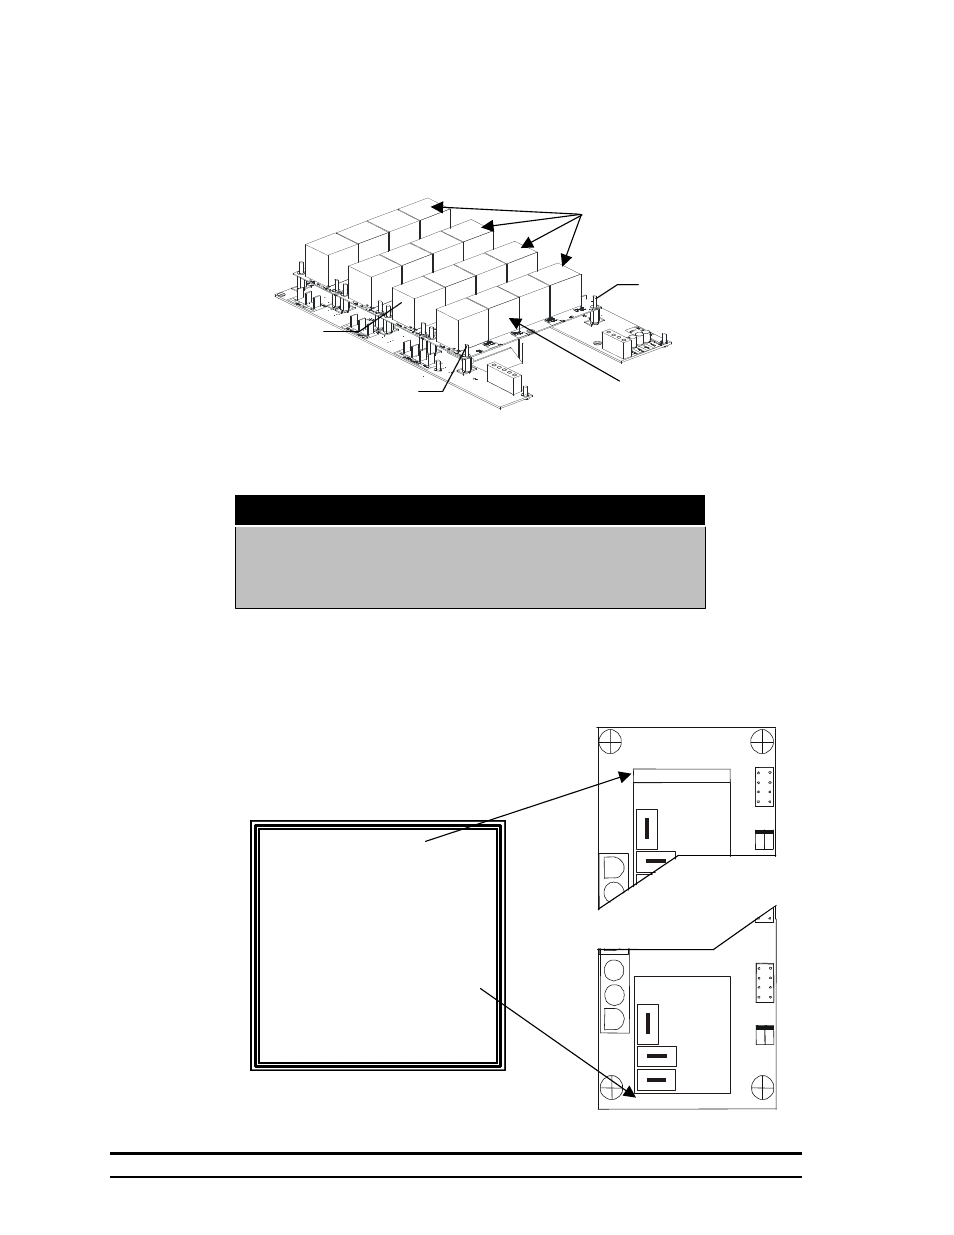
FAIL-SAFE
strips are labeled at the top of the
board
When replacing any Relay Strip
be sure that it is either a
Normally Open or Fail-Safe.
NORMALLY OPEN (N.O.)
strips are labeled at the bottom of
the board.
Inset A
(Top)
(Bottom)
HEAT
COOL 3
COOL 2
COOL 1
RPK
COOL 3
COOL 2
COOL 1
HEAT
FAIL-SAFE RELAY STRIP
COOL 3
COOL 2
COOL 1
HEAT
B Crider
N.O.RELAY STRIP
Mounting Tab
Mounting Tab
SCS™ RELAY STRIPS
(Stage numbers shown
on relays)
To verify type of
Relay Strip see
Inset A below.
1
2
3
4
5
6
7
8
9
10
11
12
13
14
15
16
Stages 13 through 16 are
shipped as Fail-Safe.