Help menu, Logging farm data – Hired-Hand HH Software: Farm Manager User Manual
Page 14
Part No. 4801-5049 Rev 8/05
Farm Manager
Page: 14
Recipient Name – Used to identify a report.
Fax Number – Fax number to send reports to.
Report Schedule – When this particular report will be
sent.
Enable Sending for Low Feed Level – When enabled,
a report will be sent to the recipient when the feed
level falls below the specified limit.
Report Items – Select the data items to be included in
this report.
Send Now – Sends the recipient a report immediately.
14. Help Menu
Farm Manager Help is accessed from the Menu or the Tool bar. Context
sensitive help is available by highlighting an item on the screen and pressing the
F1 control key. Also, a Contents help file and an Index help file are available.
The following options are on this menu:
Contents – Provides a list of the HELP file features available.
Search For Help On – Provides a topic list of most HELP screens
.
Register OnLine – If the computer is on-line (connected to the WWW), this will bring up the Web browser to the
Hired-Hand software registration page.
Report Bug to Hired-Hand – If the computer is on-line, this brings up the Hired-Hand Bug Report Web page.
About Farm Manager – Provides the Farm Manager software version number and the manufacturer’s address.
Also provides access to Microsoft’s System Information.
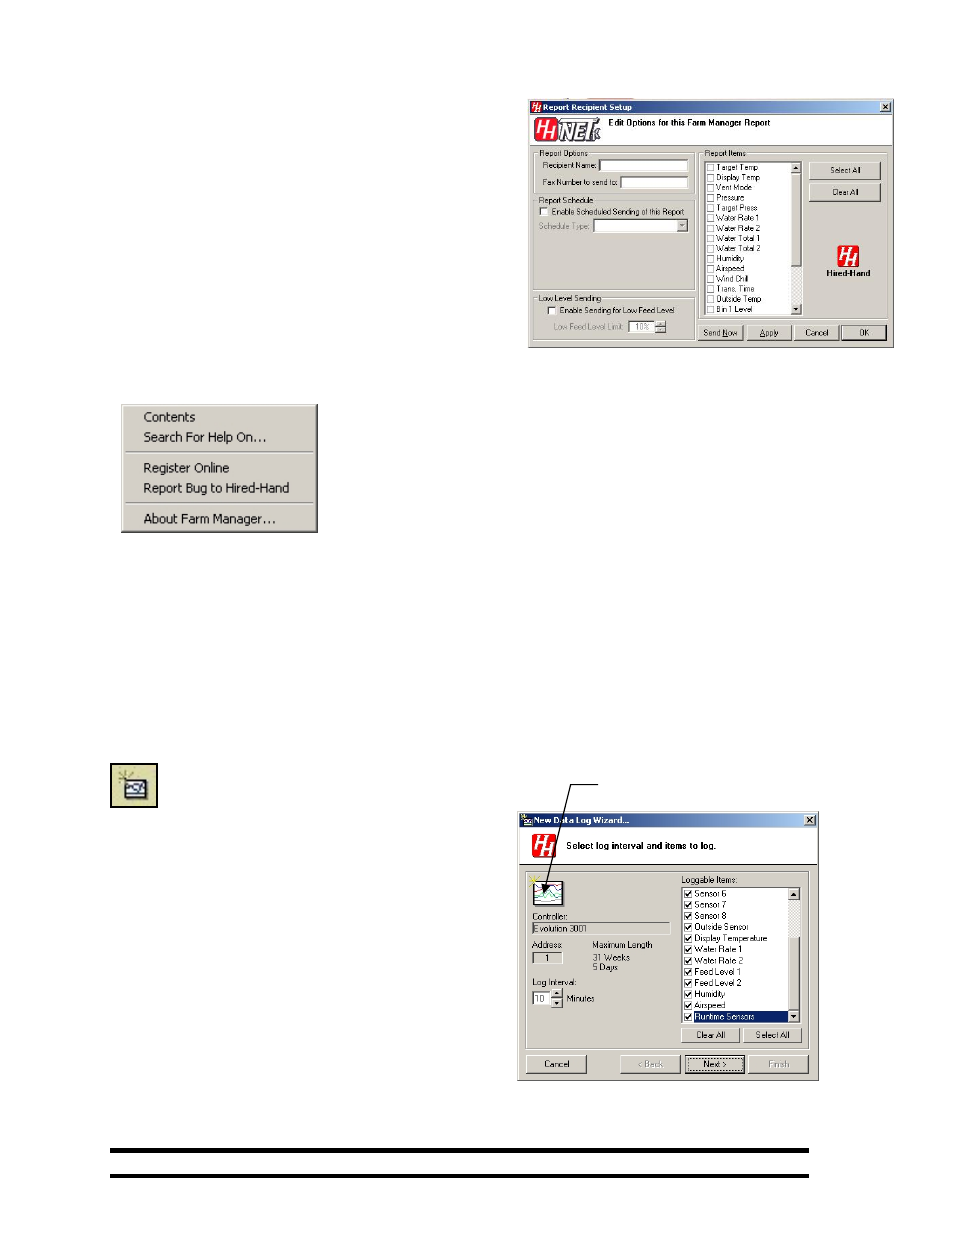
15. Logging Farm Data
Farm Manager has the capability to record
Temperature, Water Rate, Feed Level, Humidity, Air
Speed and Runtime Sensor Data from the Farm
Hand controllers attached the network. Logging is
accomplished by having Farm Manager poll the specific
controller and requesting the data. Therefore, Farm Manager
must be running at all times during the recording interval in
order to get all the data( i.e. temperature) samples. To
originate logging, First highlight the controller in the Main
window. Then click on the Start New Log icon to bring up
the New Data Log Wizard shown at the right. The controller
you highlighted should be shown as the Controller in the new
Data Log Wizard.
Select the items you want logged by checking the box next
the Item. You may select all of the loggable entries. Now
select the log interval. Now click Next to move to the next
Log Wizard Screen, the Dates Screen.
First highlight the controller in
the Main Screen