4 setting the ip address – Yokogawa DA100 User Manual
Page 35
4-6
IM DA100-11E
4.4
Setting the IP Address
Before connecting to the network, you will set the IP address, subnet mask, and default gateway of
the DA100. You will need the Data Acquisition Software 32 that came with the DA100 or the Data
Acquisition Software 32 Plus that is sold separately.
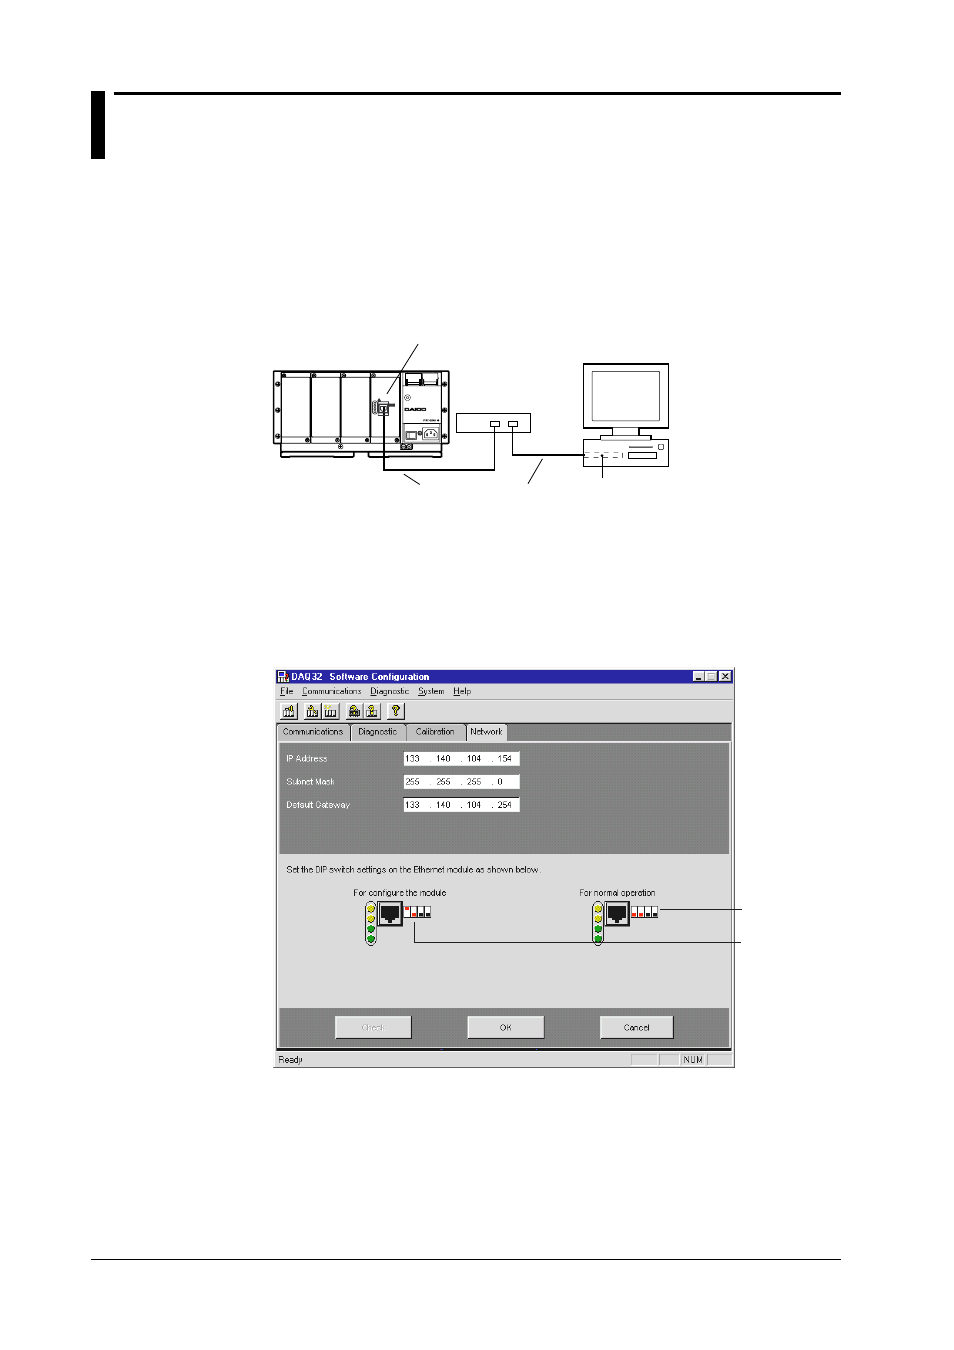
Connect the PC and the DA100 as shown below. The PC must have the Data Acquisition Software
32 or the Data Acquisition Software 32 Plus installed.
Set the mode of the Ethernet module to configuration mode.
PC
Ethernet card
Ethernet module
Hub
10BASE-T cable
P O W E R
1 0 0 - 2 4 0 V 5 0 / 6 0 H z 5 5 V A M A X
DATA ACQUITION UNIT
STATUS
DA100
10BASE-T
Setting procedures
Start the Data Acquisition Software 32 (comes with the DA100) or the Data Acquisition Software
32 Plus (sold separately).
1. Switch on power of your PC and the DA100, Startup DAQ 32 and select Software Configurator
with the Launcher toolbar.
2. Click the Network tab to display the setting screen for IP address, Subnet Mask, and Default
Gateway.
Configuration mode
setting
Communication mode
setting
3. Click the Check button to get the currently used settings. If this is the first time you use the
DA100, initial values will get displayed.
4. If you click the digits in the IP address, Subnet Mask, or Default Gateway setting boxes, the
clicked part will be invertedly displayed, allowing you to change the value.
5. Enter the appropriate setting values for IP address, Subnet Mask, and Default Gateway.
6. After making the settings click OK, and again OK when a reconfirmation message appears, to
activate the new network address (IP address, Subnet Mask, and Default Gateway). Click Cancel
to return
7. Click OK when asked Close Network? to finish the setting.