Ransburg, Needle / electrode resistance testing, Barrel assembly – Ransburg Vector R Series Cascade 79523 R90 Waterborne User Manual
Page 43
Vector R Series Cascade Applicators - Maintenance
Ransburg
39
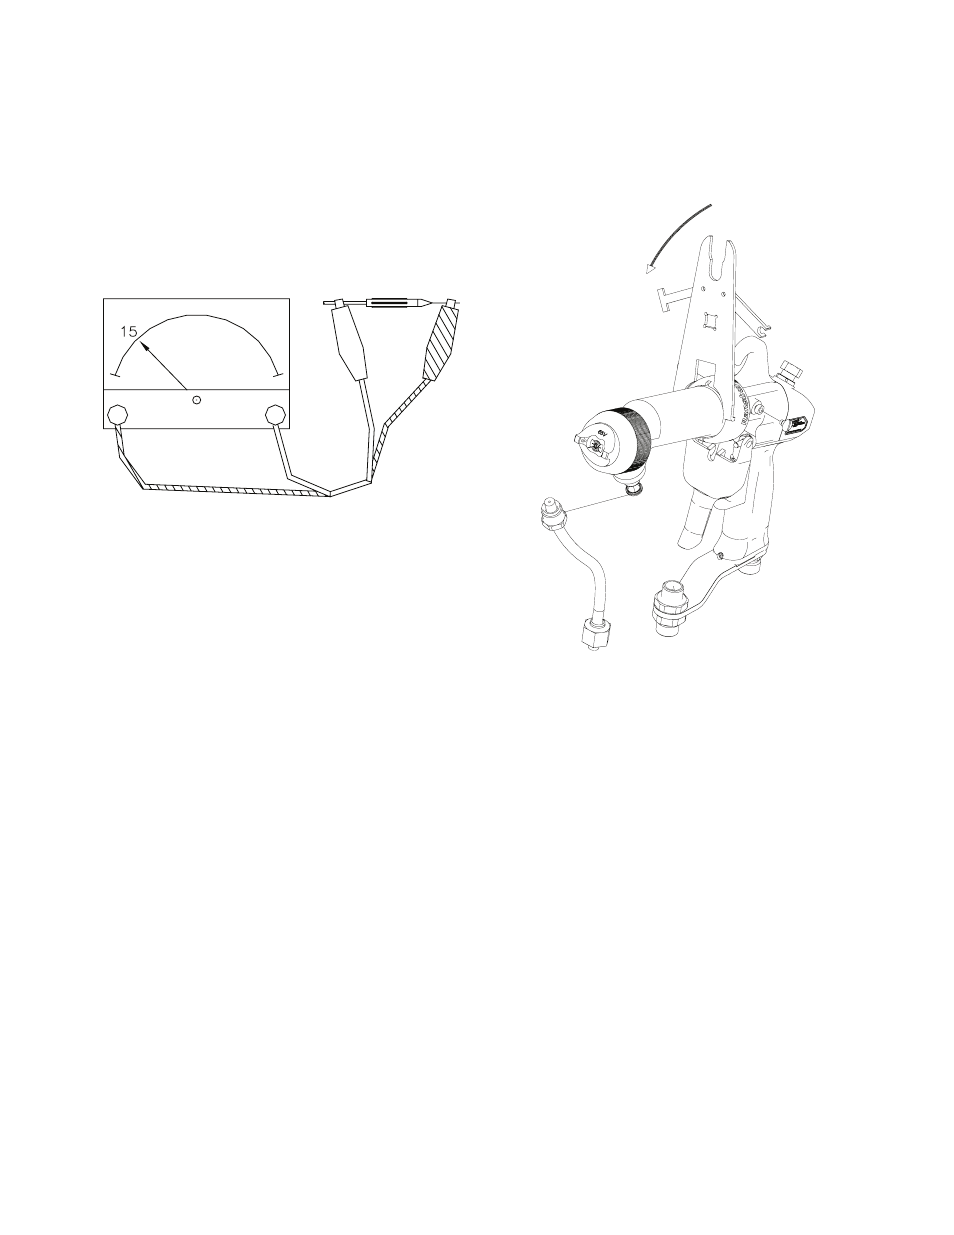
NEEDLE / ELECTRODE
RESISTANCE TESTING
The electrical resistance of the needle/electrode
should be tested periodically (typically on a weekly
basis) or any time it is removed from the applicator.
To Test
1. Install the needle/electrode onto the front end
of an available needle shaft. Be sure that the
needle/electrode is completely seated for proper
contact between the metal shaft and the threaded
insert of the needle/electrode.
2. Using a VOM meter that will read 15 megohms
accurately, connect the first meter lead to the metal
needle shaft and the second lead to the needle/
electrode wire. The needle/electrode resistance
should be 14.5 to 19 megohms (nominal 15 meg-
ohms at 9 volts or 12 to 17 megohms at 1000
volts). Needle/electrodes outside these ranges
must be replaced.
BARREL ASSEMBLY
Removal
1. While holding the barrel with one hand, loosen
the air cap retaining nut using the other hand.
2. Unscrew the retaining nut completely and
remove the air cap.
3. Using a flat head screwdriver, loosen the two
(2) shoulder screws that retain the trigger to the
applicator handle.
Figure 22: Barrel Assembly Removal
4. Remove trigger from the applicator handle.
5. Using an adjustable wrench, unscrew the fluid
tube connector from the barrel and slide it down
the fluid tube. The fluid tube must be removed
prior to removing the barrel to prevent damage
to the cascade.
6. Use the special multi-purpose wrench to loosen
the retaining nut that secures the barrel to the
applicator handle. After unscrewing the nut, slide
it forward onto the barrel.
7. Hold the applicator handle and fluid tube so the
barrel points downward. With the other hand, pull
the barrel forward to separate it from the handle.
Once the barrel has cleared the handle, remove
the spring from the spring retainer and set it aside.
C C W
Figure 21: Testing Resistive Electrode
AH-06-01.13