Mounting – Liquid Controls XL LED Display E1615_E1616_E1617_E1618 User Manual
Page 7
REmotE DISPLAy ShIELD ACCESSoRy (Pn 81879)
There are certain applications where sun or bright light may
produce glare on the display. A Remote Display Shield is
available as an accessory to the LectroCount XL LED Remote
Display to reduce the effect of glare in these applications.
to mount the Remote Display Shield:
1. Slide the shield over the display.
2. Align the four slotted holes in the shield with the four holes in the
LectroCount XL LED Remote Display’s rear cover.
3. Using four ¼” screws, screw the display and the shield to a secure location through the four holes in the rear cover of the
display and the four holes of the display shield.
mounting
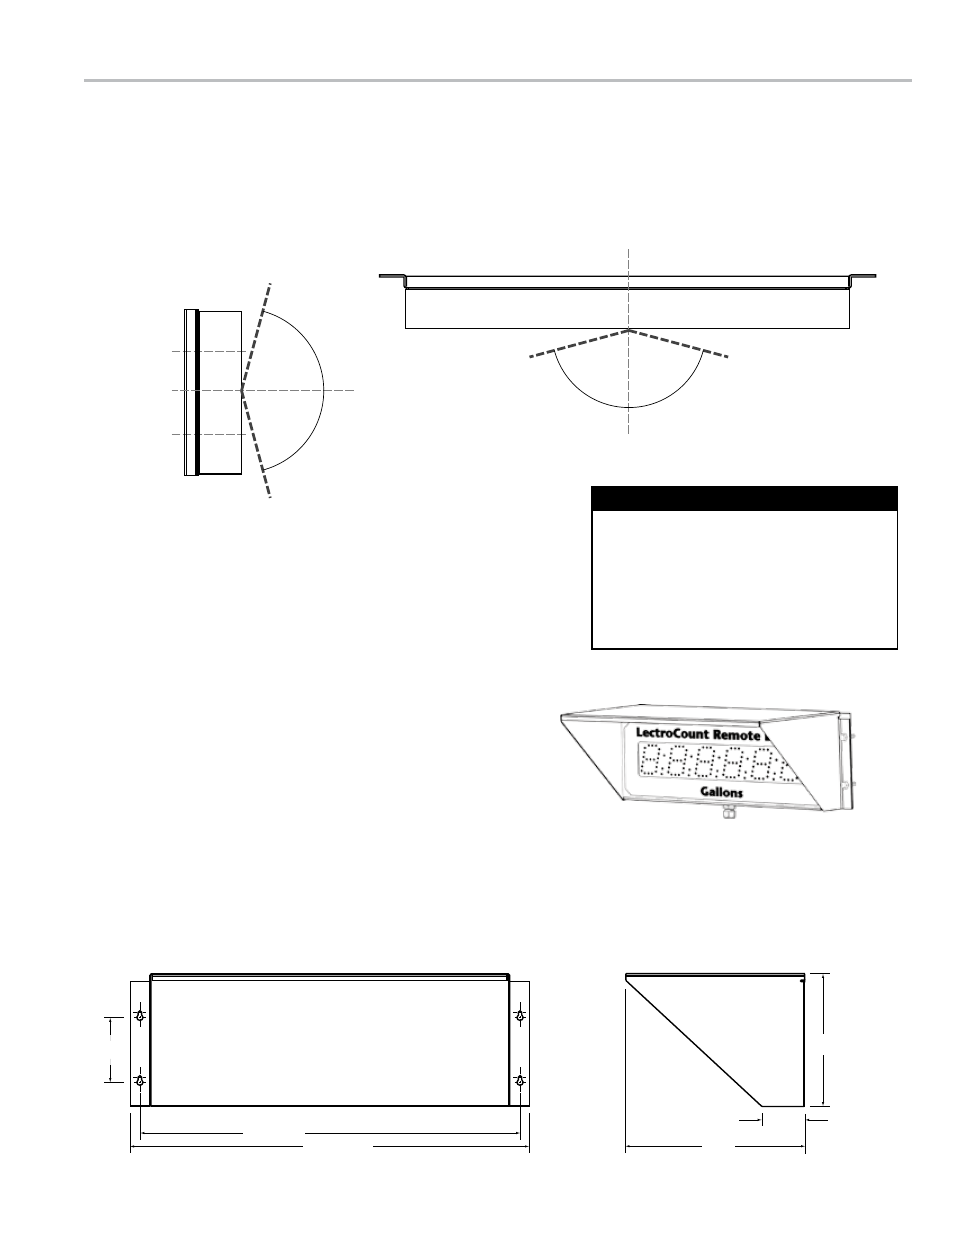
LED displays have an optimum viewing angle. Outside of the optimum viewing angle, displays lose contrast and
become difficult to read. To supply as wide a viewing area as possible, a bias has been designed into the LectroCount
XL LED Remote Display. The bias creates a optimum viewing angle offset by 75° in either direction from the horizontal
and vertical perpendicular. The LectroCount XL LED Remote Display will have the greatest contrast, when it is viewed
inside the optimum viewing angle.
75º 75º
75º
75º
Optimum Viewing Angle
Optimum Viewing Angle
Top (LED)
Center (LED)
Bottom (LED)
75º 75º
75º
75º
Optimum Viewing Angle
Optimum Viewing Angle
Top (LED)
Center (LED)
Bottom (LED)
Remote Display Shield
3"
17.25"
18.125"
8"
6.1"
1.9"
3"
17.25"
18.125"
8"
6.1"
1.9"
sIde
sIde
toP
front
MountInG
to mount the LectroCount XL LED Remote Display:
1. Select a mounting location where the display is inside the optimum
viewing angle at the most common viewing points.
2. Using four ¼" screws, screw the display to a secure location through the
four holes in the rear cover of the display.
Review the manual and determine the
necessary steps for your particular
installation. Some XL LED Remote
Display accessories and settings require
connections and settings inside the display
housing. Complete these installations and
configurations, before mounting the display.
Before Mounting
7