Burkert Type 2105 User Manual
Page 32
32
Installation
8.3.3 installation of the actuator (welded
body)
installation for actuator with control function a:
noTiCe!
damage to the diaphragm or the seat contour!
▶ When installing the actuator, ensure that the valve is in open
position.
→
Control function A pressurize the pilot air port 1 with com-
pressed air (5 bar): valve opens.
→
Lightly cross-tighten the body screws until the diaphragm is
between the body and actuator.
do not tighten the screws yet.
→
Actuate the diaphragm valve twice.
→
Without pressurization tighten the body screws to the permitted
tightening torque (see following table “Tab. 14: Tightening torques
for diaphragms”).
installation for actuator with control functions B and i:
→
Lightly cross-tighten the body screws without pressurization until
the diaphragm is between the body and actuator.
do not tighten the screws yet.
→
Pressurize pilot air port 1 of the actuator with compressed air
(5 bar).
→
Actuate the diaphragm valve twice.
→
Tighten the body screws to the permitted tightening torque (see
“Tab. 14: Tightening torques for diaphragms”).
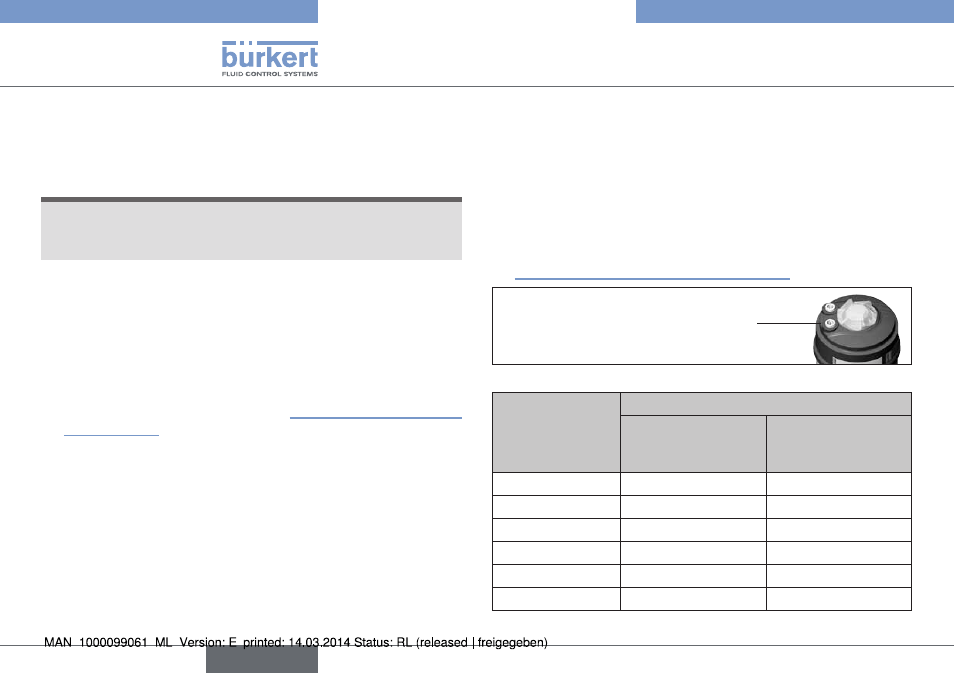
1
Pilot air port
CFA, CFB, CFI
Fig. 37: Pilot air port
Orifice dn
(diaphragm size)
[mm]
tightening torques for diaphragms [nm]
epdm/fkm
ptfe / advanced
ptfe / laminated
advanced ptfe
8
2.5
2.5
15
3.5
4
20
4
4.5
25
5
6
40
8
10
50
12
15
Tab. 14: Tightening torques for diaphragms
english
Type 2103, 2104, 2105