3 installation – Burkert Type 2105 User Manual
Page 30
30
Installation
8.2.5 preparatory work
→
Clean pipelines (sealing material, swarf, etc.).
→
Support and align pipelines.
products with Vg/Vs welded body:
noTe!
damage to the diaphragm or the actuator!
▶ Before welding in the body, remove the actuator.
remove the actuator from the valve body:
noTiCe!
damage to the diaphragm or the seat contour!
▶ When removing the actuator, ensure that the valve is in open
position.
→
Control function A pressurize the pilot air port 1 with com-
pressed air (5 bar): valve opens.
→
Remove actuator with diaphragm by loosening the body screws.
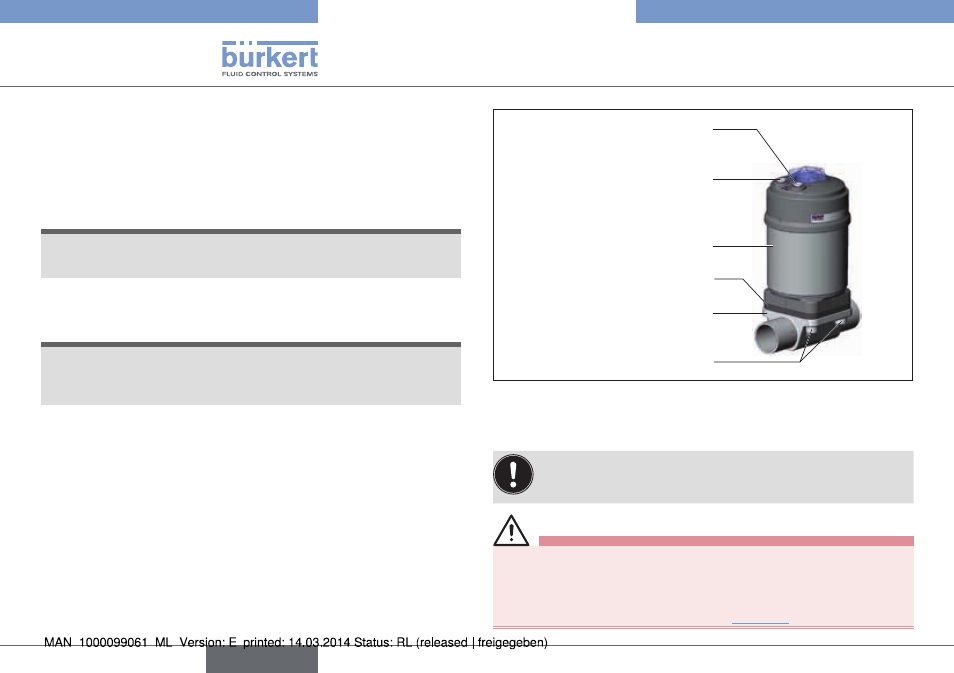
Actuator
Valve body
Air discharge connection CFA, CFB
Pilot air port CFI
Pilot air port CFA, CFB, CFI
2
1
Body screws (4x)
Diaphragm
Fig. 36: Installation
8.3
installation
If used in an aggressive environment, we recommend con-
veying all free pneumatic connections into a neutral atmos-
phere with the aid of a pneumatic hose.
Warning!
risk of injury from improper installation!
Non-observance of the tightening torque is dangerous as the product
may be damaged.
▶ Observe the tightening torque (see “Tab. 14”).
english
Type 2103, 2104, 2105