Anchoring slide rail (continued) – FlexLink X45 (43 мм) Тех. обслуживание User Manual
Page 16
16
Maintenance
Anchoring slide rail (continued)
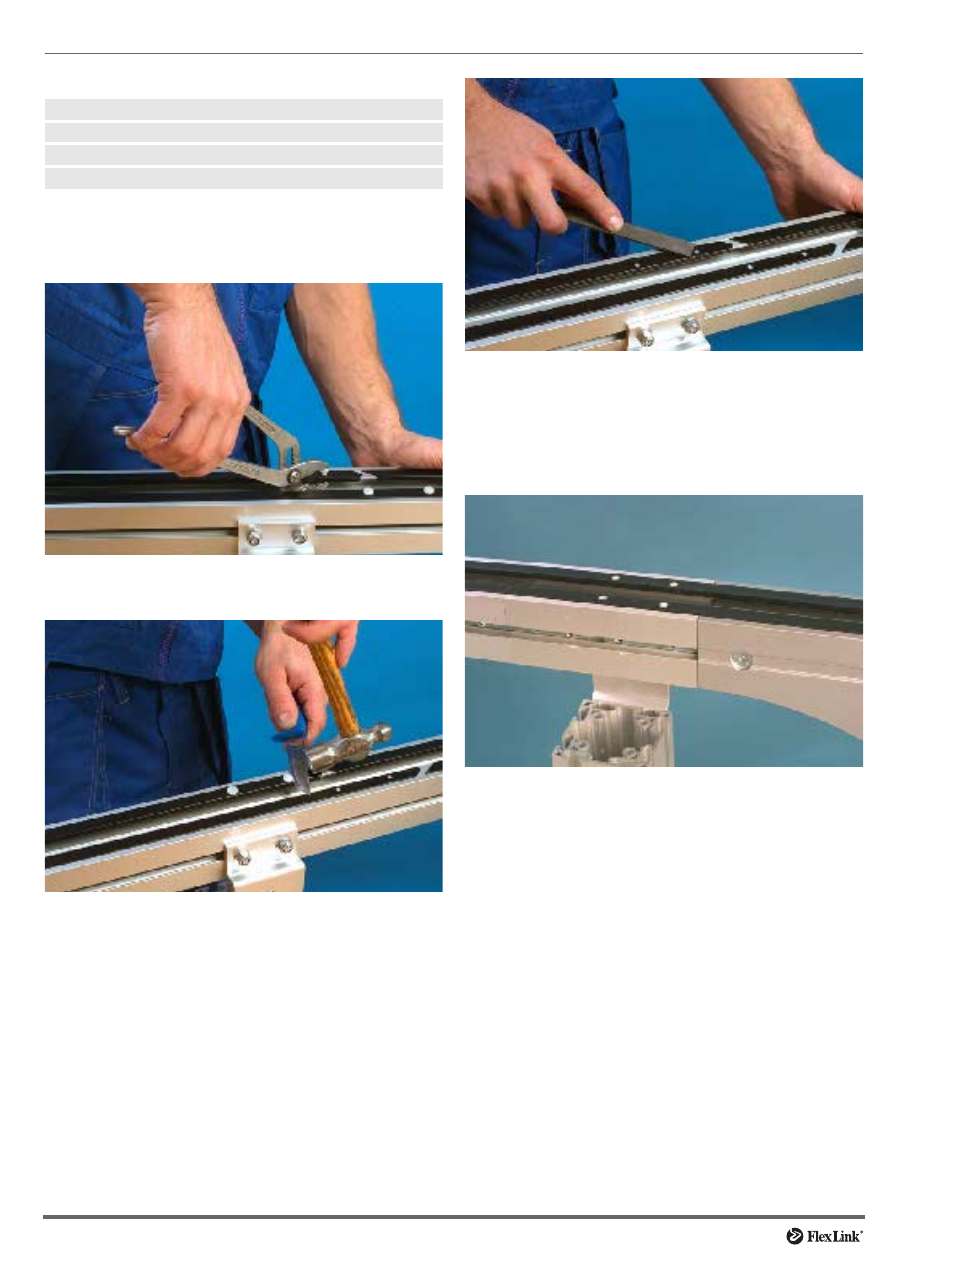
Method 2: Using plastic screws
An alternative to aluminium rivets is to use plastic screws
XLAG 5:
Mounting:
Pliers/screwdriver
Knife
Hammer
Plastic screws
XLAG 5
1 Press or screw the screws into the holes using a pair
of pliers or a screwdriver.
2 Cut off the screw heads by using a knife and a ham-
mer. The cut should be made away from the joint, in
the direction of chain travel.
3 Make sure the slide rail surface is smooth and that
screws do not protrude over the surface of the slide
rail. If the surface should be uneven, file the edges
smooth.
Check both top and underneath surface of slide rail for
protruding plastic or metal.
4 Keep a distance of approximately 30 mm between
screws and idler unit. This is in case the idler unit has
to be removed after conveyor system assembly.
- X45H (43 мм) Тех. обслуживание XS (45 мм) Тех. обслуживание XL (65 мм) Тех. обслуживание X85 (85 мм) Тех. обслуживание XH (105 мм) Тех. обслуживание XK (105 мм) Тех. обслуживание X180 (182 мм) Тех. обслуживание X300 (300 мм) Тех. обслуживание XW (300–1200 мм) Тех. обслуживание X45E (макс. 250 г) Тех. обслуживание XL (макс. 3 кг) Тех. обслуживание X85 (макс. 10 кг) Тех. обслуживание XK (макс. 30 кг) Тех. обслуживание