Datamax-O'Neil M-Class Mark II Operator’s Manual User Manual
Page 57
Chapter 5 – Maintenance and Adjustments
51
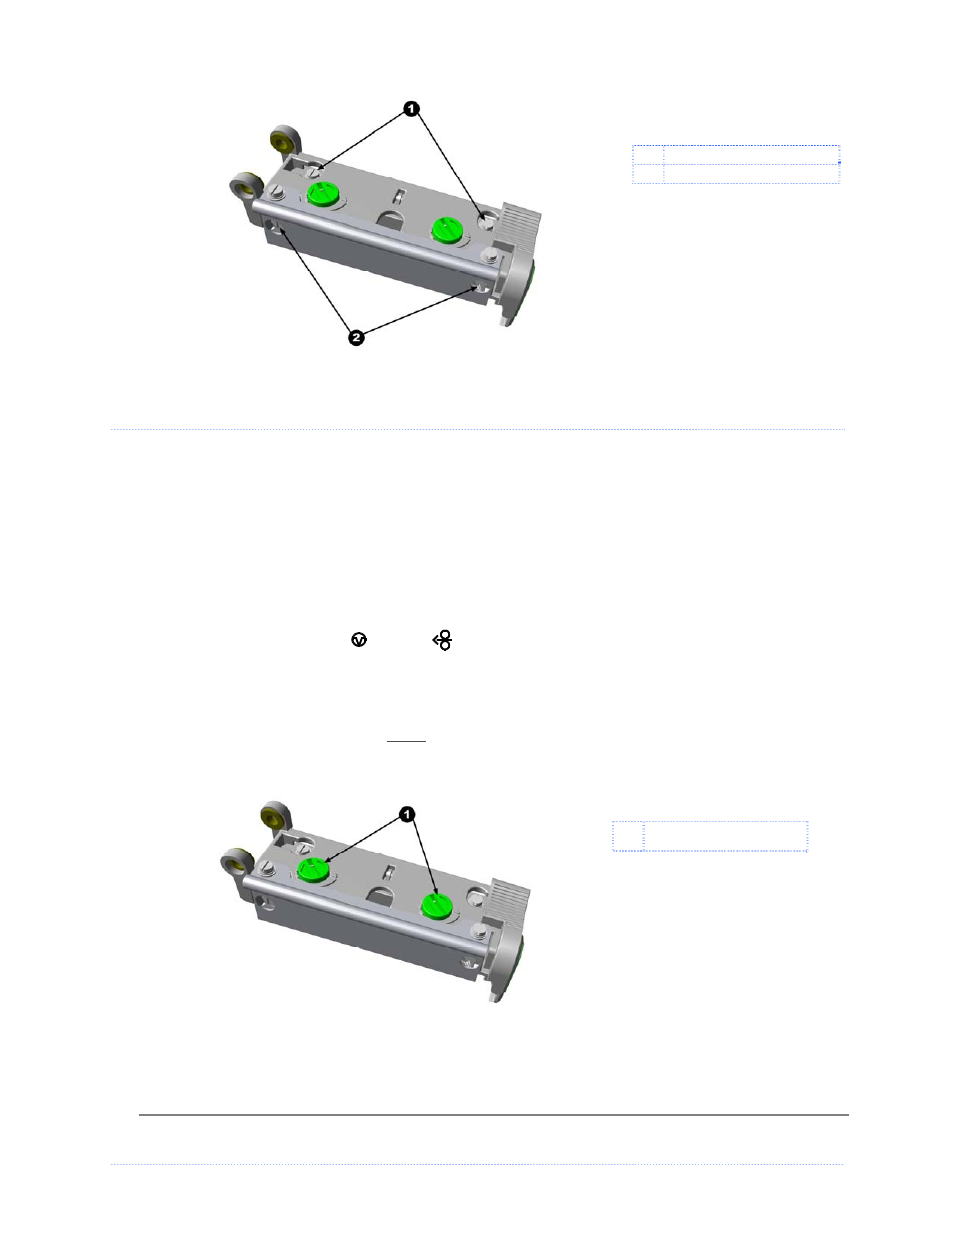
Locking Screws
Adjustment Screws
5
5
5
.
.
.
5
5
5
P
P
P
r
r
r
i
i
i
n
n
n
t
t
t
h
h
h
e
e
e
a
a
a
d
d
d
P
P
P
r
r
r
e
e
e
s
s
s
s
s
s
u
u
u
r
r
r
e
e
e
A
A
A
d
d
d
j
j
j
u
u
u
s
s
s
t
t
t
m
m
m
e
e
e
n
n
n
t
t
t
To accommodate a variety of media types, printhead pressure is adjustable. This pressure is
factory set to work with most media types, so this adjustment should only be performed after
attempting to improve print quality through the use of the (1) heat and/or (2) print speed. When
adjusting, use only the minimum pressure necessary for better imaging. To adjust:
1. Load at least 4” (102mm) wide media and ribbon, see Section 2.2.
2. Ensure the Media Width Adjustment is set to its “left most” position, see Section 5.3.
3. Print a test label.
Non-display printers:
Simultaneously press the
PAUSE
+
FEED
buttons
Display-equipped printers:
See Section 4.4
4. Turn the Pressure Adjustment Cams counterclockwise to increase the applied pressure or
clockwise to decrease it. Make equal adjustments to each cam to achieve even print contrast
across the media.
Pressure Adjustment
Cams
When using narrow media it is sometimes necessary to increase the pressure on the inner
(closest to centerplate) Pressure Adjustment Cam to prevent ribbon smudging.
Excessive pressure can reduce the service life of the printhead and platen roller, while unequal
pressure may cause ribbon and label tracking problems.