Analog Way Smart Edge User Manual
Page 57
55
The
STE100
offers a wide variety of transitions
between the scenes you create for your shows
and events. It allows for live recall of 4 user
presets, each of which you can edit at any given
time.
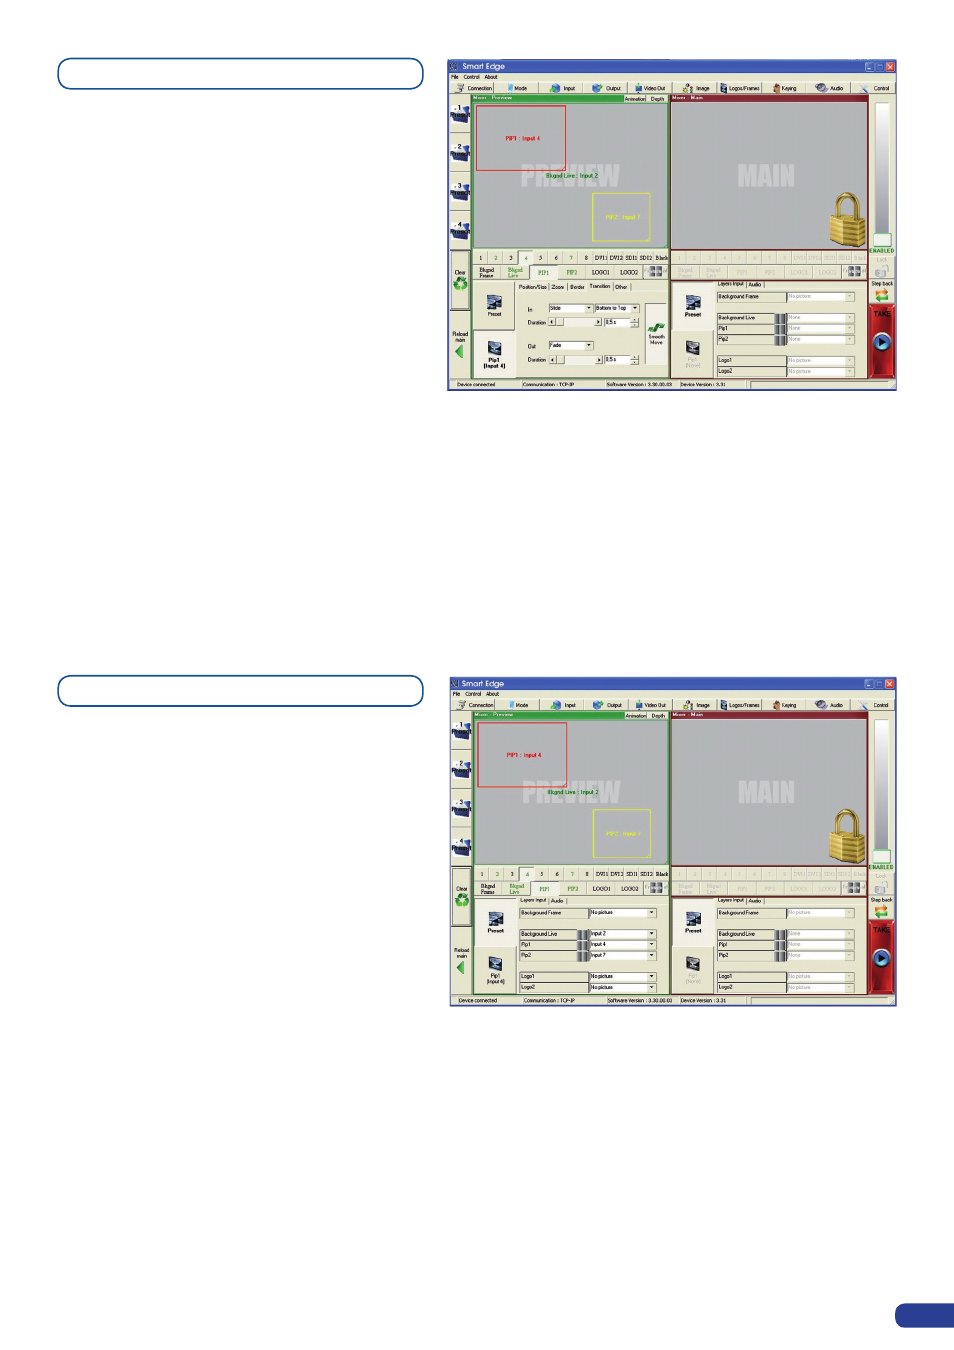
1. In the Layer Selection section, click on
the PIP1 button. On your Preview screen,
PIP1 will appear as a color rectangle. The
parameters of the layer will automatically
appear in the RCS Preview section.
2. At the bottom of the Preview section, click on
the Transition tab, then select the transition
type from the left dropdown menu, and the effect behaviour from the right dropdown menu.
3. Determine effect duration by sliding the duration bar left (shorter) or right (longer), or by manually setting the
value in the duration value box.
4. Repeat the procedure in the Closing Effect tab to determine the way your layer will close.
The
STE100
allows the creation of user
defined presets very easily. Any setup you have
configured on screen, can be stored into one of
the 4 available user presets.
1. After having configured layers, PIP transitions,
logos... on your screen (see “Working with the
RCS” chapter, p. 49), click on one of the four
available Preset buttons.
2. In the dropdown menu, choose Save From
Main or Save From Preview to determine
which screen you want to memorize the
preset from.
3. By clicking one of the two options, the RCS will automatically load and preview the selected Preset.
4. Click on the Take button to view your preset on the Main screen.
Transitions & effects
Creating Presets