Electrical connection, Checking the water connection for leaks, Aligning the appliance – Neff K3990X7 User Manual
Page 37
37
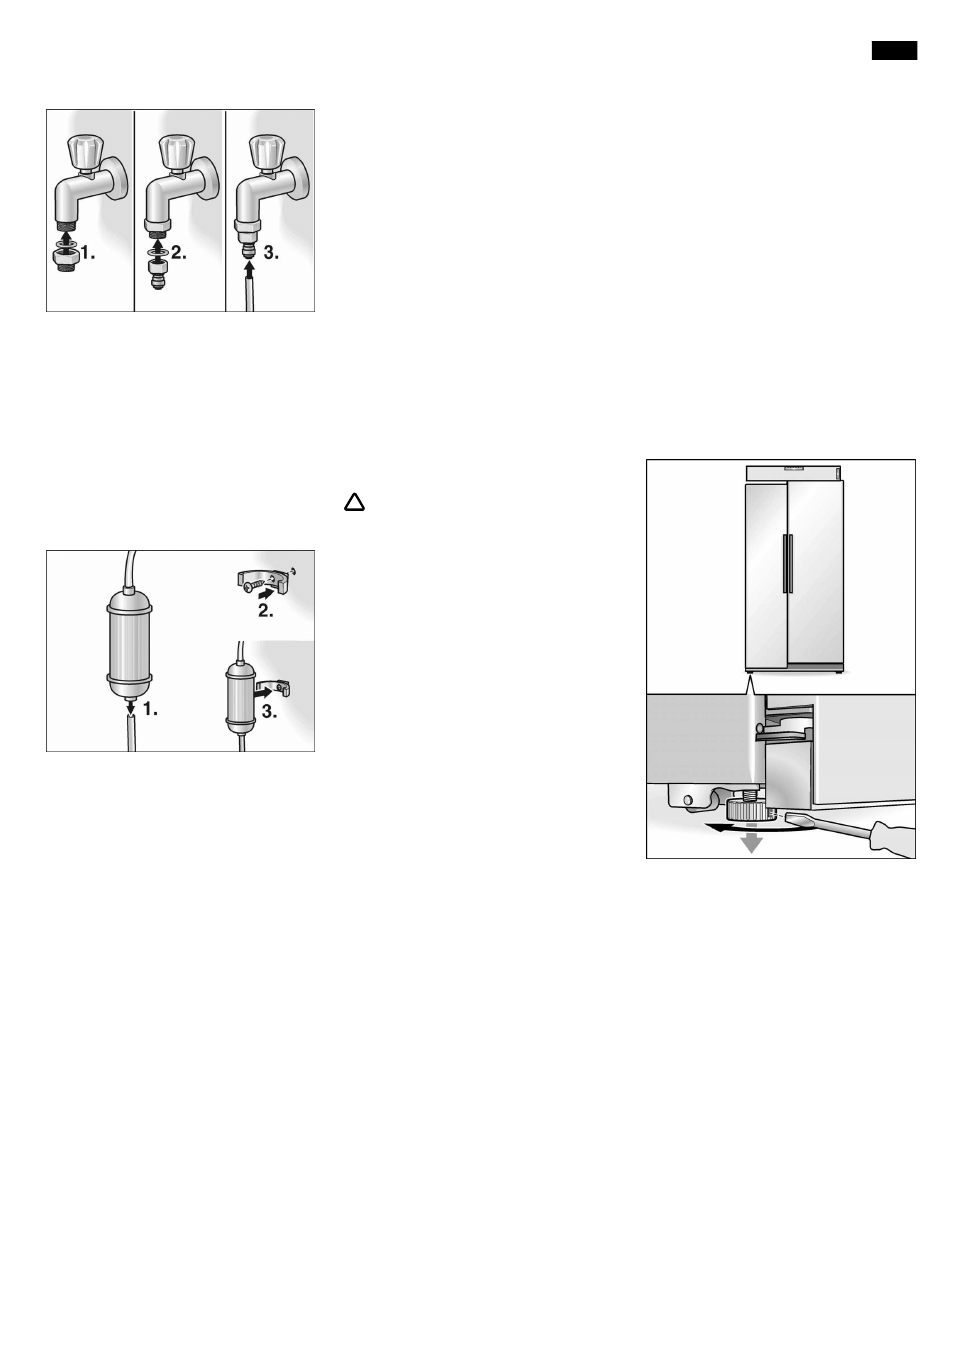
S Connect the line to the tap.
S Using the enclosed clips, attach the
connecting line to the rear panel of
the appliance and to the room wall.
S Place the connecting line in loops
or coils so that the appliance can be
moved away from the wall.
Installing the filter in the water
supply line
S Connect the ends of the connecting
line to the filter (1). Observe the
direction of flow printed on the filter!
S Attach the filter holder in a suitable
position on the left or right of the
appliance (e.g. base unit) (2) and
insert the filter (3).
Electrical connection
Do not use an extension lead or
a multiĆplug socket. This appliance
must be connected to a permaĆ
nently installed socket.
The plug to secure the appliance must
be freely accessible. Connect the
appliance to a 220-240 V/50 Hz
ac current via a plug which has been
properly installed. The socket must
be fused with a 10 A fuse or higher.
If the appliance is to be operated
in a nonĆEuropean country, check
on the rating plate whether the indiĆ
cated voltage and current type
correspond to the values of your
mains supply. The rating plate is
situated in the bottom leftĆhand side
of the appliance. Any necessary
exchanging of the mains lead
should carried out by a specialist
electrician.
!
Warning!
Never connect the appliance
to electronic energy saver plugs
(e.g. Ecoboy: Sava Plug) or to
power inverters which convert the
direct current to 230 V alternating
current (e.g. solar equipment, power
supplies on ships).
Important!
When installing or changing the power
cord, attach a cord grip.
Checking the water
connection for leaks
S Switch on the appliance according
to the enclosed operating
instructions.
S Remove water according to the
operating instructions. This will take
several seconds, as there will still be
air in the lines and in the water tank.
S Check all screwĆon water
connections for leaks on the
appliance and on the water
connection.
S After checking for leaks, pull out the
mains plug again and attach the
motor compartment cover.
Aligning the appliance
To ensure that the appliance functions
correctly, it must be set level with
a spirit level.
If the appliance is not level, water may
flow out of the ice maker, ice cubes
may be irregular or the doors may not
close properly.
S Place the appliance in the designated
location.
S To prevent the appliance from rolling
away, unscrew the front and rear feet
until they have good contact with the
floor.
S Rotate front and rear feet until the
appliance is aligned exactly. Use the
doors as a reference point!
Freezer compartment door is deeper:
en