Franklin Fueling Systems TSP-LL2 User Manual
Page 3
3
Probe Installation Kits
Suspended Probe Kits
Model
Description
TSP-K2A
Mag Probe install kit for 2" riser pipe
TSP-K2B
Mag Probe install kit for 2" riser pipe with
BSP threads
TSP-K4A
Mag Probe install kit for 4" riser pipe
TSP-K4B
Mag Probe install kit for 4" riser pipe with
BSP threads
TSP-K4AS #316 Stainless Steel mag probe install kit
for 4" riser pipes
TSP-LPGK LPG Probe install kit, 149" maximum
LL2 probe length
Inventory Control Probe Caps and Adapters
(for bottom-mounted probes)
Model
Description
TSP-C2A
Inventory Probe 2" Riser Cap and Adaptor
TSP-C2B
Inventory Probe 2" Riser Cap and Adaptor
with BSP threads
TSP-C4A
Inventory Probe 4" Riser Cap and Adaptor
TSP-C4B
Inventory Probe 4" Riser Cap and Adaptor
with BSP threads
A locally supplied riser cap for Inventory Control Probes
should meet all applicable codes and approvals. The cord
grip must be for use with a cable diameter of 0.19 inches
(4.8 mm) and must also be compatible with the liquid
installed in the tank.
Density Floats
Density floats are two-part floats. The inner and outer float
are calibrated at manufacture and must be used together.
Model
Description
TSP-IDF4D
Diesel / Fuel Oil Density Kit
TSP-IGF4D
Gasoline density float kit
Refer to manual 000-0527 for more information about
density float installation.
Riser Pipe
Below is a example for determining riser length.
92" Tank
96" Tank
TSP-LL2-101 Probe Overall
Length
+111
+111
Suspension chain allowance
+5
+5
Total
+116
+116
Tank Diameter
-92
-96
Minimum Riser Length
24
20
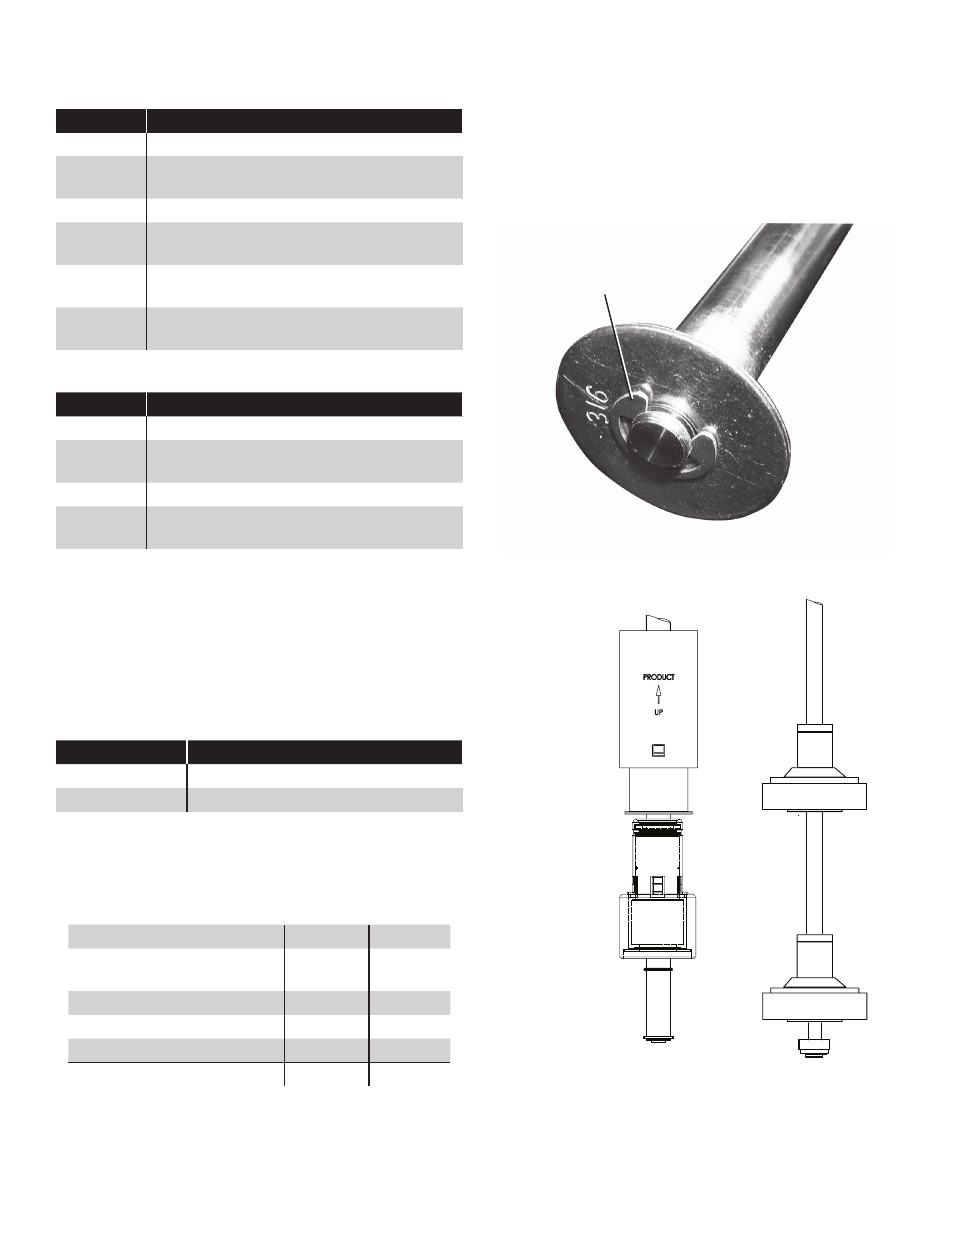
Installing Floats
For TSP-LL2 probes the float(s) will need to be installed on
the probe.
1. Carefully remove the E-Clip and washer / bottom
mount foot.
2. Install the floats as shown in figure 2.
3. Reinstall the Washer / bottom-mount foot and
E-Clip.
Figure 1: Probe C-Clip and Washer
Float orientation
Product
Float
(Magnet
End Up)
Water /Interface
Float
(Magnet End Up)
2 Inch Floats
3 or 4 Inch Floats
Figure 2: Float Orientation
E-Clip