Rgb 468xi, Rgb 468 mxi, 5 mm stereo plug connector (unbalanced) – Extron Electronics RGB 460xi Series User Guide User Manual
Page 12
RGB 460 Series • Installation and Operation
6
k l
RCA audio connectors (RGB 464xi ) — Connect
the left audio signal cable to the white RCA connector
(
k
– L/Mono), and the right audio signal cable to the
red RCA connector (
l
– R) for unbalanced stereo audio
pass-through input. Wire the RCA plugs as shown at
right.
NOTE: When a mono audio signal is applied to the L/Mono input, the same
signal is output to both left and right audio outputs.
m
Network connector (RGB 464xi
) — Connect a computer to this RJ-45 female
connector for pass-through to a network.
n
Opening for architectural adapter plates (RGB 468xi
) — The RGB 468xi accepts
up to four optional standard architectural adapter plates (AAPs) attached here (up to
three on the RGB 468xi AKM UK). The RGB 468 Mxi can accept up to four optional mini
architectural adapter plates (MAAPs) attached here. The adapter plates come in a variety
of audio/video connector configurations.
H. SHIFT
MIN/MAX
TM
RGB 468xi
#4-40 Nut w/ Captive
Washer
AAP Module
(not included)
INPU
T
MONITOR
AUDIO
RGB 468
WITH ADSP
MONITOR
NO MONITOR
H. SHIFT
MIN/MAX
RGB 468 Mxi
INPU
T
MONITOR
AUDIO
RGB 468
WITH ADSP
MONITOR
NO MONITOR
TM
#4 - 40
Hex Screws
MAAP Module
(not included)
Mounting Screws
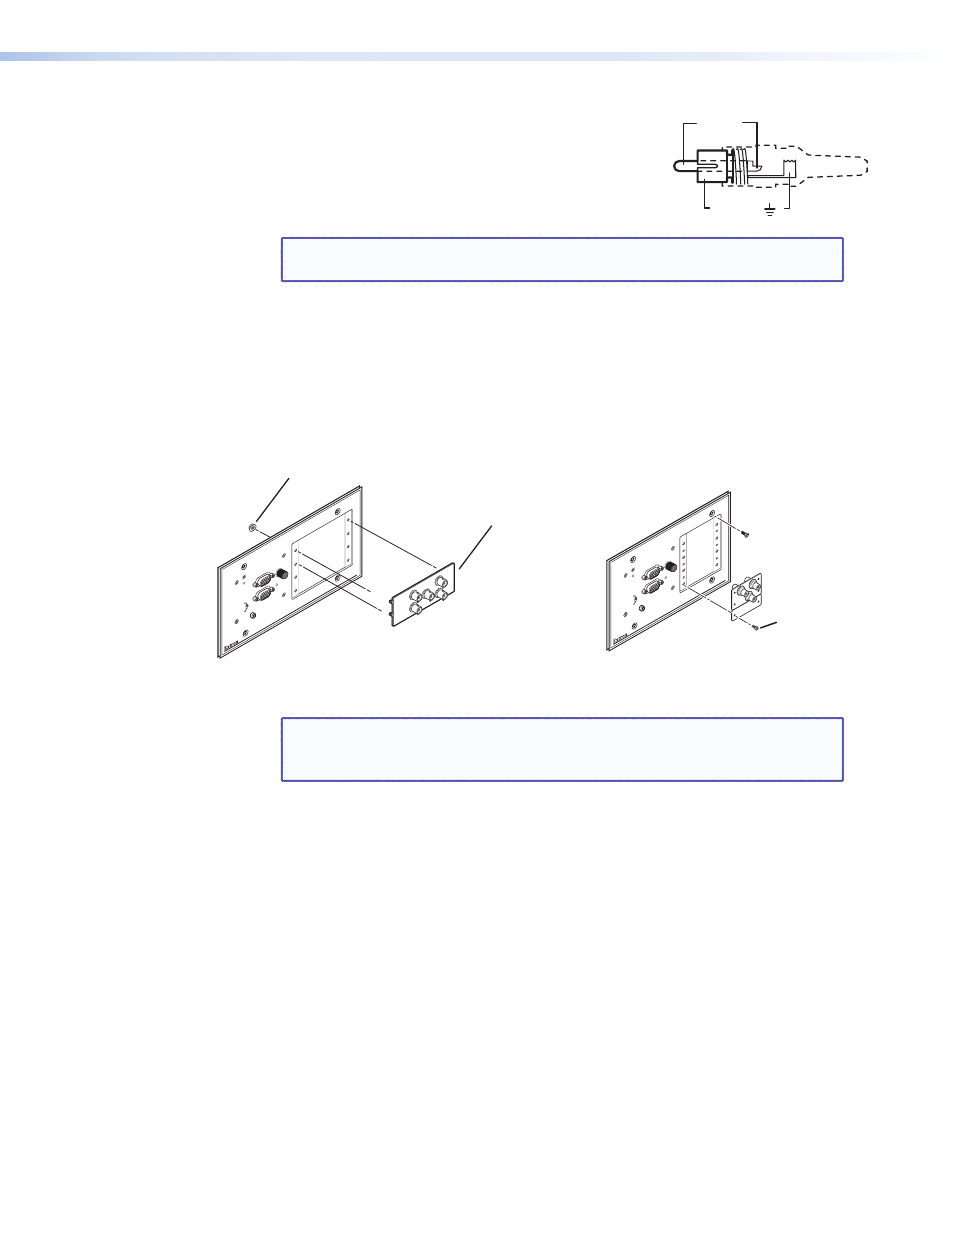
Figure 3.
AAP and MAAP Mounting
NOTE: The AAPs for the RGB 468xi mount from the rear using #4-40 nuts.
The MAAPs for the RGB 468 Mxi mount from the front using #4-40 hex
screws.
Blank plates (two single space and one double space) are included with the interface
to cover unused spaces. Adapter plates must be ordered separately (see
“AAP/MAAP
Availability”
on page 17). They must also be attached to the faceplate and cabled
before the interface is installed in the wall or furniture. The screws needed for installing
the MAAP adapter plates are supplied, or built into the plates (AAPs). Nuts are supplied
for AAP mounting.
To attach an AAP or MAAP:
1.
Remove the blank plate or plates from the interface by unscrewing the hex screws
(MAAPs) or removing the nuts (AAPs) that fasten the plates to the faceplate.
2.
Attach the adapter plate to the faceplate with the provided hex screws (MAAPs) or
captive washers and #4-40 nuts (AAPs).
3.
Attach the output cables to the rear connectors of the adapter plates. Soldering
will be required for some connectors. Attach foil and braided shields to ground
connections.
Tip (+)
Sleeve ( )
Sleeve ( )
Ring (-)
Tip (+)
Audio Plugs.eps
RCA Connector
3.5 mm Stereo Plug Connector
(balanced)
Sleeve ( )
Ring (R)
Tip (L)
3.5 mm Stereo Plug Connector
(unbalanced)