Example 3: remove a tie from a set of ties, Operation, cont’d – Extron Electronics DXP Series User Manual
Page 25
Operation, cont’d
Digital XPoint Matrix Switchers • Operation
3-8
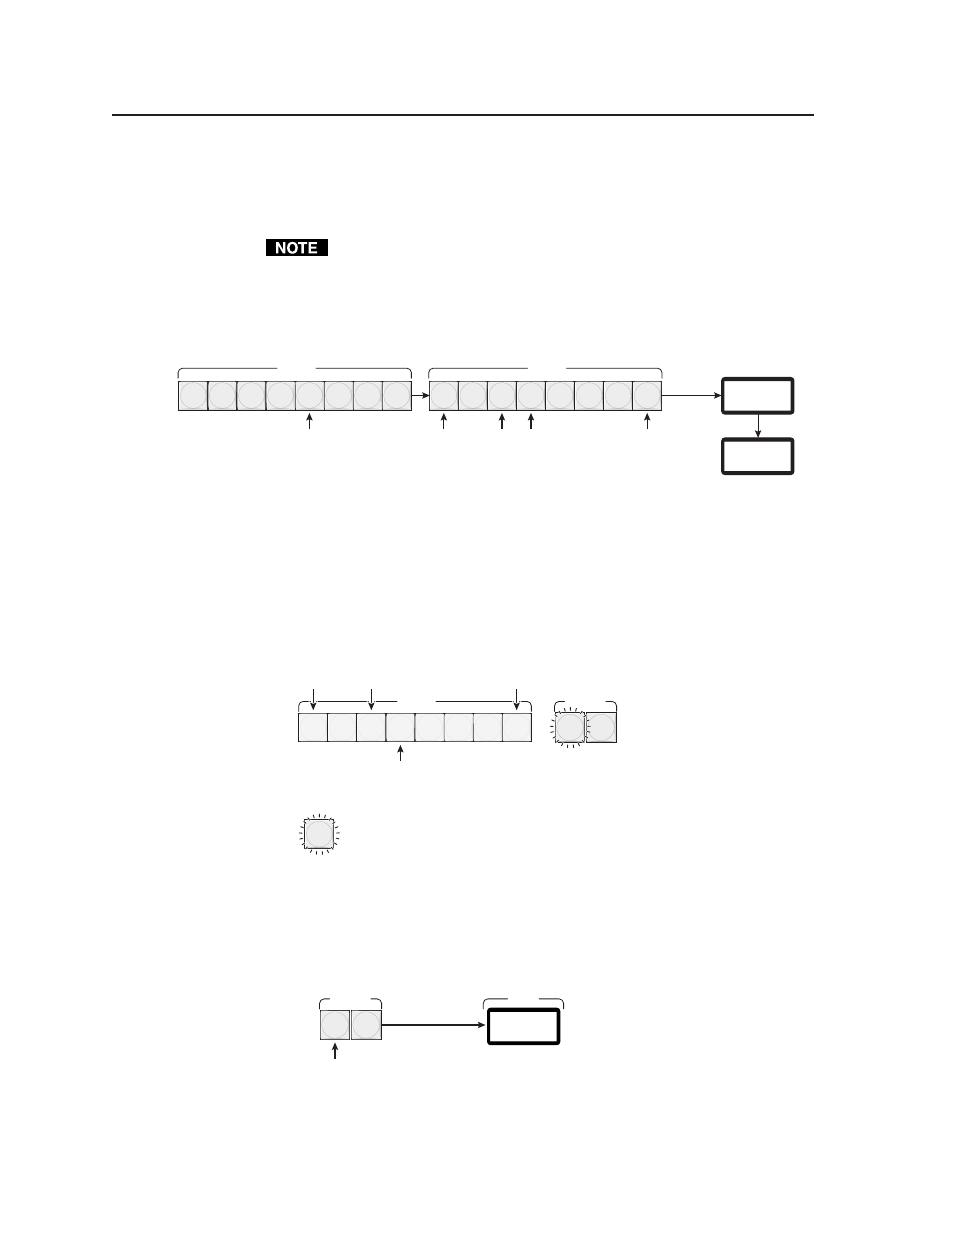
Example 3: Remove a tie from a set of ties
The following steps show an example in which an existing tie is removed from the
current configuration in enter switch mode. Each step shows the front panel
indications that result from your action.
This example assumes that the switcher is in enter switch mode. If the
switcher is in the quick switch mode, output buttons light red and the step in
which the Enter button is pressed is not necessary.
1
.
Press and release the input 5 button (figure 3-13). If the steps in Example 1
have been completed, the output 1, the output 3, output 4, and output 8
buttons indicate ties already created.
INPUTS
1 2 3 4 5 6 7 8
OUTPUTS
1 2 3 4 5 6 7 8
INPUTS
OUTPUTS
I n p u
4
t # 5
_ 5 5 _ _ _ 5
5
1 2 3 5 6 7 8
Press and release the input 5 button.
The button lights green.
1 Second
Buttons for selected outputs light green.
The LCD displays the input number,
then the current switch configuration.
See “Viewing the current
configuration” in this chapter.
Figure 3-13 — Select an input
2
.
Press and release the output 4 button (figure 3-14). The output 4 button
returns to either unlit or to background illumination, while the output 1,
output 3, and output 8 buttons remain lit green. The Enter button blinks to
indicate that a potential change to the configuration needs to be confirmed.
Press and release the output 4
button. The button goes out or
returns to background illumination.
The Enter button
blinks green to
indicate the need to
confirm the change.
OUTPUTS
1 2 3 4 5 6 7 8
CONTROL
ENTER
PRESET
Buttons are green to indicate current ties.
= Blinking Button
Figure 3-14 — Deselect an input
3
.
Press and release the Enter button (figure 3-15). The input, output, and Enter
buttons return to either unlit or to background illumination. The LCD returns
to the default display. The current configuration is now defined as input 5
tied to output 1, output 3, and output 8.
Press the Enter button to
confirm the configuration
change.
CONTROL
ENTER
PRESET
STATUS
D X P 8 8
E X T RON
The LCD returns to the
default display.
All buttons return to unlit or
background illumination.
Figure 3-15 — Press Enter