Asus AP2400R-E2(AS8) User Manual
Page 30
C h a p t e r 2 : H a r d w a r e s e t u p
C h a p t e r 2 : H a r d w a r e s e t u p
C h a p t e r 2 : H a r d w a r e s e t u p
C h a p t e r 2 : H a r d w a r e s e t u p
C h a p t e r 2 : H a r d w a r e s e t u p
2 - 1 0
2 - 1 0
2 - 1 0
2 - 1 0
2 - 1 0
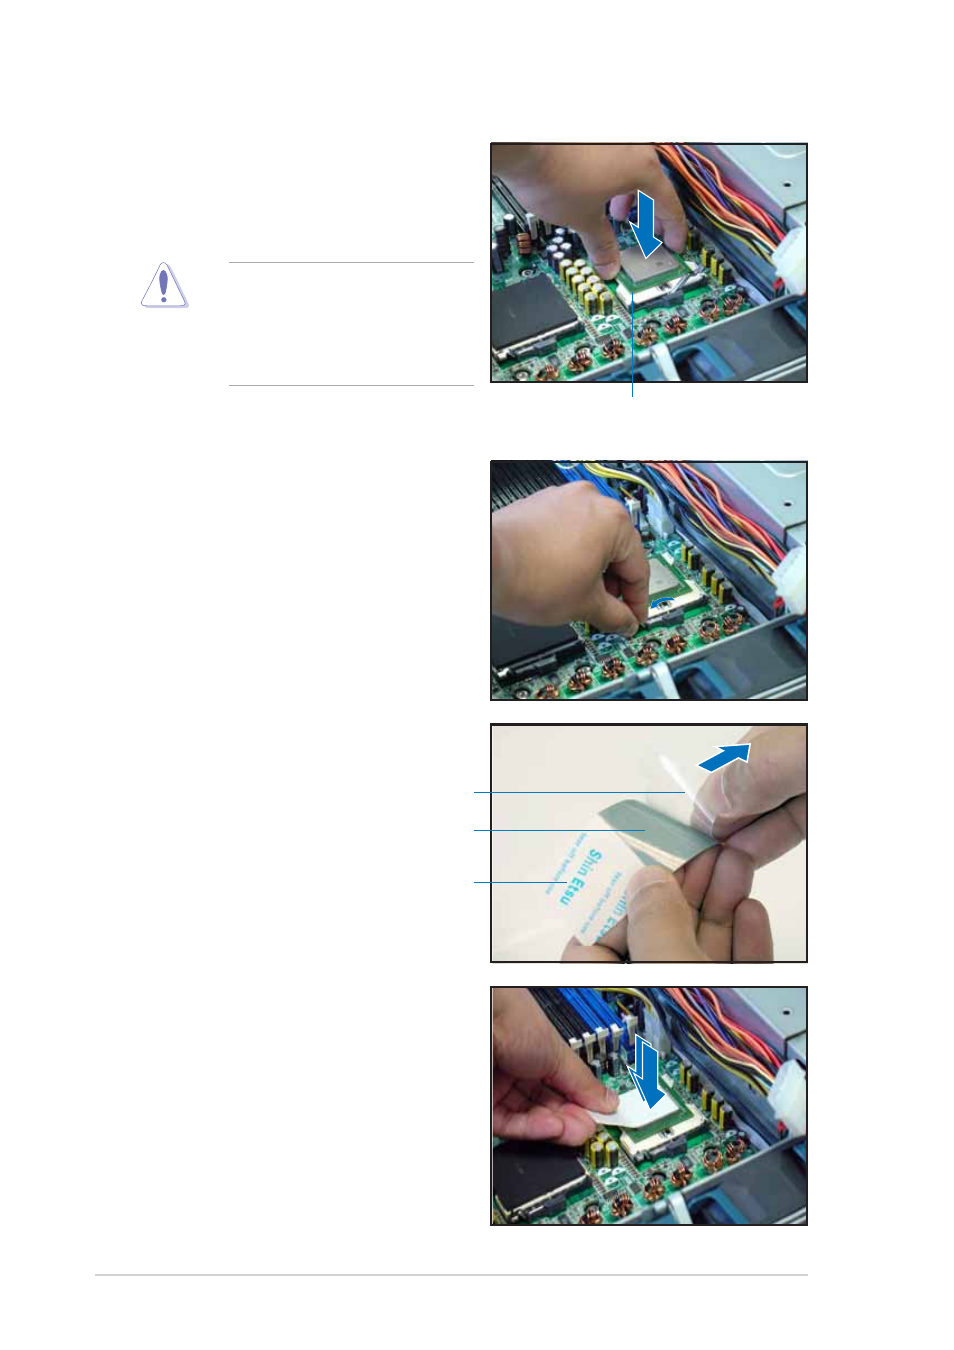
2.
Position the CPU above the
socket as shown.
3.
Carefully insert the CPU into the
socket until it fits in place.
The CPU fits only in one
correct orientation. DO NOT
force the CPU into the socket
to prevent bending the pins
and damaging the CPU!
4.
Carefully push down the socket
lever to secure the CPU. The
lever clicks on the side tab to
indicate that it is locked.
M a r k e d c o r n e r
M a r k e d c o r n e r
M a r k e d c o r n e r
M a r k e d c o r n e r
M a r k e d c o r n e r
5.
Peel off the plastic film of the
thermal grease strip.
6.
Place the thermal grease strip
on top of the installed CPU.
Make sure that the thermal
grease covers the entire surface
of the CPU.
P l a s t i c f i l m
P l a s t i c f i l m
P l a s t i c f i l m
P l a s t i c f i l m
P l a s t i c f i l m
T h e r m a l g r e a s e
T h e r m a l g r e a s e
T h e r m a l g r e a s e
T h e r m a l g r e a s e
T h e r m a l g r e a s e
T h e r m a l g r e a s e s t r i p
T h e r m a l g r e a s e s t r i p
T h e r m a l g r e a s e s t r i p
T h e r m a l g r e a s e s t r i p
T h e r m a l g r e a s e s t r i p