Chapter 7: roof assembly – Grain Systems Tanks PNEG-4135A User Manual
Page 81
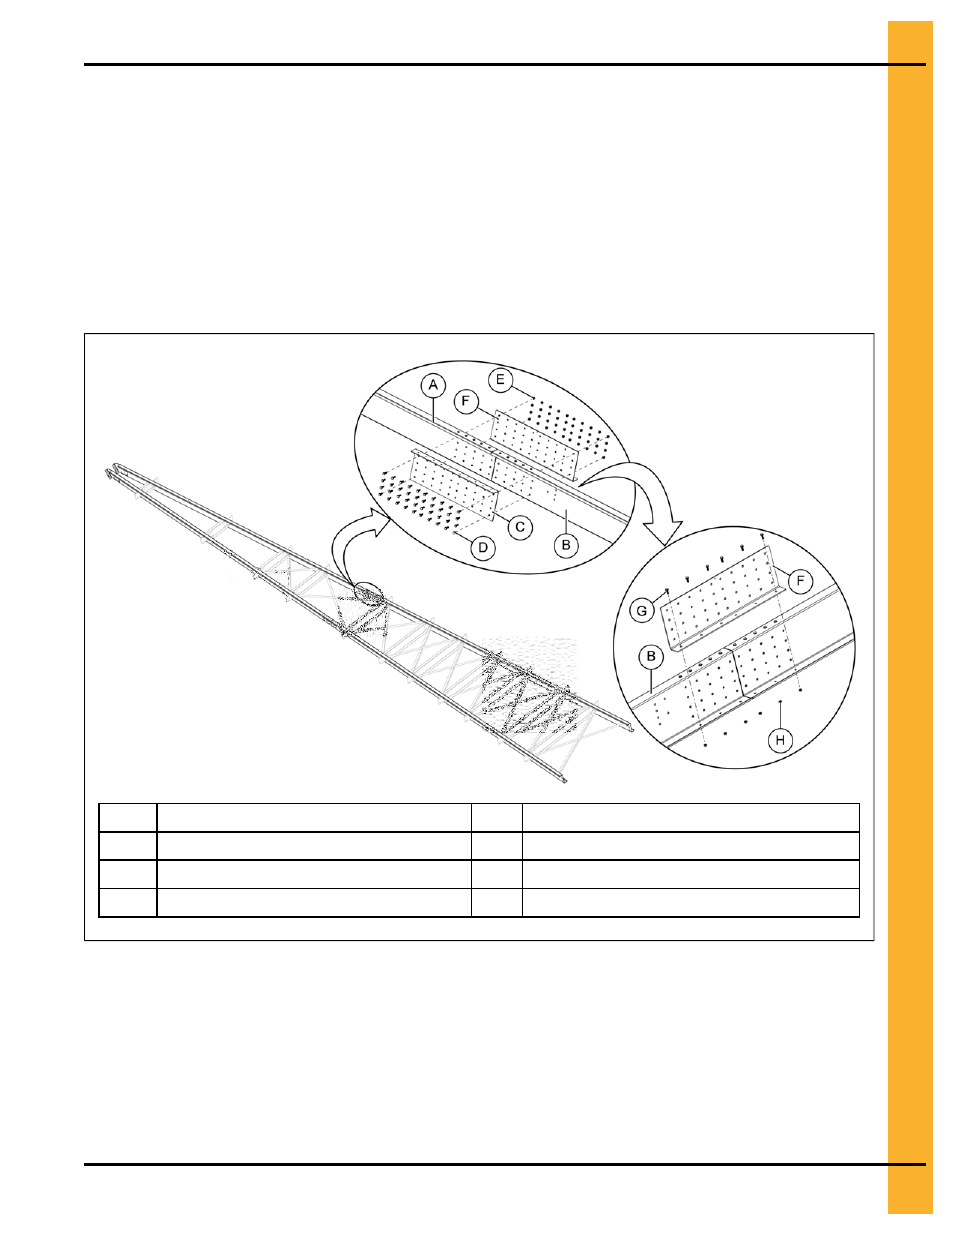
NOTE: Ensure that the flange of rafter clip (C) is facing up and seated below the flange of the rafters
on one side and the flange of rafter clip (F) is facing down and seated above the flange of the
rafters.
3. Install twenty flange bolts (D) and twenty flange nuts (E) securing the rafters with the rafter clips.
4. Install six flange bolts (G) and six flange nuts (H) to secure the bottom flange of the rafters with the
rafter clip (F), and tighten hardware to the recommended torque specifications. See
.
NOTE: The flange bolts and flange nuts securing the top flange of the rafter and the rafter clip (C) will
be installed only after the roof panels are installed on top of the rafters.
Figure 7-7 A-frame assembly (Note: complete A-frame assembly shown for clarity)
A
Upper rafter (CTR-0548)
E
1/2 in. flange nut (S-10253)
B
Lower rafter (CTR-0549)
F
Rafter clip (CTR-0501)
C
Rafter clip (CTR-0544)
G
1/2 x 1-3/4 in. flange bolt (S-10252)
D
1/2 x 1-3/4 in. flange bolt (S-10252)
H
1/2 in. flange nut (S-10253)
After You Finish
Repeat this procedure for the remaining rafters.
Attaching the Center Collar Rafter Clips to the Rafter
Center collar rafter clips secure the A-frame rafter sections to the center collar.
What You Should Know
Pneg-4135A 135 Ft Diameter 40-Series Bin
81