Rough Country 909 User Manual
Page 8
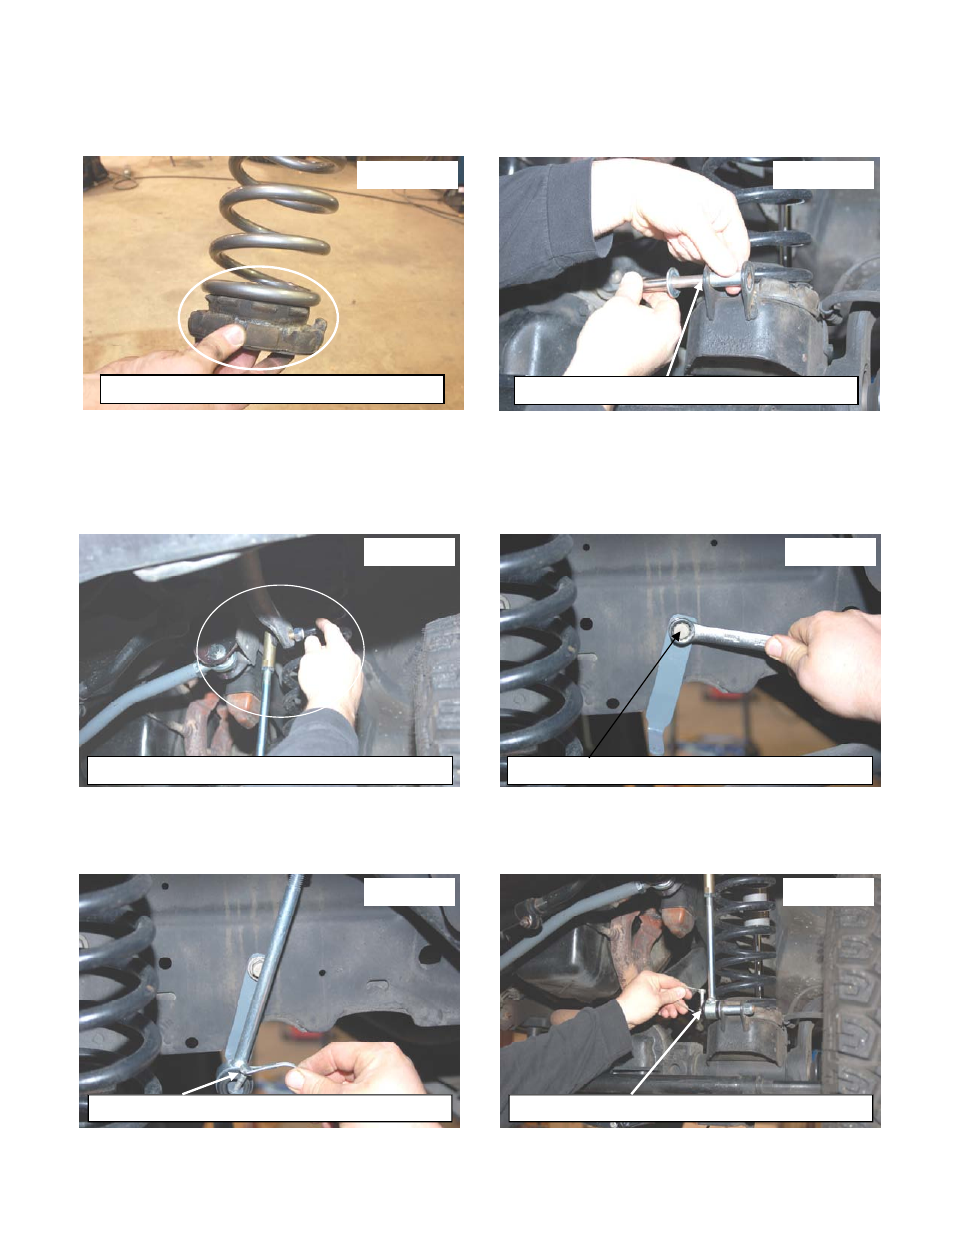
28. Remove the stock coil isolator from the lower end of the stock coil and reinstall on the lower end of the new coil. See
Photo 19.
29. Install the new coil in the lower and upper spring seats.
30. Install supplied pin on the axle with supplied crush sleeve in stock mount. See Photo 20. Hold using a screwdriver &
tighten 1/2” lock nut using a 3/4” wrench.
31. Assemble the sway bar link with the link body, the jam nut and rod end Adjust the sway bar to a length of 11 1/4”
from top to bottom. Tighten the jam nut against the rod end using a 19mm & 5/8” wrench.
32. Install the sway bar link on the upper sway bar mount with the supplied 12mm flange lock nut. See Photo 21.
Tighten using a 18mm & 5/8” wrench.
33. Remove the stock bolt from the vehicle on both driver and passengers side and install the sway bar bracket with
stock hardware. Tighten bolt using a 15mm wrench. See Photo 22.
34. With the sway bar link installed on the supplied frame bracket, swing the bracket and sway bar link up and position
the bracket on the frame as shown in Photo 23.
35. Install on the lower axle mounting pin. Install the disconnect hitch pin. See Photo 24. Note: When disconnected the
hitch pin will be used on the upper mount to secure the sway bar link to the mount.
Photo 19
Reinstall the lower coil isolator on ne coil
Photo 24
Install the sway bar link on the axle with hitch pin
Photo 20
Photo 21
Install the link on the mount
Photo 22
Place the mount on the uni-body
Photo 23
Install the pin on the axle
Link shown on upper link bracket