Rough Country 909 User Manual
Page 5
FRONT INSTALLATION INSTRUCTIONS
1. Chock the rear wheels and jack up the front of the vehicle and support the vehicle with jack stands.
2. Support the front axle with a floor jack.
3. Remove the lower sway bar link from the axle and the sway bar using a 15mm & 18mm wrench. See Photo 1.
4. Remove the shocks using a 15mm wrench/socket for the top mount and a 13mm wrench/socket for the bottom
mount.
5. Lower the axle using the floor jack and remove the coil springs.
6. Remove the stock lower control arm using a 21mm wrench/socket. Retain factory hardware for re-use See Photo 2.
7. Remove the stock upper control arms using a torx bit and a 18MM wrench.
8. Remove the track bar using a 19mm wrench/socket from the driver side mount as shown in Photo 3 and remove
from the axle using a 15mm socket. Retain the axle hardware for reuse.
9. Remove the brake line bracket from the driver and passenger side frame using a 10mm socket. Retain the hardware
for reuse. See Photo 4.
10. Remove the lower control arm mount from the driver and passenger side flush with frame using a cut off wheel or
reciprocating saw. See Photo 5.
11. Grind smooth and paint to prevent rusting. See Photo 6.
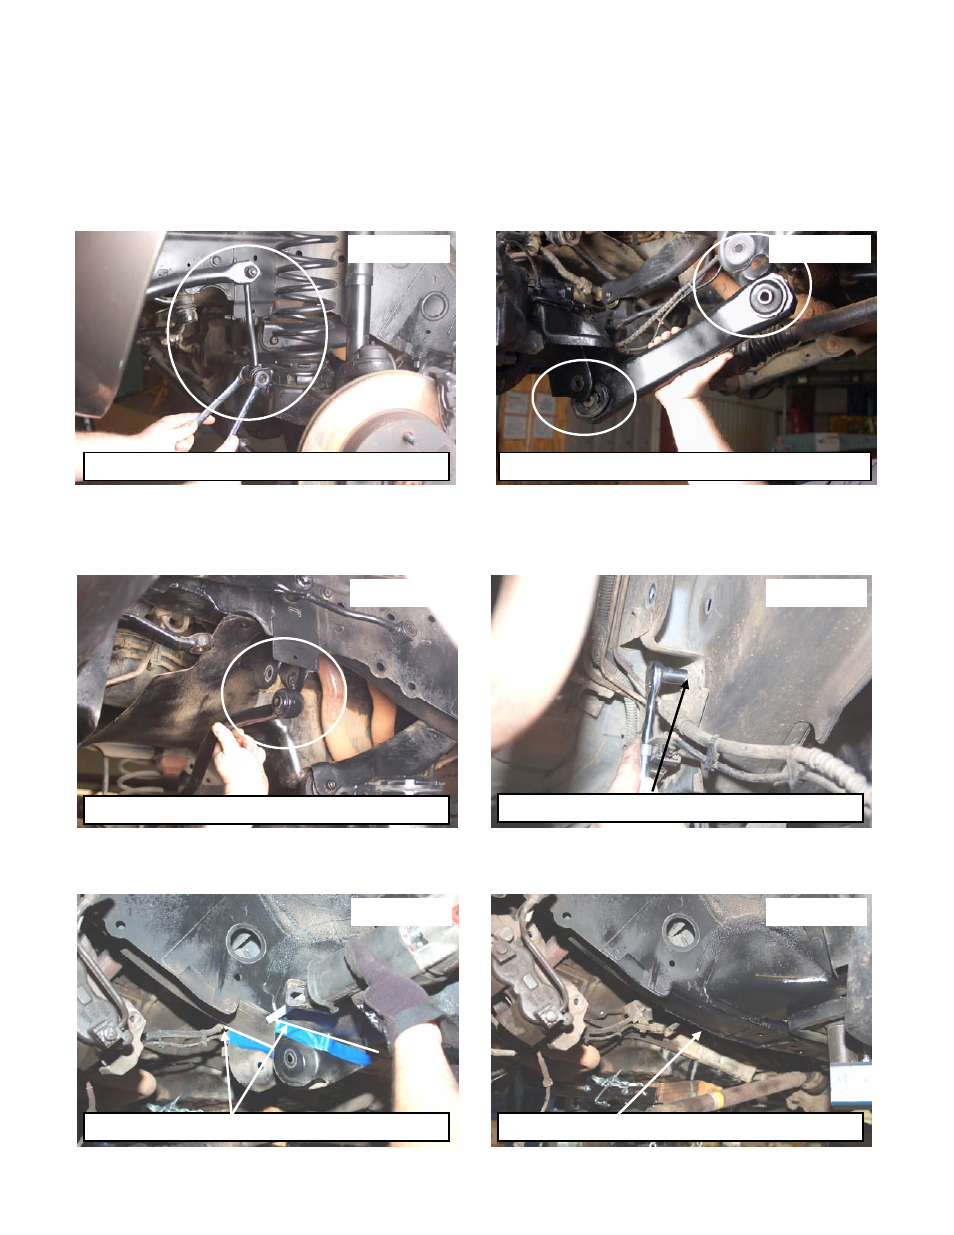
Photo 1
Remove Lower Sway Bar Link from Axle Mount
Remove Lower Control Arm
Photo 2
Photo 3
Remove Track Rod from Driver Side
Photo 4
Remove Brake Line Bracket
Photo 5
Photo 6
Remove the lower front control arm mounts
Grind and paint the area